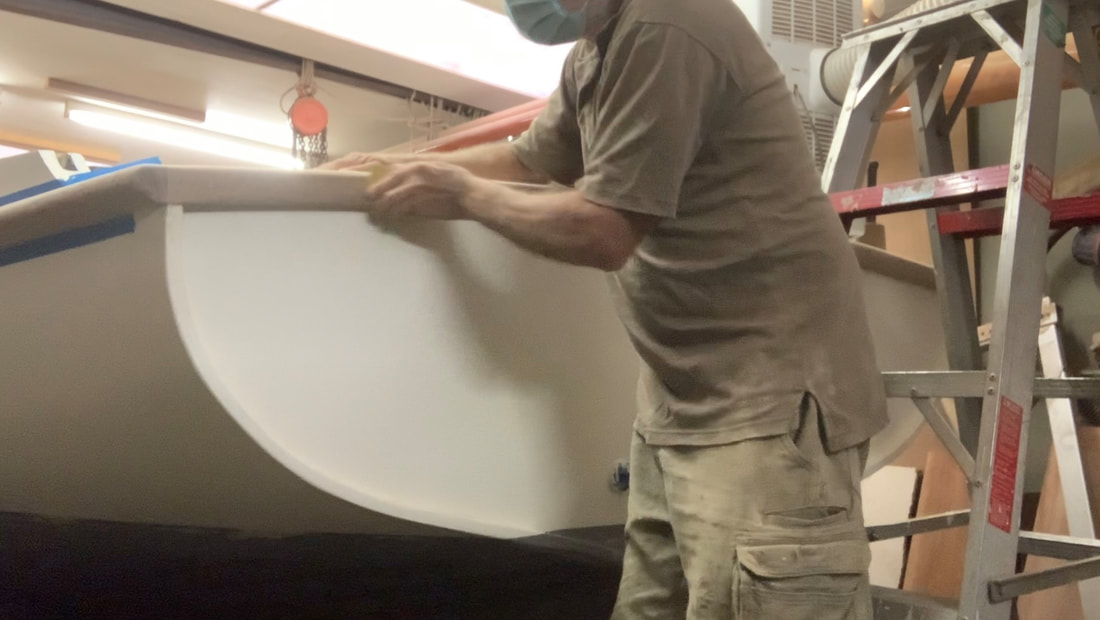
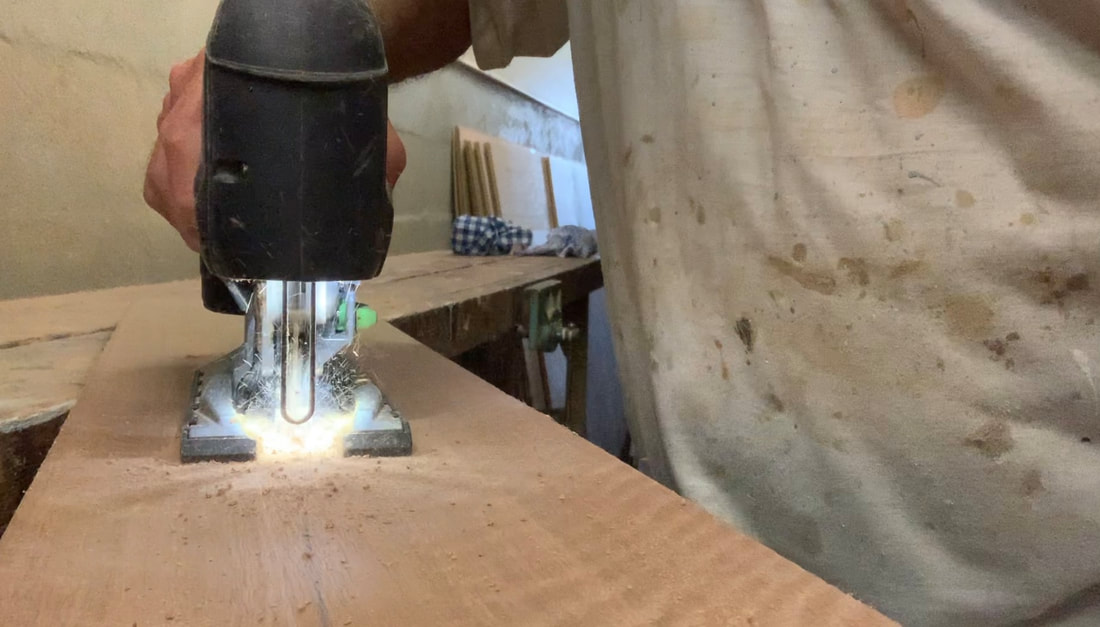
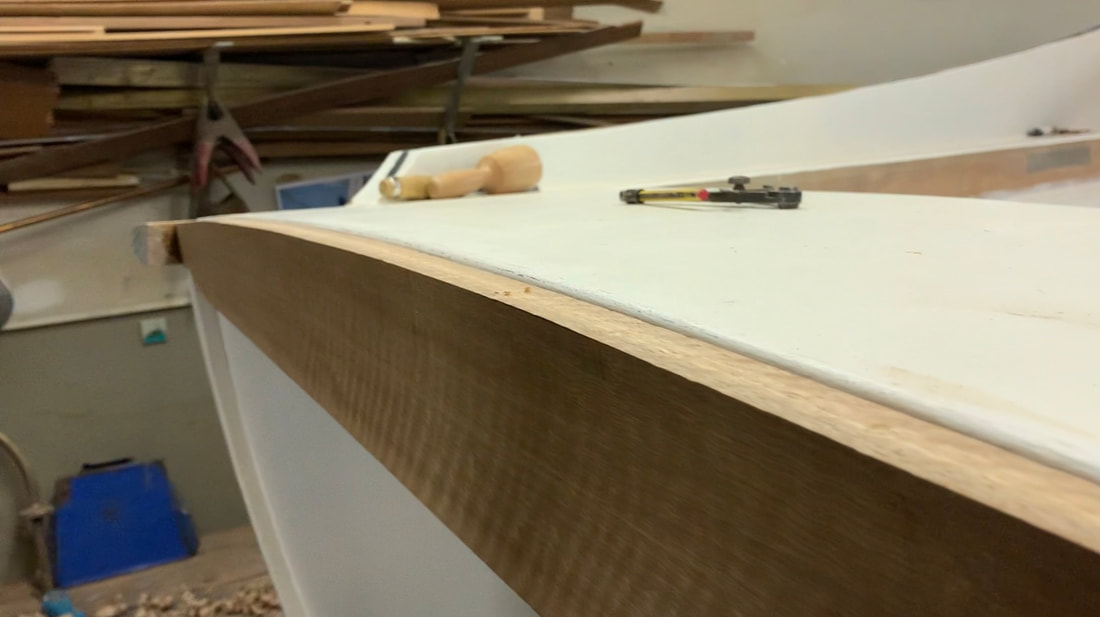
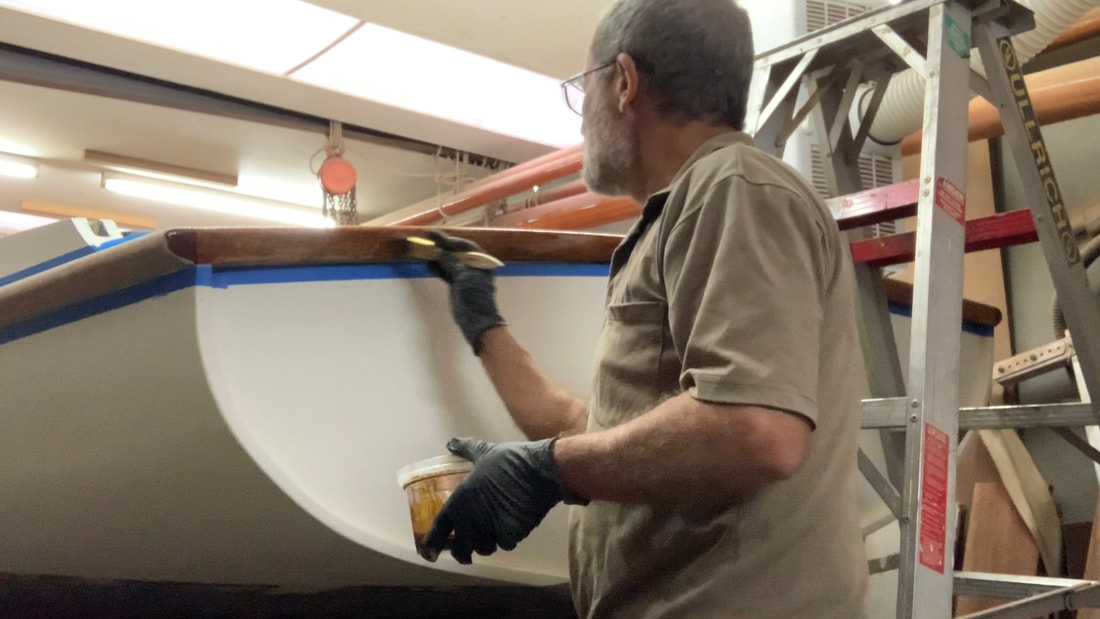
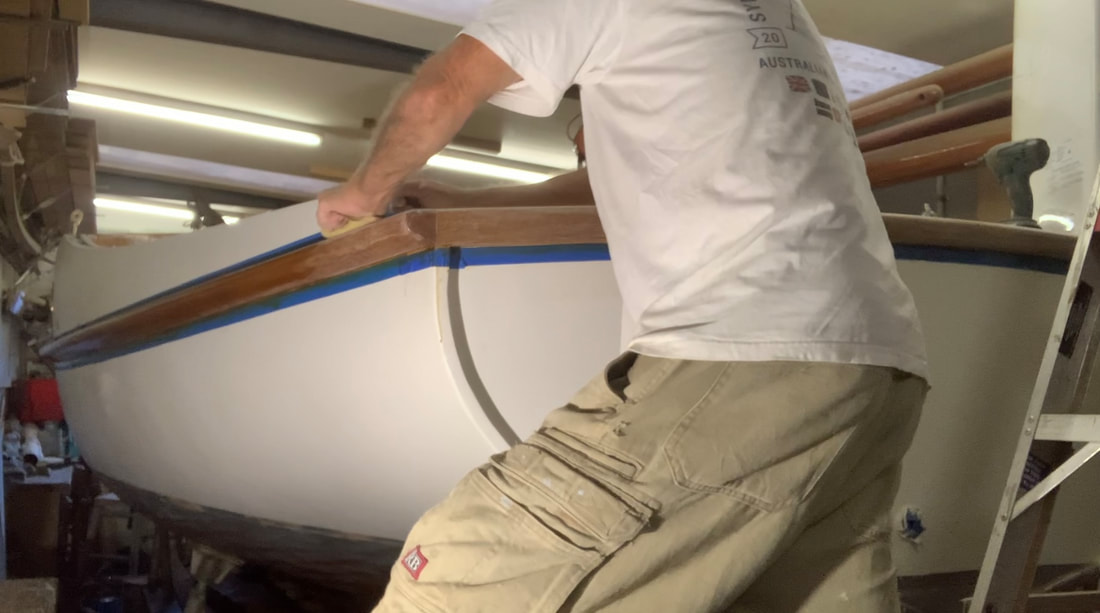
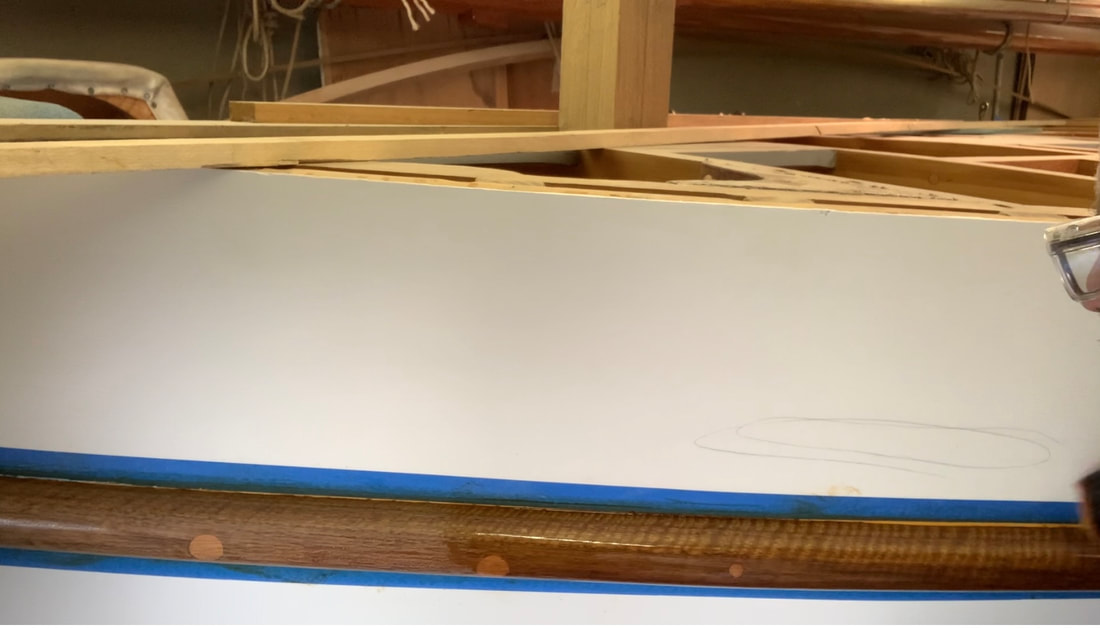
 Well the lowest sponsons (rub rails) have been on for some time, even before planking was finished, but now I've added a Spotted Gum fashion piece to the top of the tuck (transom) and faired it in to the ends of the lower sponsons on each side. I had a piece of 8" x 1" (200 x 25mm) Spotted Gum with a beautiful fiddleback grain pattern reserved just for this job, and I marked and cut it to the curve of the transom, then when happy with the fit of the top, cut the underside in a fair curve so that the piece is narrowest in the middle and sweeps towards Port and Starboard. I also planed it so that it is not dead flat but has a subtle curve on its aft face. I'll explain why I did this in a future video, but the short version is that it looks better. I then fastened and bedded it on, and sanded it and the full length of the sponsons on both sides in preparation for clear finishing. I power sanded using an in-line sander with 60 grit, then 80 grit, then 150 grit and finished off by hand-sanding with 150 grit. You'll notice in the photo below that I've also fastened in the whisker stay chainplates right through the upper sheer clamp. I'm using Awlwood MA for all exterior varnished surfaces, and the first stage of this process is to apply the primer, in this case their yellow primer in order to darken the wood a little, applying by brush but then wiping the excess off thoroughly with a rage. The next day I applied the first clear gloss coat and at 2-3 hour intervals 2 more coats. This quick buildup is one of the main advantages of Awlwood MA. I sand after 3 coats (240grit) and then put 3 more coats on. In the second photo above you can see the gloss beginning to really show up the fiddleback grain. There's a short video of the process on my Facebook Page (Ian Smith).
0 Comments
Leave a Reply. |
AuthorIan Smith, Boatbuilder (ret'd) Archives
January 2024
Categories |


 RSS Feed
