|
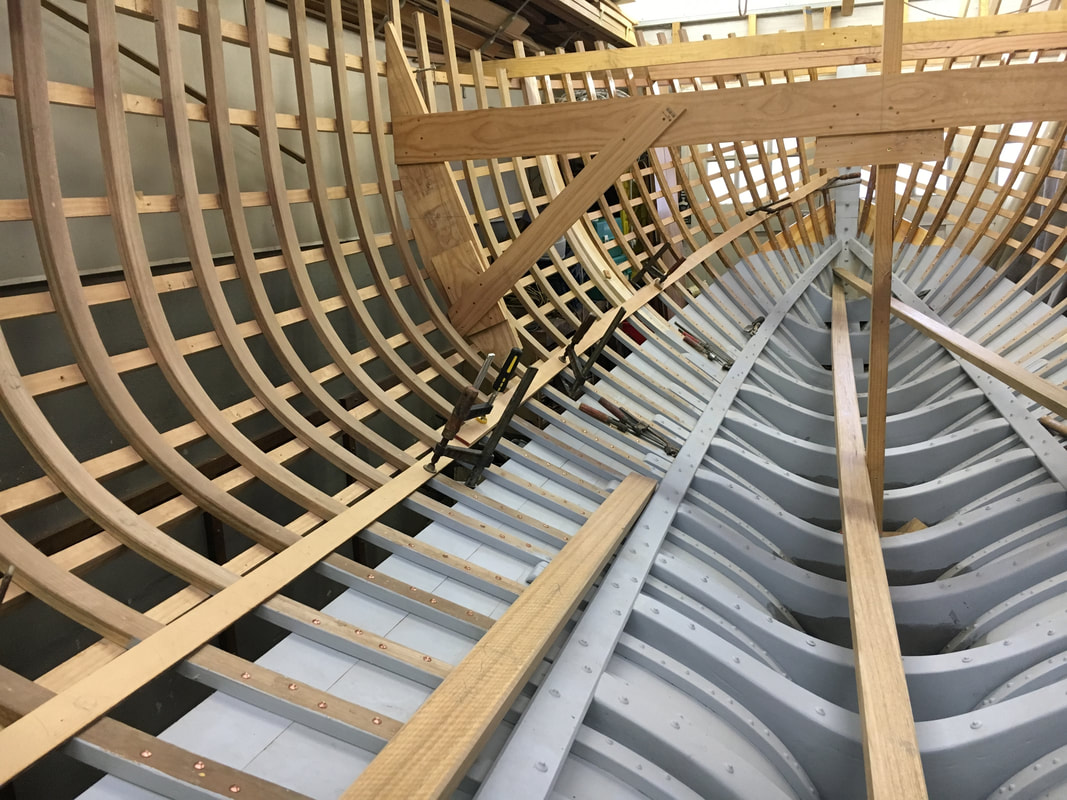
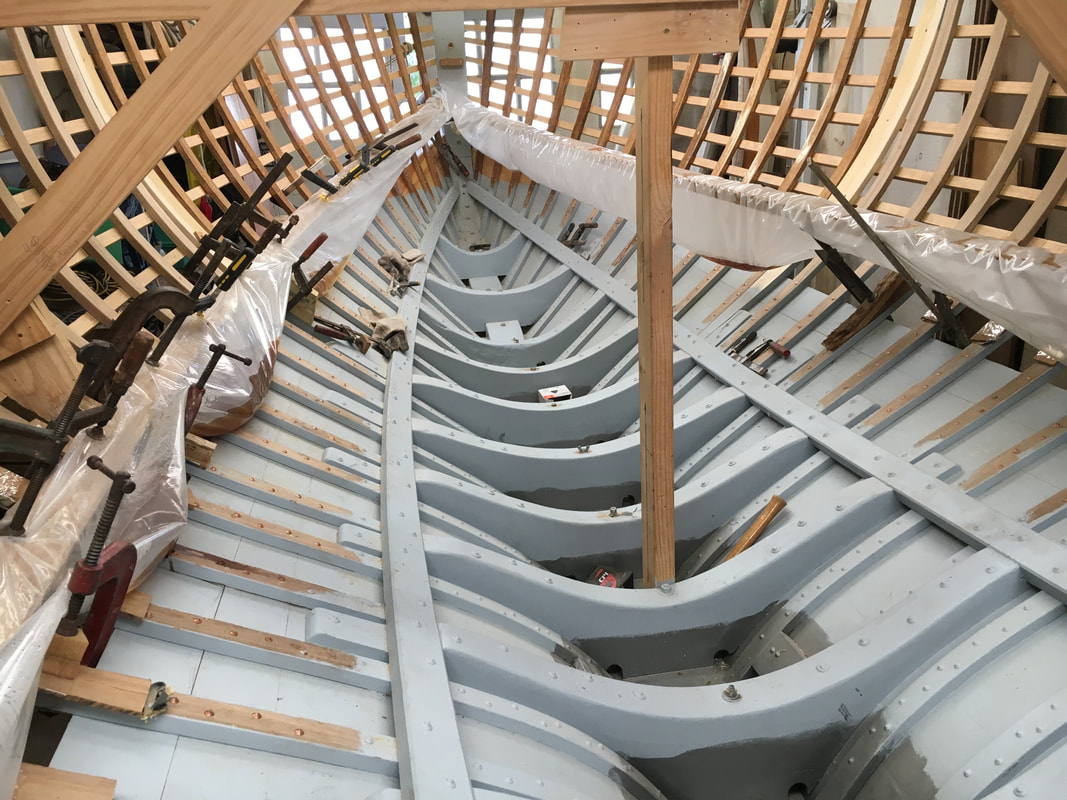
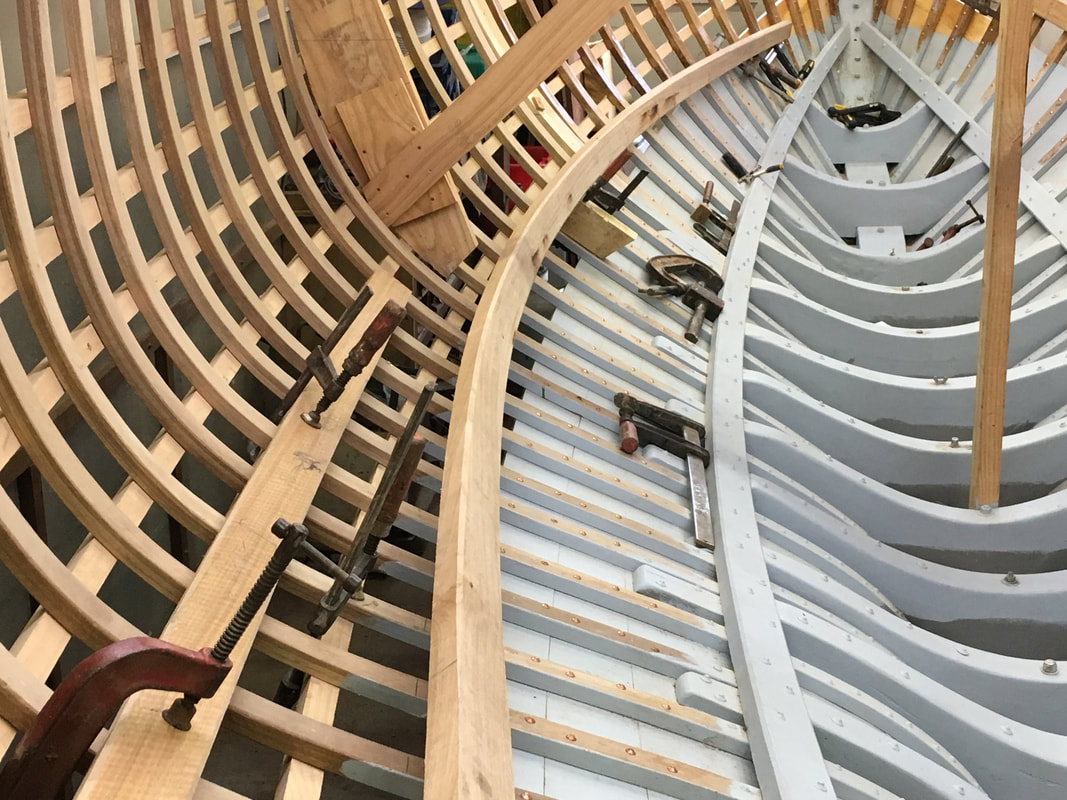
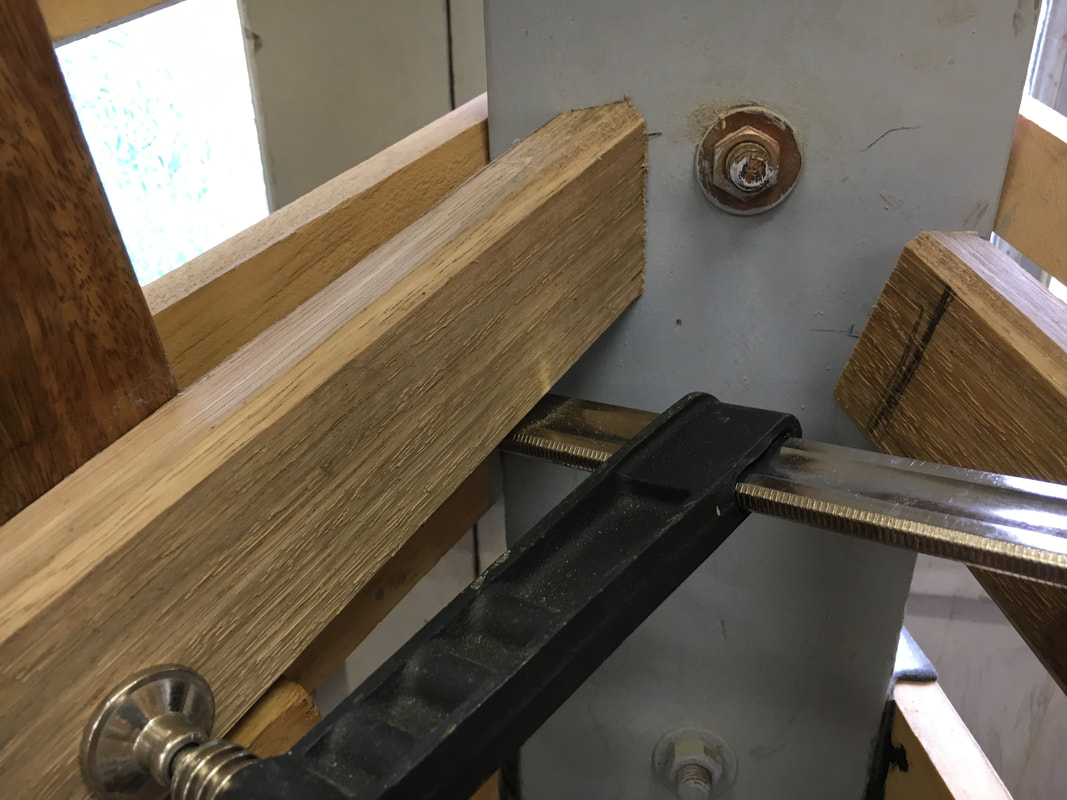
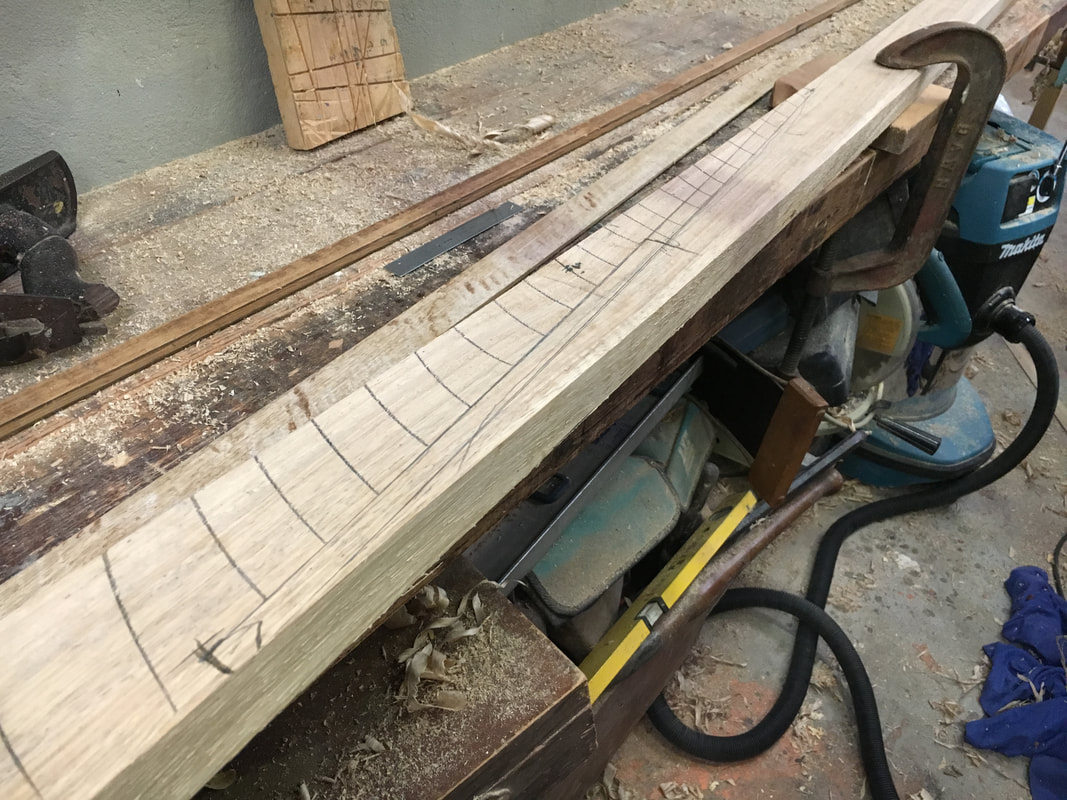
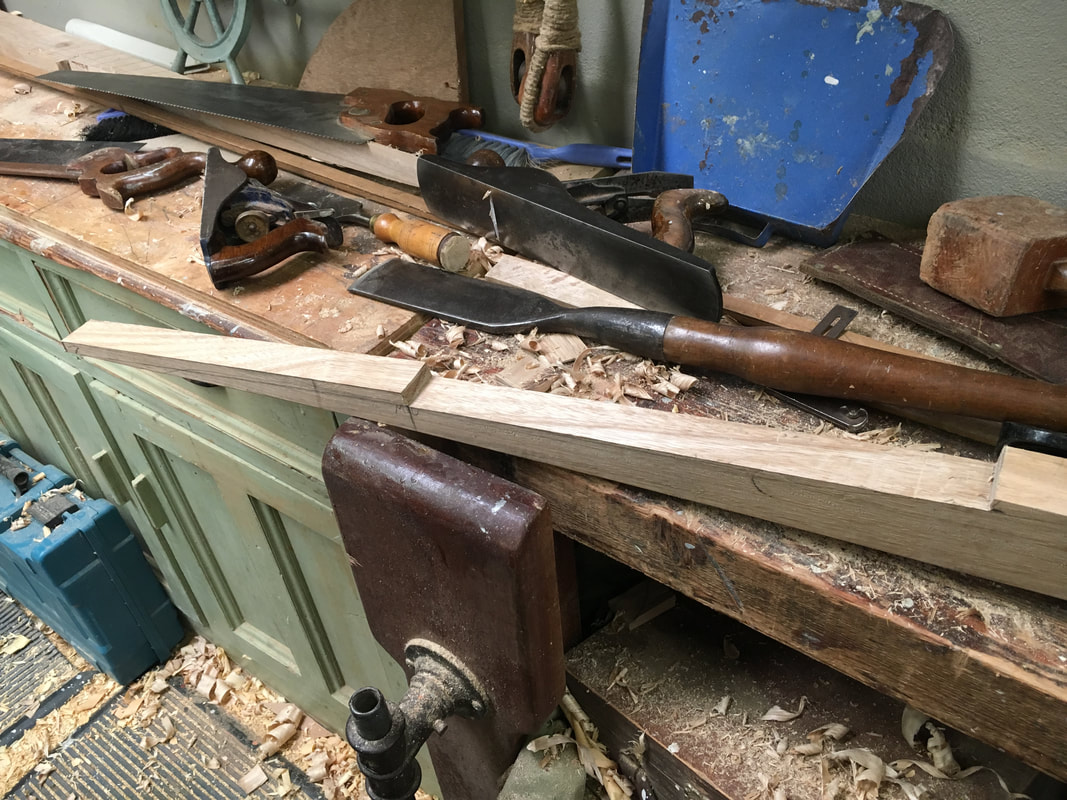
There's a second pair of Spotted Gum stringers in the bilges of the Ranger, on the upper part of the flat sections aft. The original boats in the class mostly have these a bit higher, in fact most of them are right through the turn of the bilge. This is common in Australia and has been the source of a great many of my repair jobs. In most cases most if not all ribs are broken behind the stringer, it has acted as a hard spot and the ribs have flexed around it. The purpose of stringers in the bilges of a boat is to support and stiffen the flat areas......the curve of the bilge is a compound curve and as such has a great deal of strength on its own. It's easier to dry fit them now before the planking lands on that area. I couldn't get the stringers in one length so I had to scarf them. But first I had to bend them in and this required steaming. Since I don't have a 6-metre steam box I place the first forward section of stringer in plastic tubing and put it in the boat. After a bit over an hour of steaming I started to bend the stringer out to the hull, clamping it in the middle, and gradually adding clamps sequentially both forward and aft until it lay against all ribs, positioning each clamp to favour the edge that needed to twist. I repeated it with the other side, and then did the aft sections (the next day as it happened). The photos show the stringer position being marked out with battens, the forward sections in their tubing and the bend and twist that is retained after they come out of the bag. Oh, and I tapered the forward and aft third both in thickness and width before steaming. I trimmed the ends to fit after steaming. After removing the bags I re-clamped the sections in place and left them to dry for a day or two. Then I marked for the scarf joint on the forward sections, removed the stringers from the boat and cut the scarfs on the bench. I then clamped the forward sections back in where they are going to live and marked the scarf on a witness batten so I could match the aft sections up. I have described this process in the book Wooden Boatbuilding, The Sydney Wooden Boat School Manuals , see http://sydneywoodenboatschool.com.au/product/wooden-boatbuilding-the-sydney-wooden-boat-school-manuals/ The scarfs are locked stepped scarfs which are the traditional way to join longitudinal members like stringers, and I have nailed and roved them as per tradition but also glued them together with epoxy. There is a short video on my Facebook Page, and this footage will go into a longer YouTube video once I have fitted the sheer clamps as well. he photos below show a locked stepped scarf marked out, starting with two parallel lines between the steps, and the cut scarf. The final image is of the scarfed stringers primed on the back ready to fit once the next few planks are on. I have varnished the forward sections where they will be seen in the forepeak. 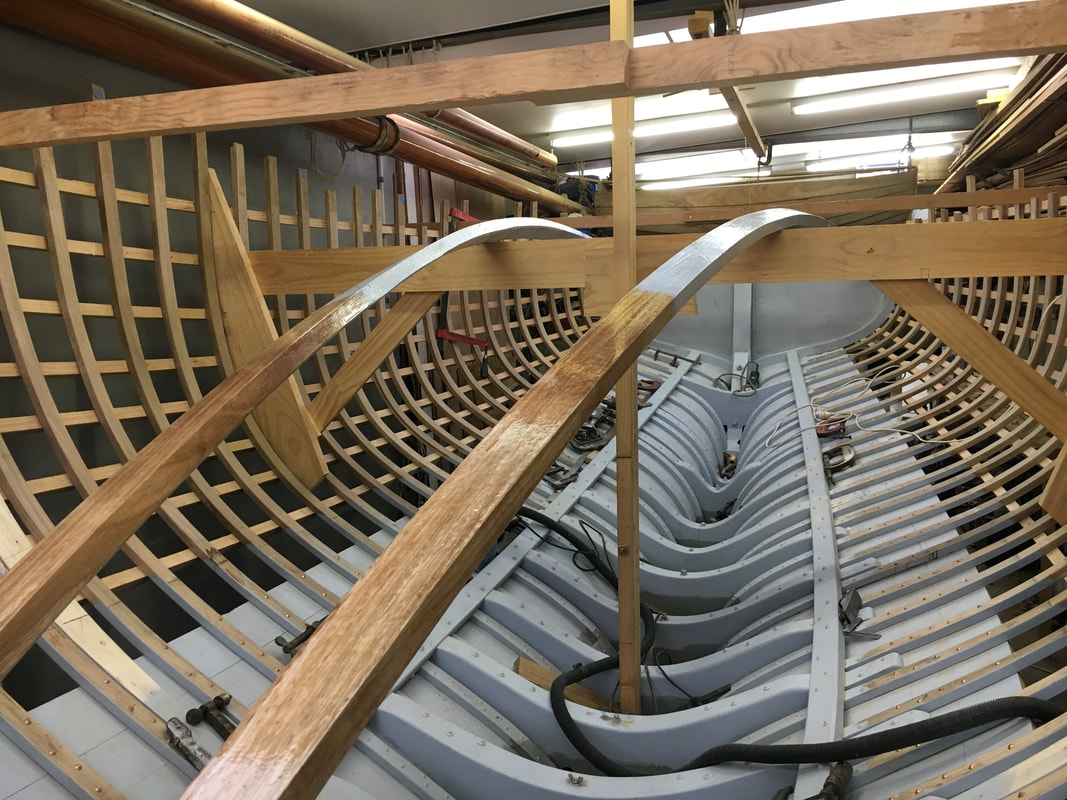
0 Comments
If you peruse the photos in earlier posts you will see that I don't have a lot of room in my shed. It's basically a tandem two-car garage. It's definitely cramped, but the commute is good, I walk out the back door and down six steps and I'm at work. But this means that I don't have any room to machine long timber. I have my old circular saw bench which I converted from 415 to 240 volts when I shut down my commercial shed 5 years ago, but even angling it and poking timber out the back door I can only machine up to about 10' (3m) in length. Plus there is simply no room to store the volume of timber I need to have on hand. Luckily a generous friend allows me to have a 20' container on their property an hour's drive out of town. The remainder of the Huon Pine planking timber and the Spotted Gum for the remaining stringers, beam shelf, mast step etc is also there plus a lot of miscellaneous timber I couldn't bear to part with when I shut up shop. Whenever I need more planking timber I work out the lengths I need for the next 2 or 3 rounds so as to stagger the scarf joints, and drive out to Smithy's Boatshed West. I have a deep-ripping Laguna bandsaw with a 1" blade and a DeWalt thickness planer in the container. The Huon Pine was originally bought for a different project, and sawn 1 1/2" thick (38mm) so I rip each board to about 1 1/8"(28mm) and thickness it down to 1" which leaves ample to hollow and round the planking to fit the curve of the ribs for a finished thickness of 7/8" (22mm). I'm left with lots of thin Huon for internal panelling and maybe even a dinghy or two. This video shows the setup and some machining shots of the nice Spotted Gum I need for the mid-bilge stringer as well as the next load of Huon Pine planking. |
AuthorIan Smith, Boatbuilder (ret'd) Archives
January 2024
Categories |
 RSS Feed
