|
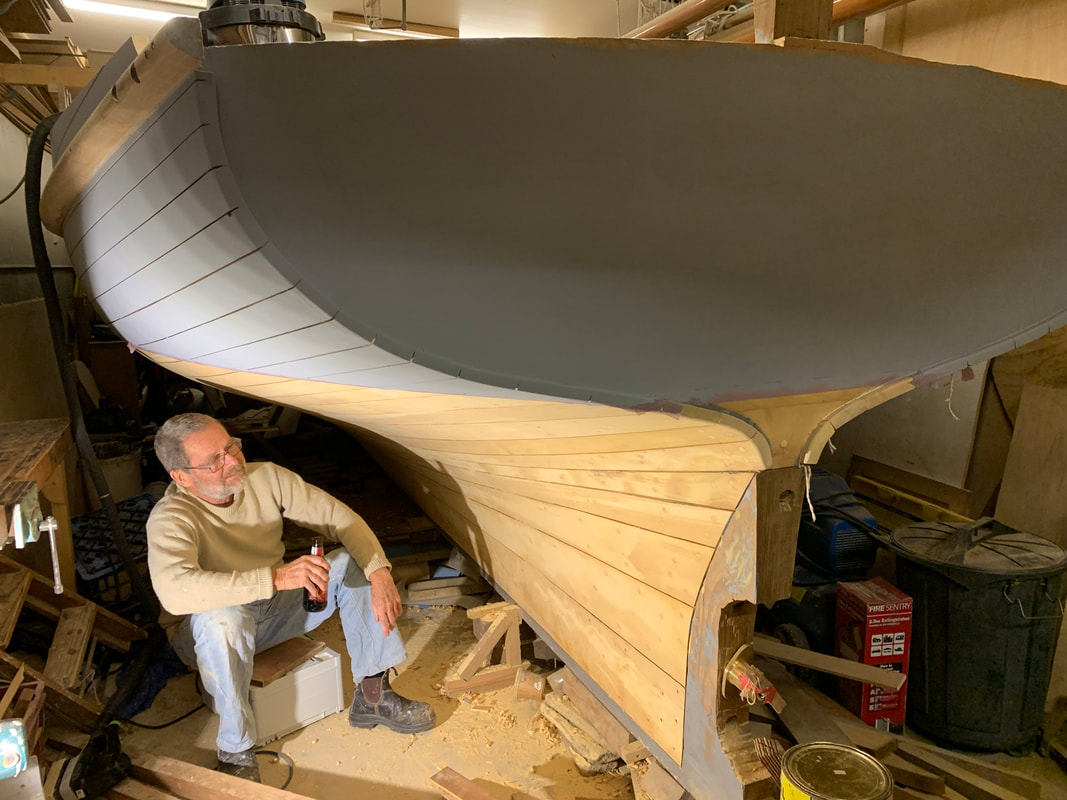
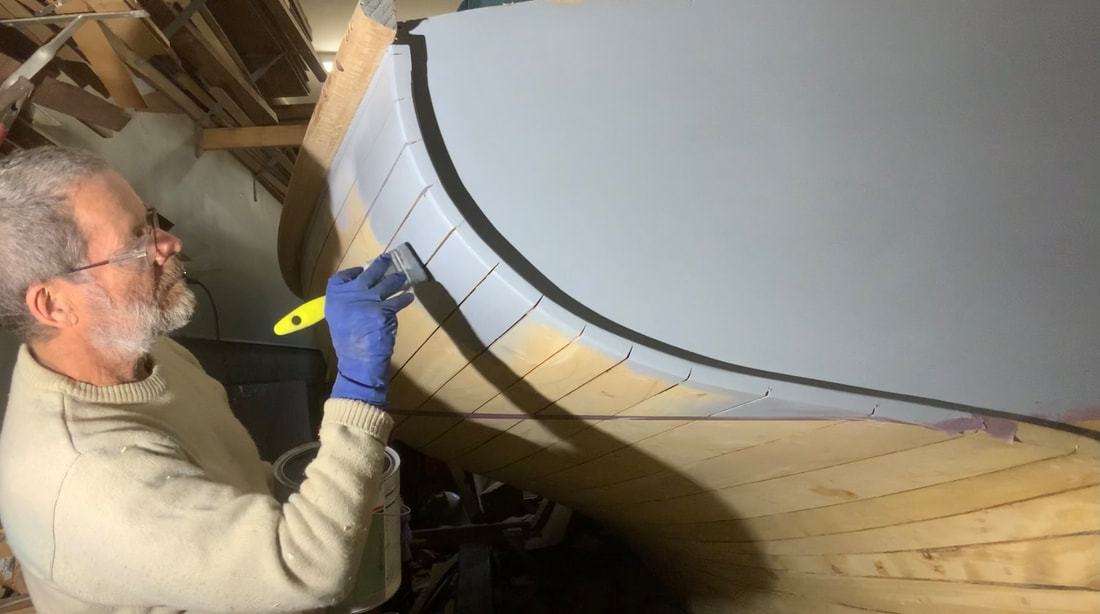
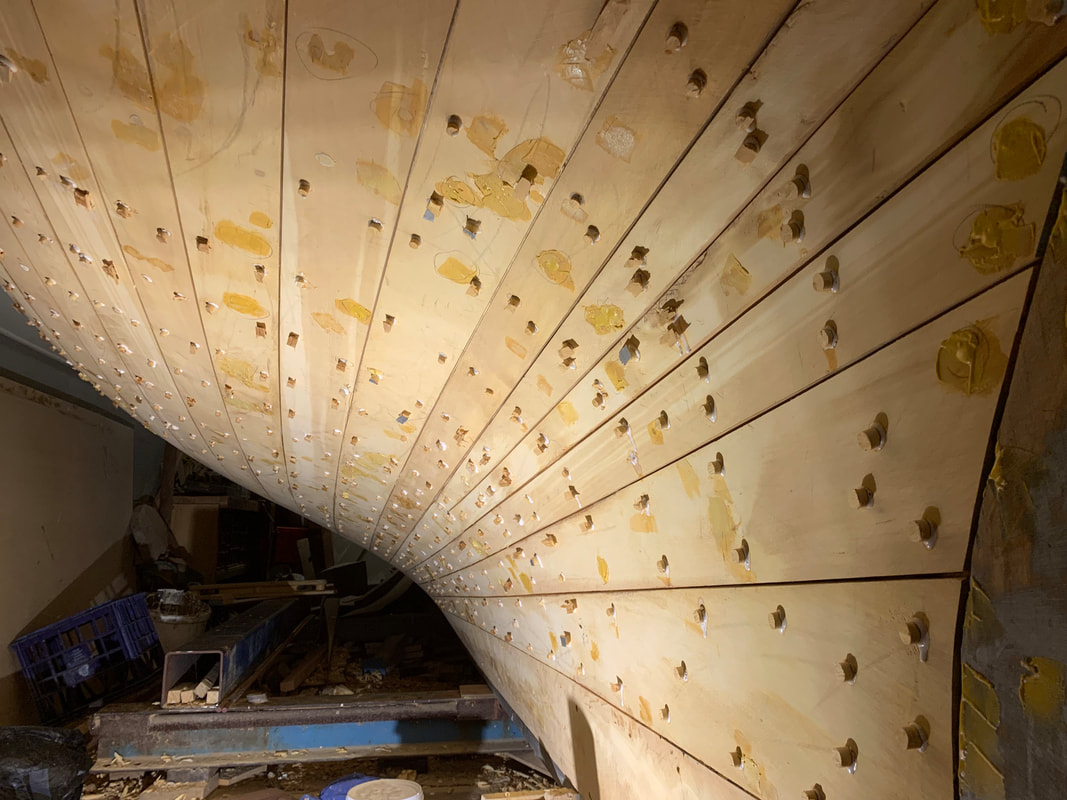
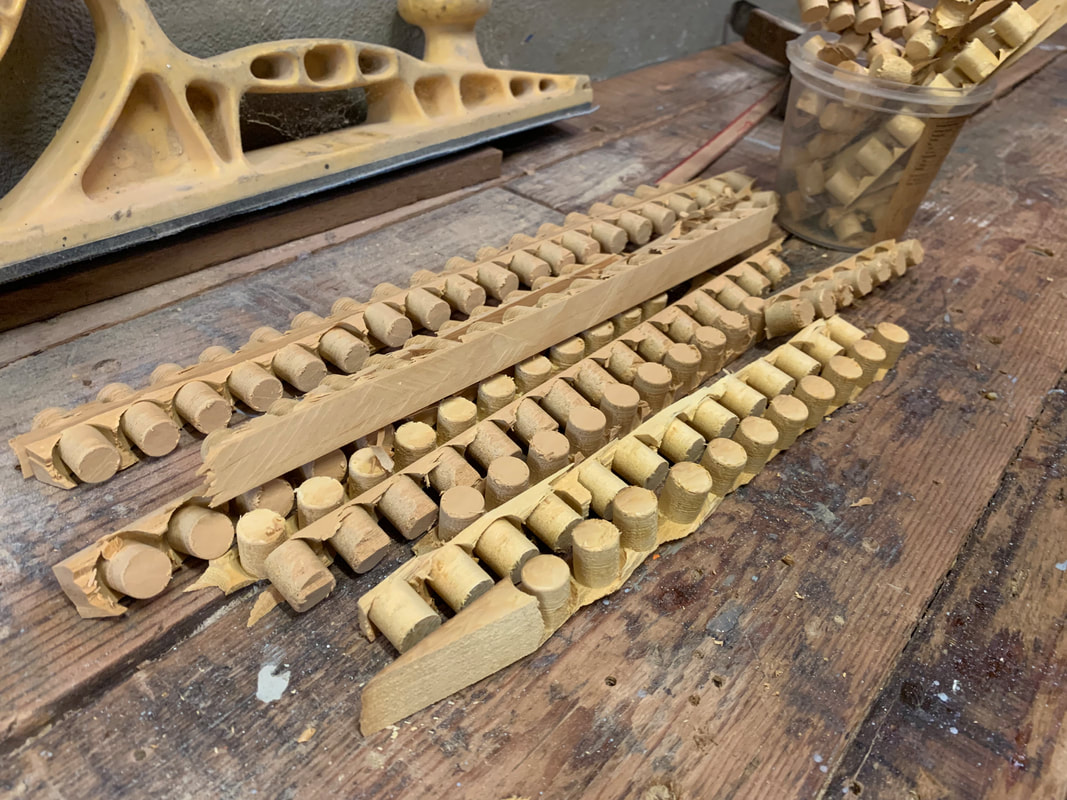
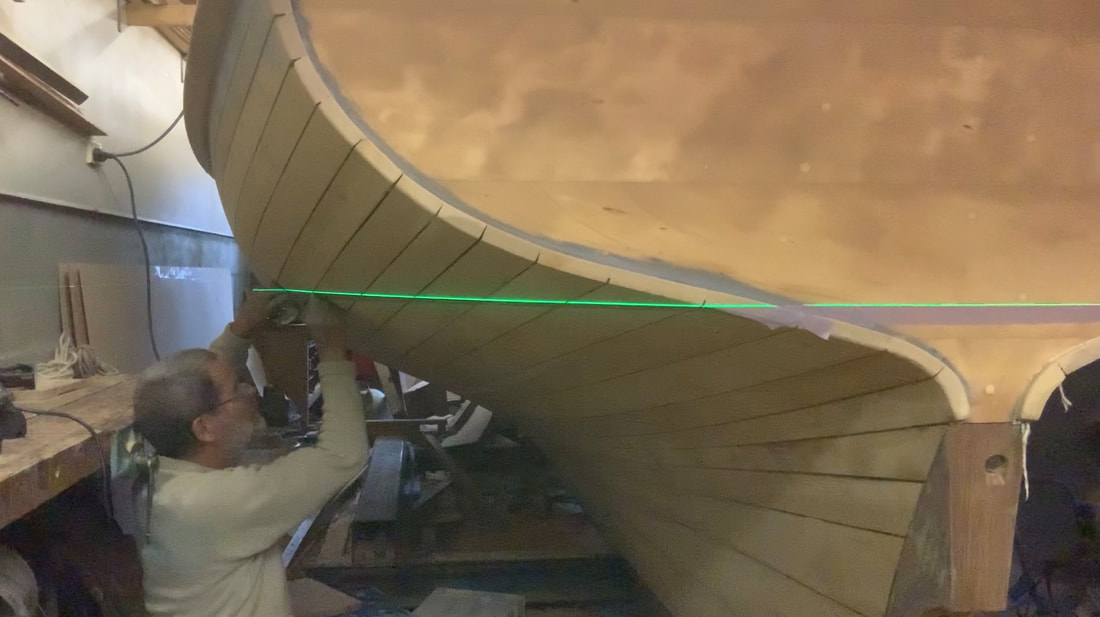
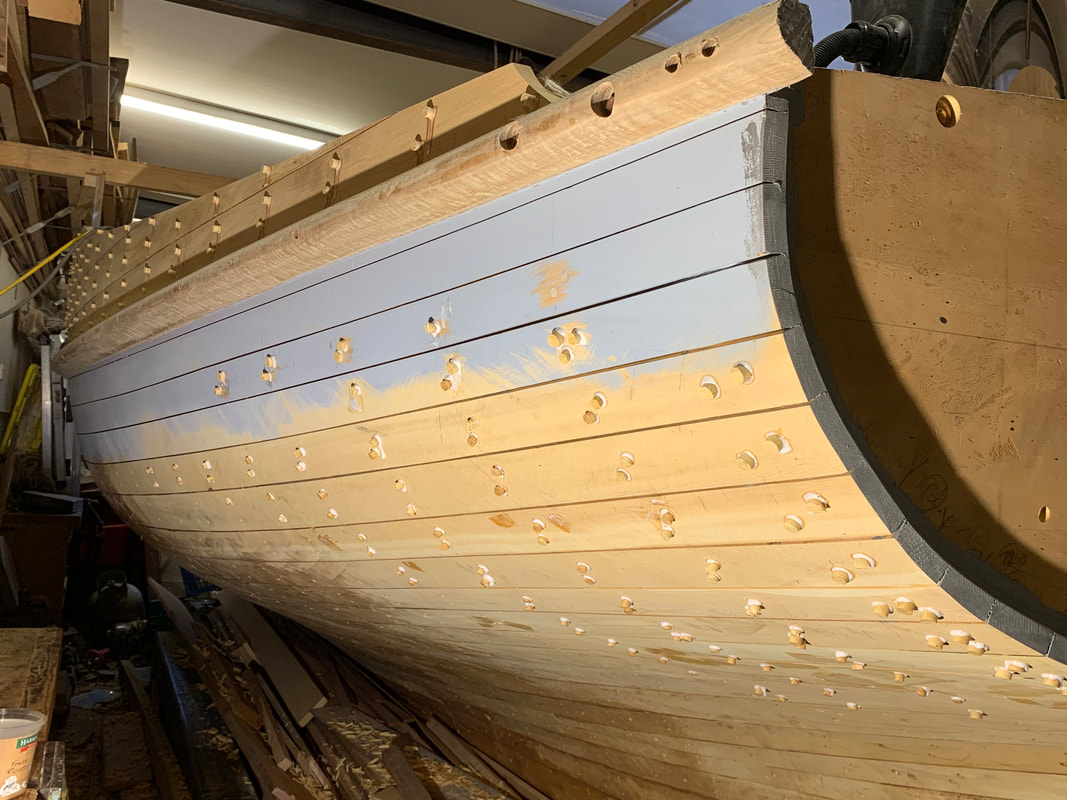
After fairing the hull surface is ready to prime. These pictures are a bit misleading....in order to break up the work I have only faired the port stern quarter, so three-quarters of the boat still remains to be done. But as it is best to prime sanded timber as soon as possible after sanding I have marked the waterline and applied the first coat of primer above the waterline, plus on the transom. The primer is International Yacht primer. I will prime below the waterline in a day or so with International Primocon. The whole of the Port stern quarter is plugged. There is a short video of this process on the Ian Smith Facebook Page, and I will be adding that footage to a longer video on plugs and gravos (graving pieces) soon. I used a method that Larry Pardey showed me 30 years ago where you drill the plugs in a line on a thin strip leaving only a millimetre or less of wood connecting the plugs. You dip the end one in glue and tap it into the hole, lining the strip up so the grain follows the grain of the planking. It's a little quicker, less messy and more accurate (with regard to the grain) than cutting and fitting individual plugs. I use WEST epoxy glue with Microspheres to thicken it. This mix is not as strong a glue as with Microfibres, but that is a good thing, it is well strong enough to glue in the plugs but soft enough to sand easily. The Facebook post certainly brought out the plug Nazis! Laser levels are brilliant for marking waterlines! I set it up to do the transom and the Port aft quarter and ran masking tape along the bottom of the line. When the topside primer is dry enough to take tape, I will retape above the line and prime the bottom. There will be only one coat at the moment, the rest of the priming will have to wait until the seams are fully caulked and payed.
0 Comments
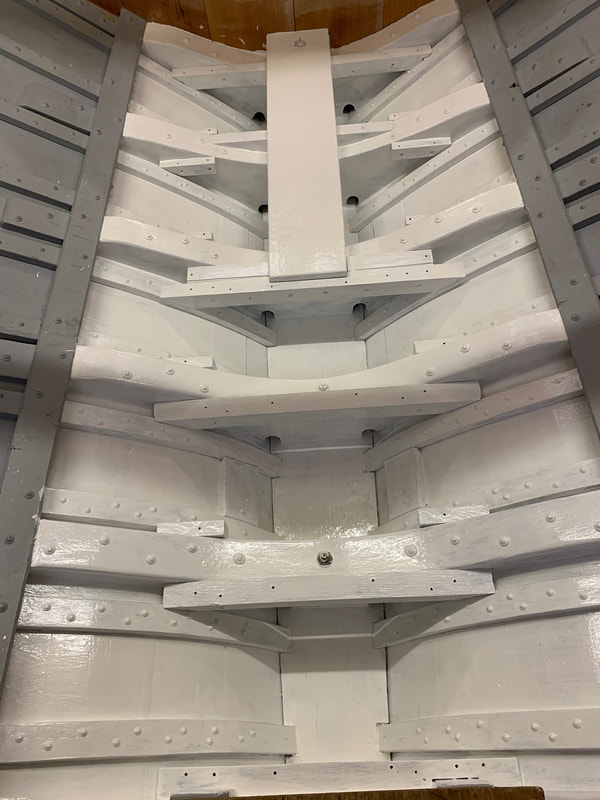
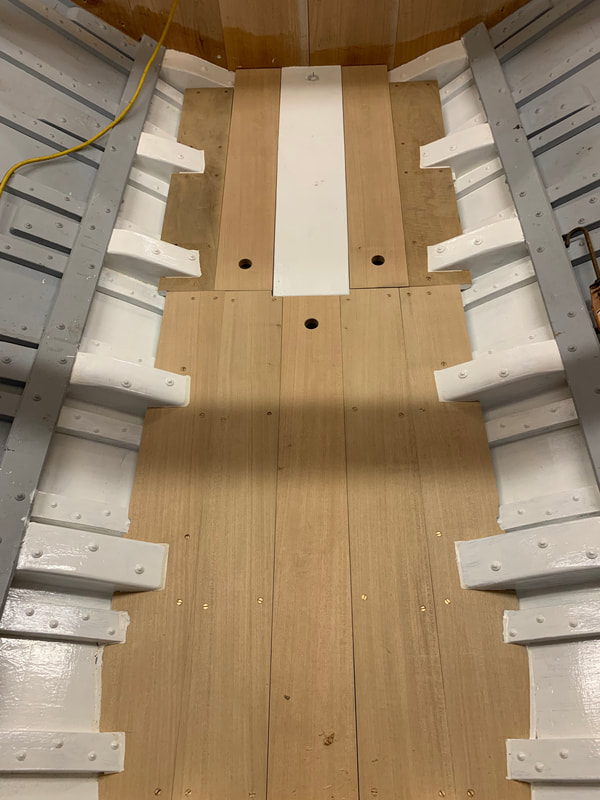
I had fitted a temporary sole of MDF to make it easier to walk around inside the hull, but with the cabin joinery next on the list I needed to fit the permanent sole as the bunk fronts land on the outer edges of the sole. I originally planned to use Kauri boards which was commonly done back in the day (even if they were painted), but with Covid disruptions and shortages in the building industry I was unable to find suitable boards in Queensland Kauri, Fijian Kauri or Malaysian Kauri (Damar Minyak), let alone New Zealand Kauri. So I settled for Queensland White Beech (no relation to Northern Hemisphere Beech), which was commonly used in laid decks, as it is durable and weathers to a light silvery grey. I don't expect it will go grey in the cabin for a long time, but I plan to leave it bare. If it shows the dirt too much I will eventually oil or clear finish it. The boards with the finger holes are loose, the others are tongue-and-grooved together, screwed but not glued down. I plan to make all of the interior joinery relatively easily removable. This will make it easier for future generations of repairers. I have painted the bilges and the other side of the sole boards with white International Bilgekote (sold in Europe as Danbolene), from one of two 1 litre cans I was able to secure. There is still a shortage of some International Paint products. In the cooler weather I have been getting into fairing the hull. I faired the upper topsides last year before fitting the lower sponsons, and now I am moving down to the lower topsides and below the waterline. I hope to finish it in the cooler months. Its a big job and I will be pacing myself by interspersing bouts of fairing with the interior joiner work.
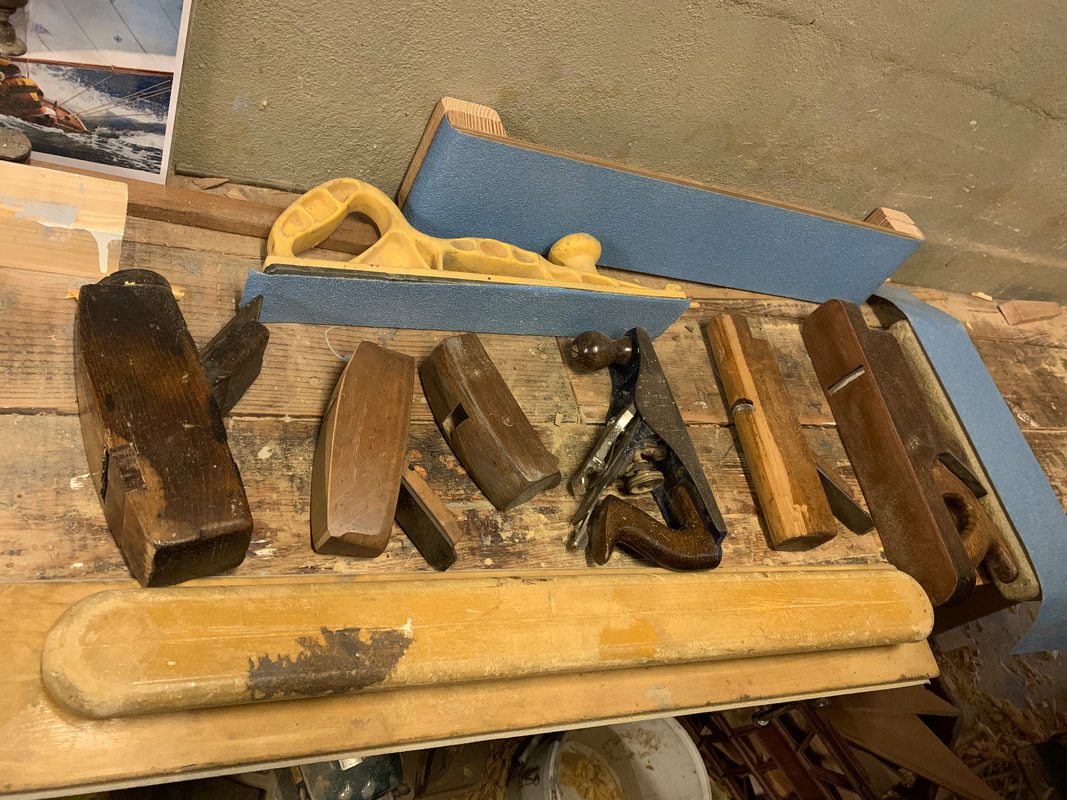
The photo shows a selection of the tools I use for fairing. Most of the work is done by planes. All of the convex and flat surfaces are planed with the Record No3, planing in all directions but mostly with alternate diagonal strokes. The concave surfaces are planed with a selection of round-soled wooden planes. The flexible fairing boards pictured with 40-grit paper are used to remove the plane marks and do the fine tuning before priming. The concave surfaces are sanded with the paper held on a rounded block of foam and a selection of rounded items such as large-diameter plastic water pipe. The other photo shows the Port stern quarter and the raised deck section of planking above the sponson which have been roughly faired receiving plugs in the fastening holes. |
AuthorIan Smith, Boatbuilder (ret'd) Archives
January 2024
Categories |

 RSS Feed
