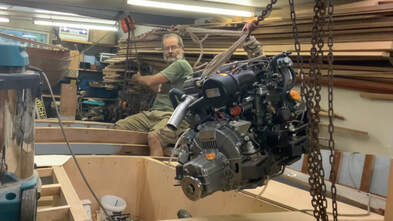
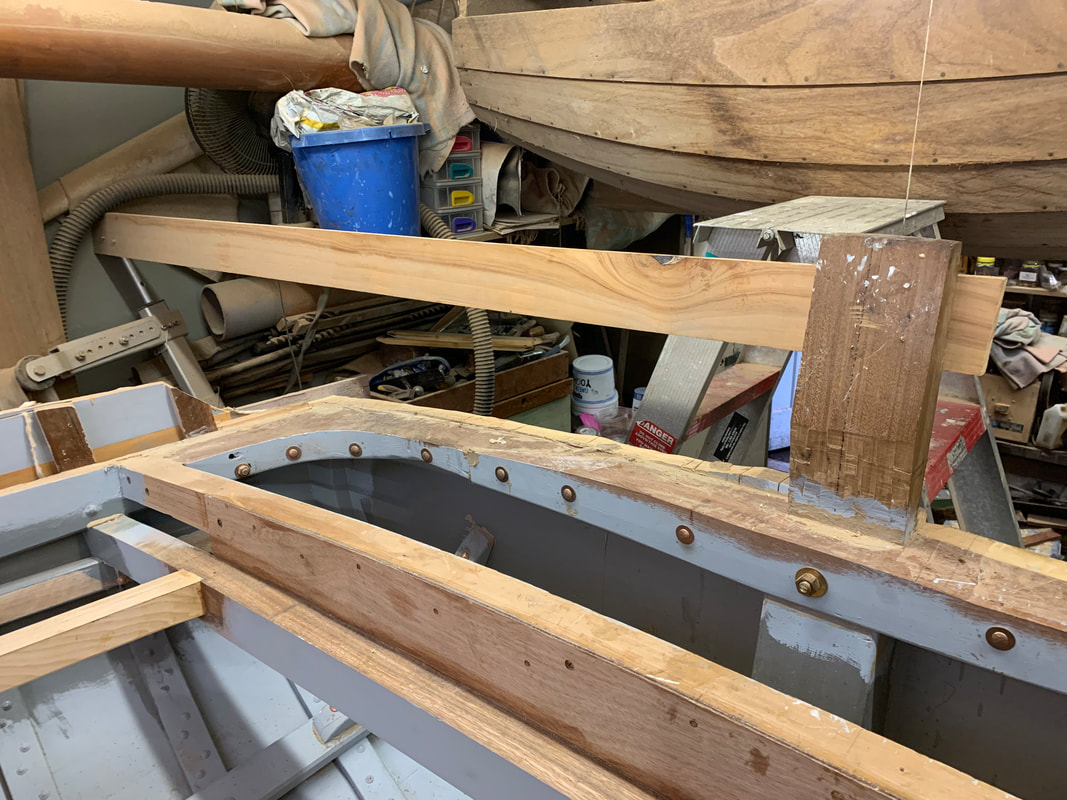
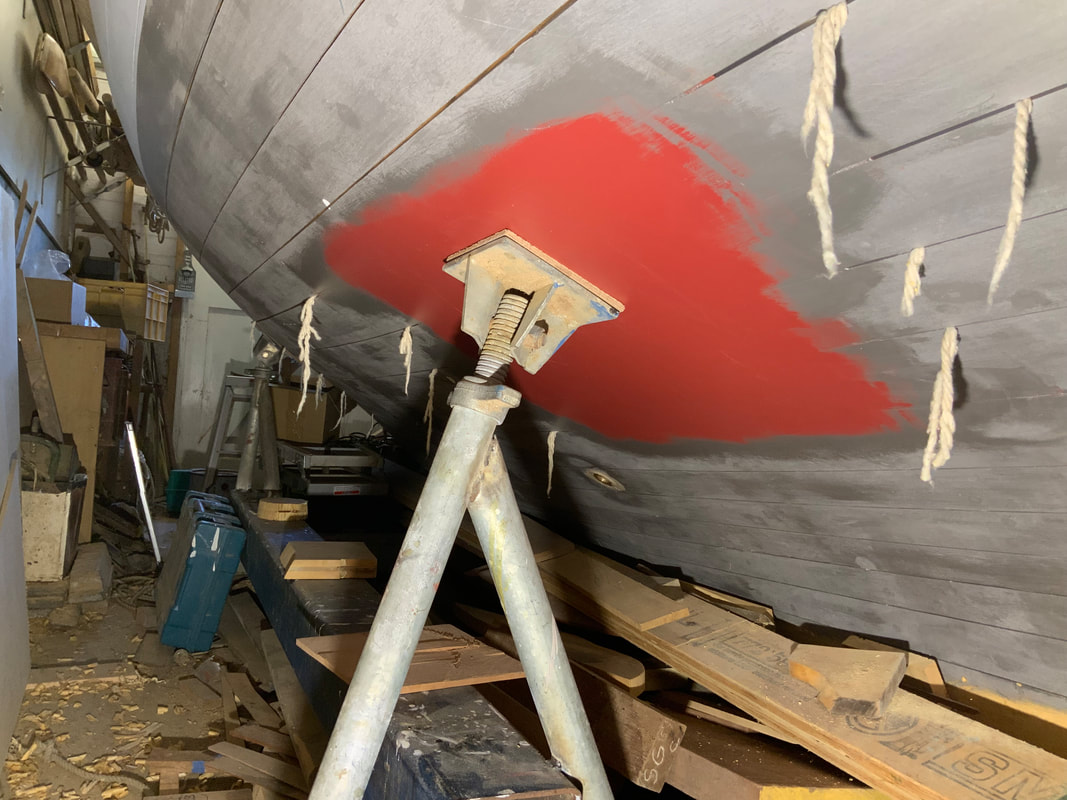
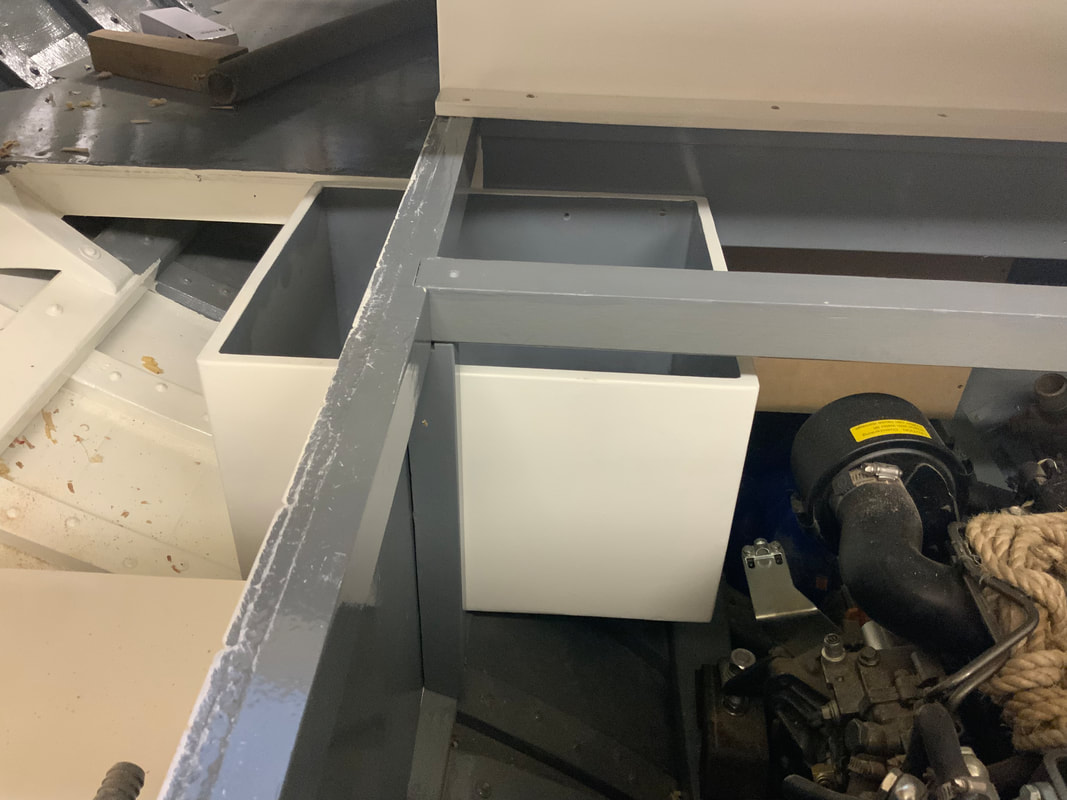
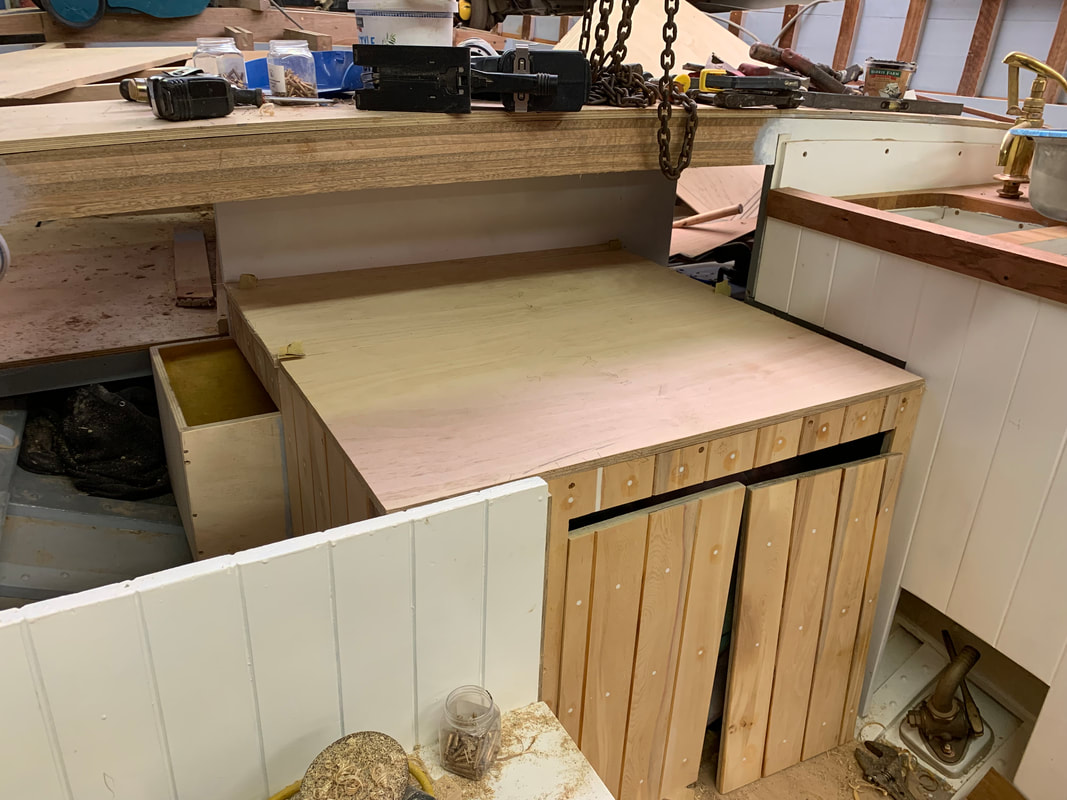
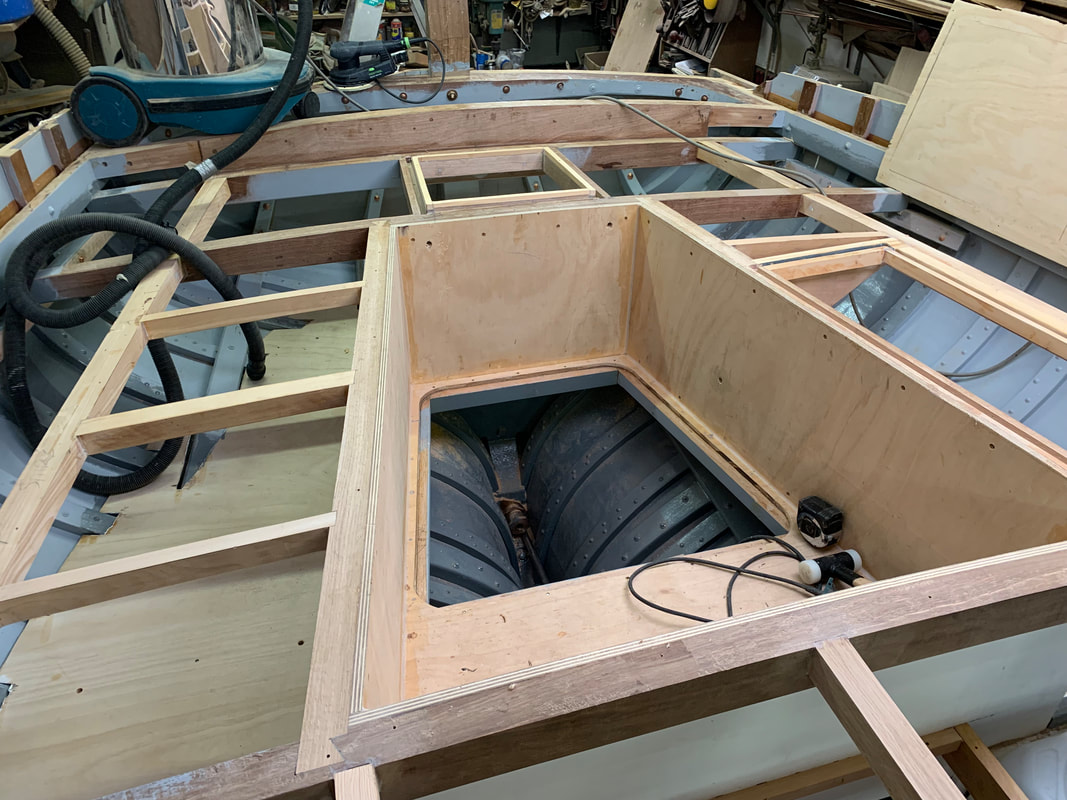
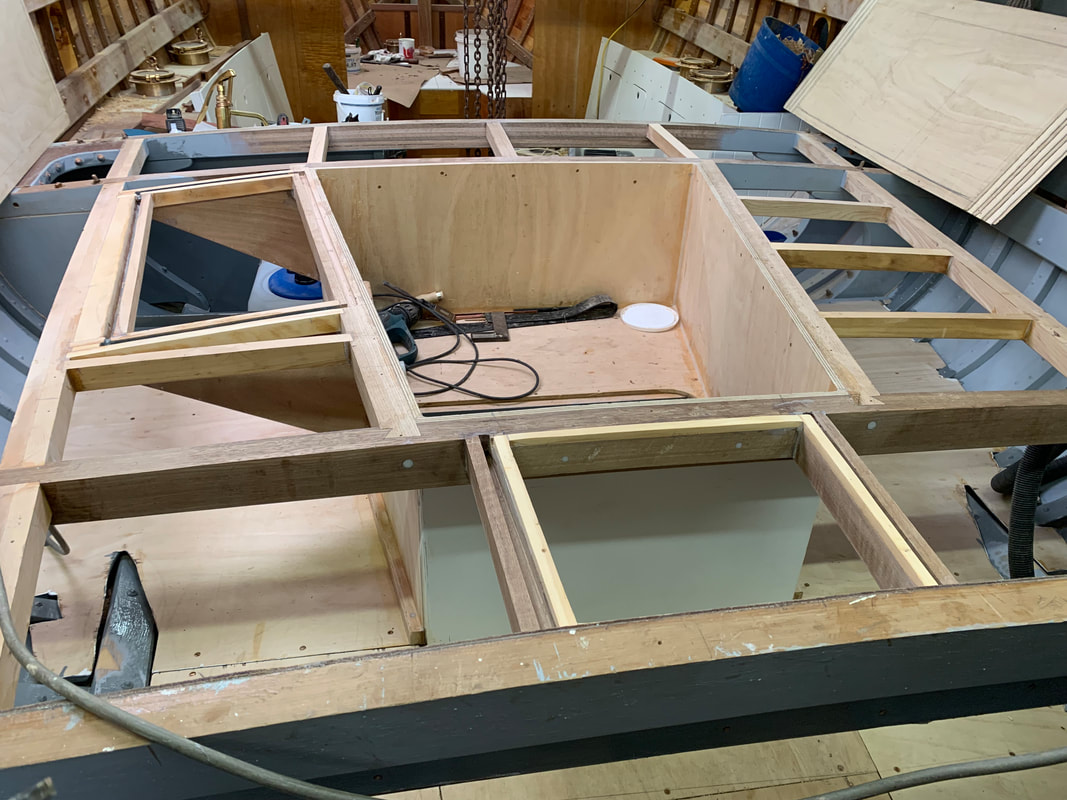
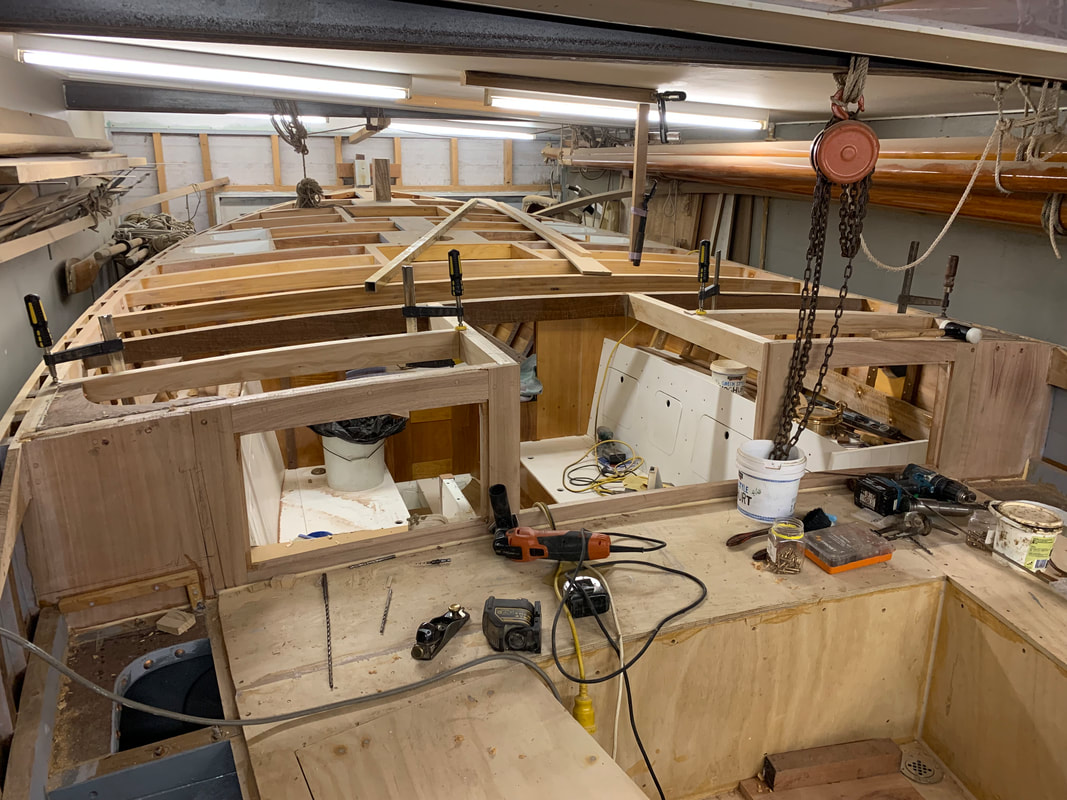
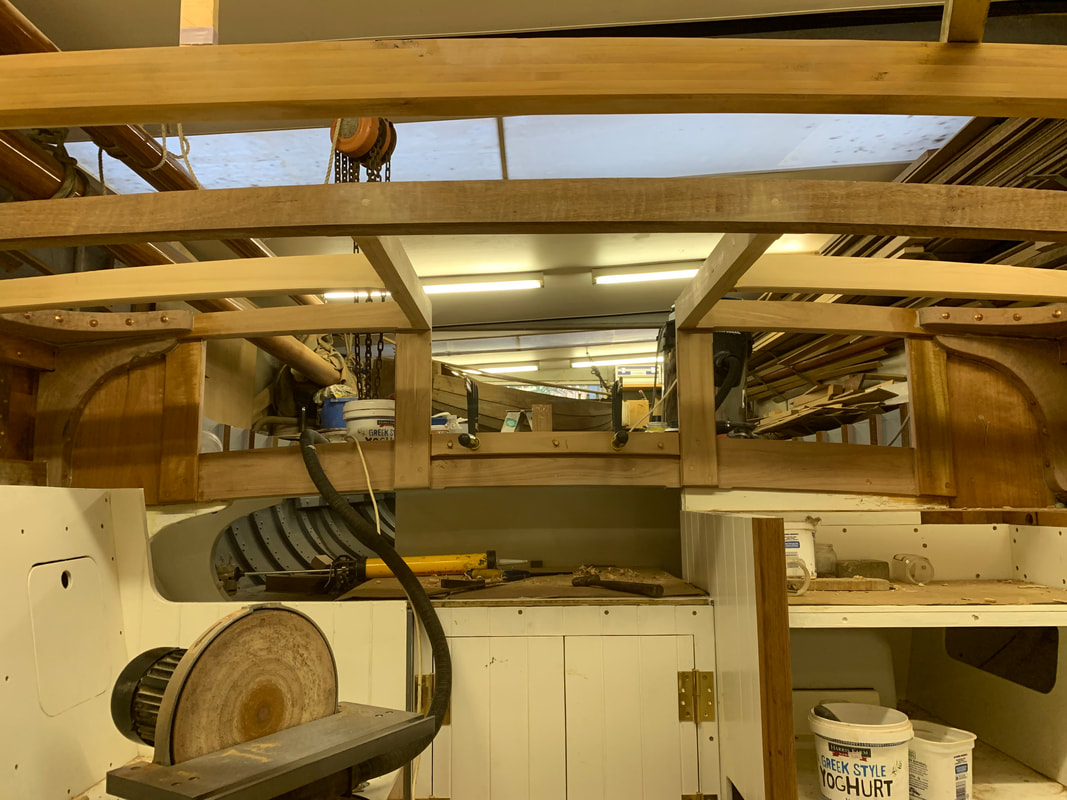
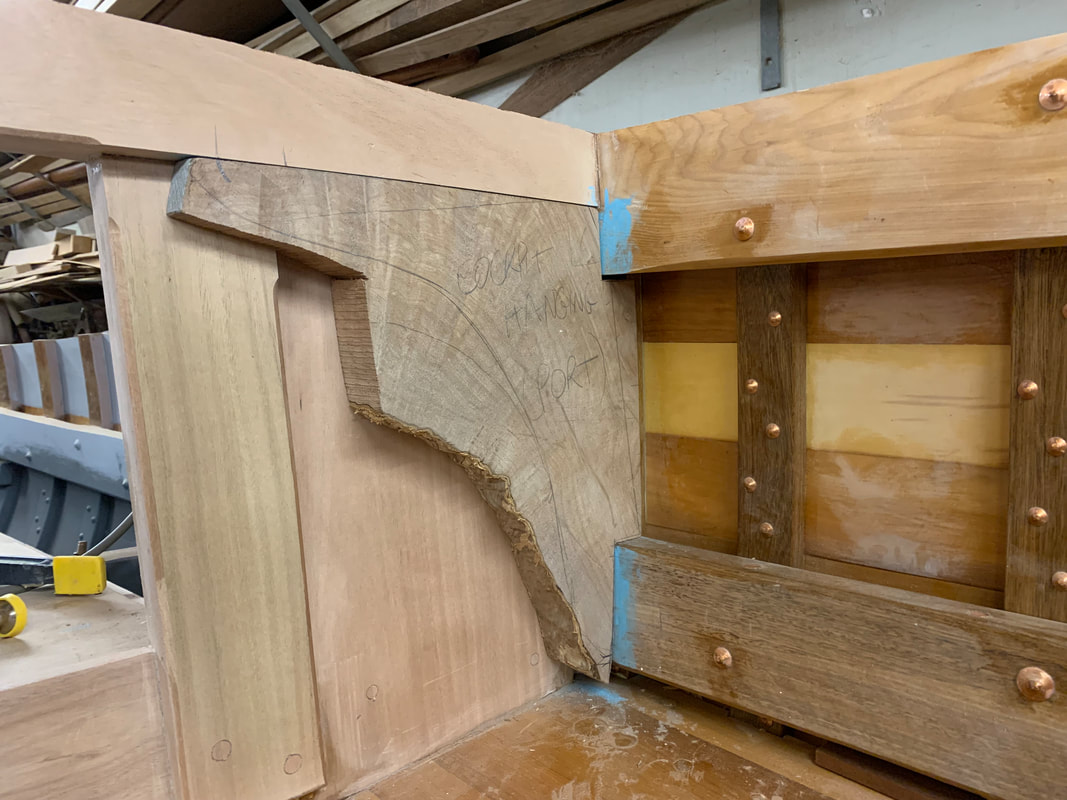
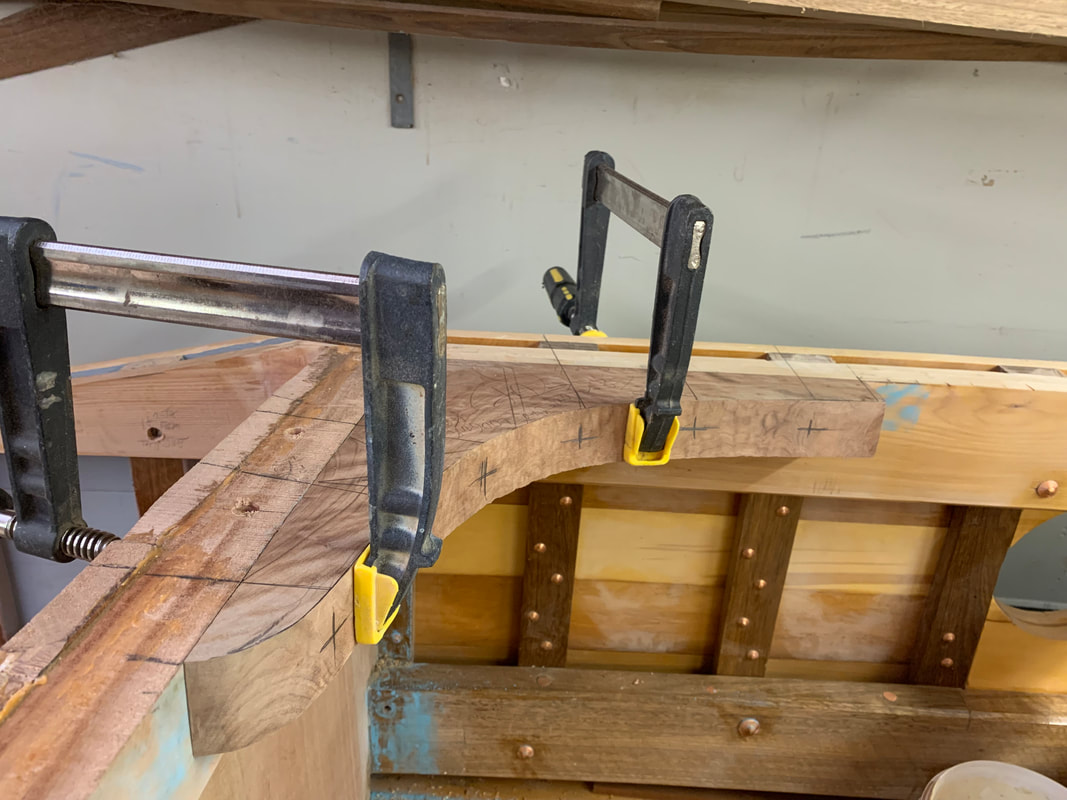
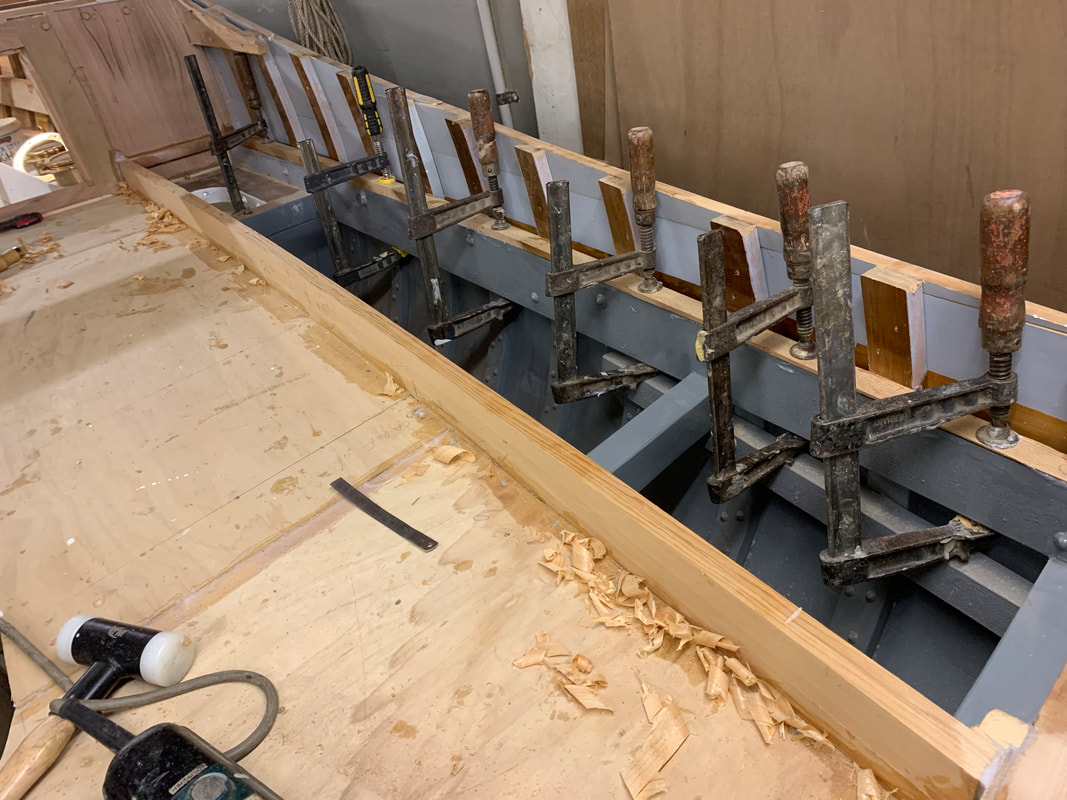
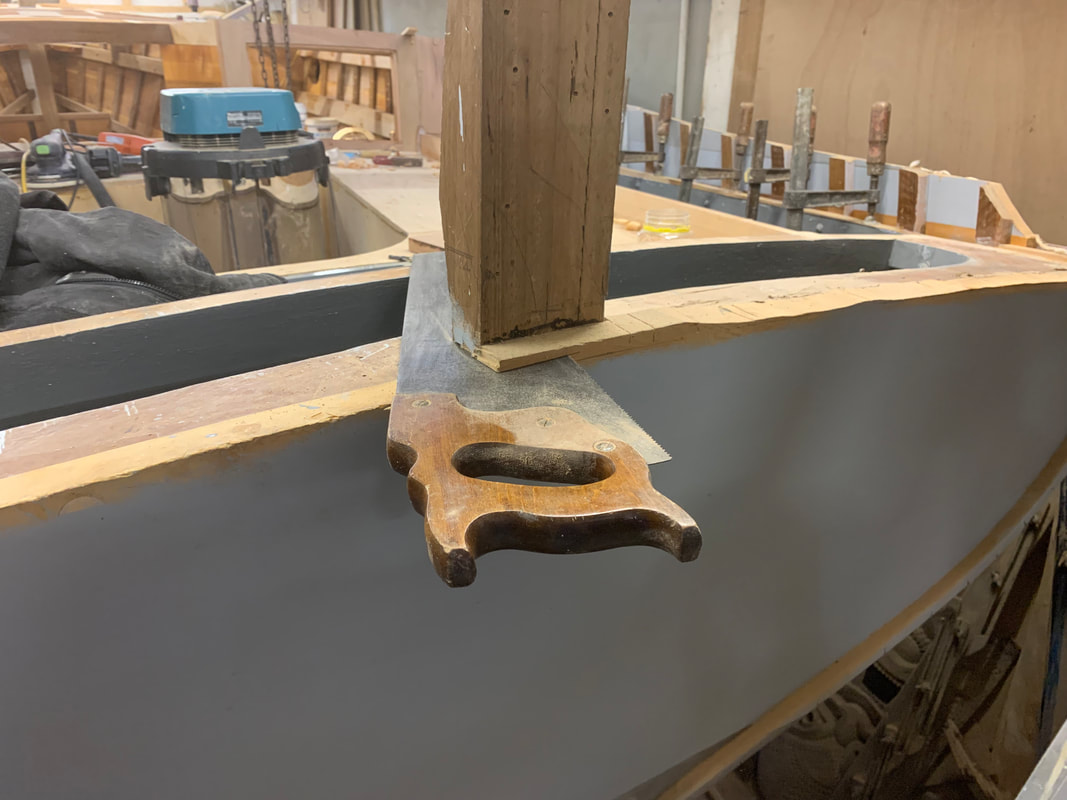
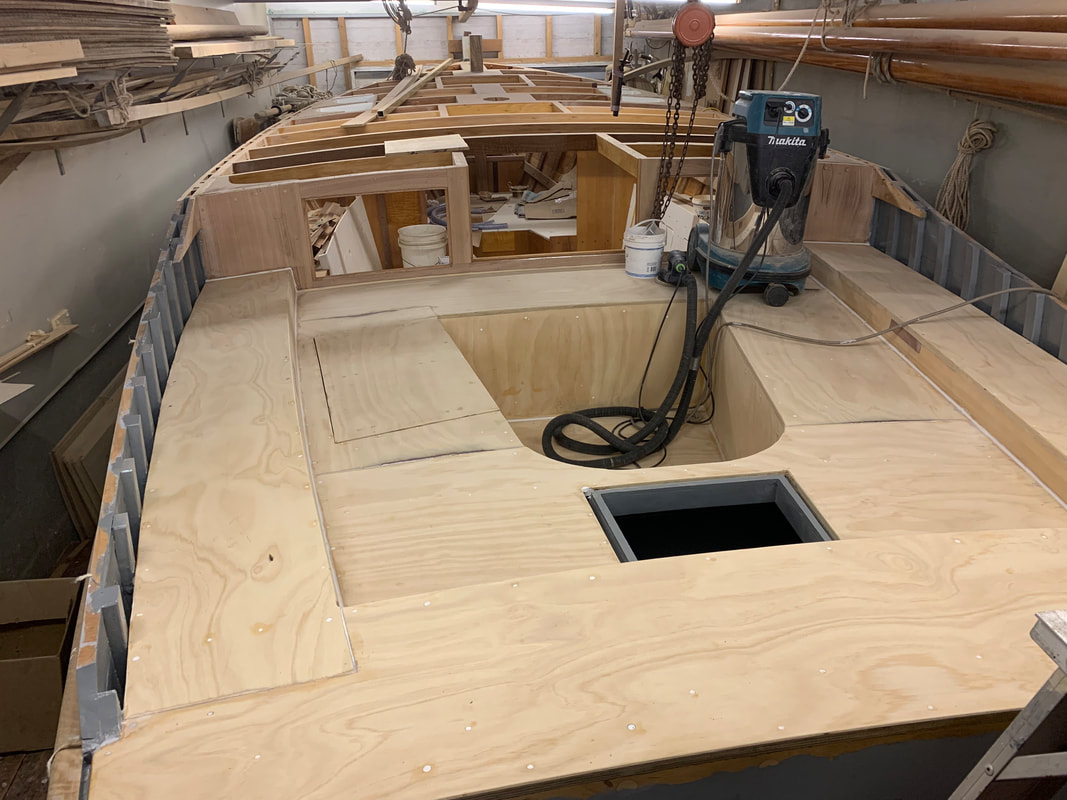
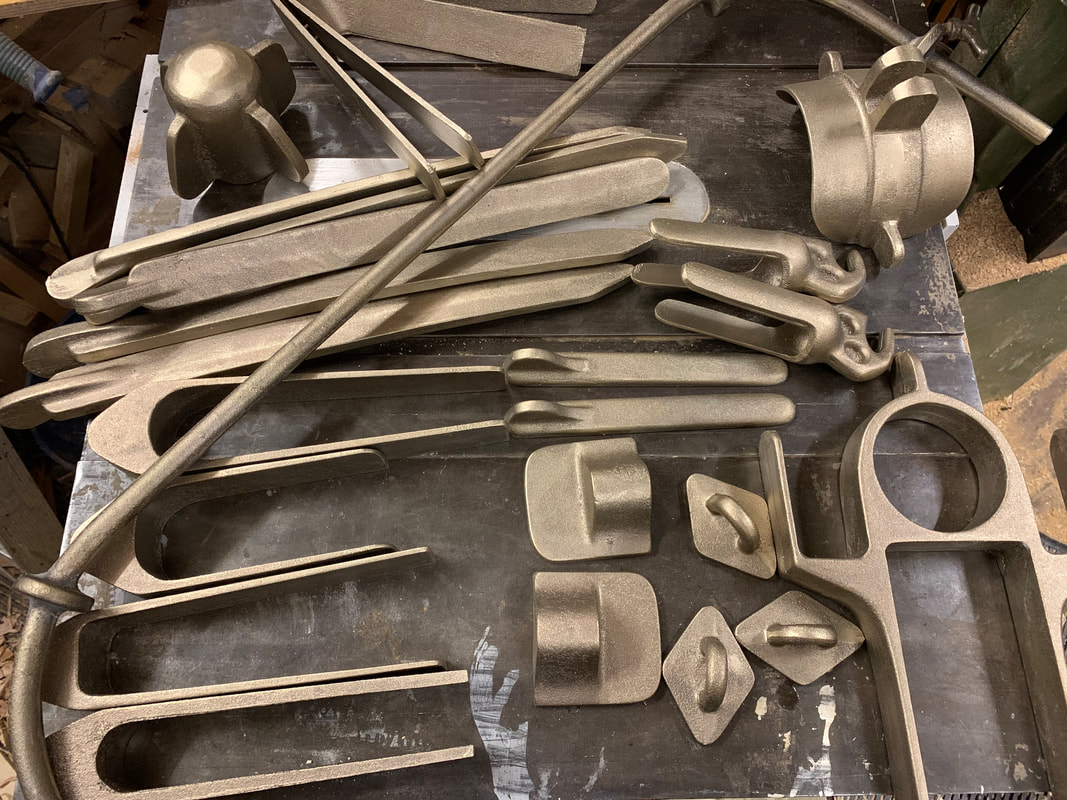
 At the end of March I lifted the Yanmar 2YM 15-horse motor into the boat. It's sitting on its engine beds, but it will stay like that for a while as there's a lot to do before bolting it down. But before I could lift it in I needed to removed several timber props that were holding the hull upright: a cross beam from wall to wall fixed to the frame heads at the cabin/cockpit break in deck, and a prop to Starboard attached to both the wall on that side and the top of the sternpost...... but before I removed those, I had to prop up the hull from underneath......but before I could do that i needed to caulk, pay and paint the hull where the props would sit because access would be difficult to those areas later. So I caulked four hull patches with cotton, primed and payed the seams with linseed oil putty with a little anti-fouling paint added as these areas were all under the waterline, then painted on several coats of International Primocon and 2 coats of anti-fouling. Then a good mate Dave Paget welded the tubing holding the adjustable props to the cradle and I wound them up tight. I removed the timber props from the upper works monitoring with a laser level to make sure the boat didn't move. It didn't, not a millimetre, so the hull is still perfectly level. Having the engine in place allowed me to locate the engine water intake seacock and work out satisfactory locations for the cockpit drain seacocks so they would not interfere with the drive train and exhaust system, and to built the battery box and engine box, to the point where it is now painted and only needs Cedar trim to be finished. But it can and will be easily disassembled when cockpit drain hoses, exhaust hose and drive train need to be fitted. Here's the YouTube video I made covering the whole process of lifting the engine in. youtu.be/yP6RmfYyEZo The cockpit seating ply had only been temporarily fasted down when I first installed it for two reasons. The first was that it's always best to leave irreversible decisions like that as long as possible to make sure that you've done everything that needs to be done before you're committed, and secondly because the pre-painting of areas that would become inaccessible after the seating was glued down had to be delayed because last year there was a shortage of some International paints due to Covid problems, including the grey Bilgekote I was using under the cockpit. When I glued down the cockpit sole and the well sides I only had enough Bilgekote to do the areas that would become inaccessible once they were permanent. But since then I was able to get enough Bilgekote to do all the areas that will be below the cockpit. The coating sequence for all plywood was this: 3 coats of WEST System epoxy resin, the first coat rolled on and allowed to cure. The next day I scoured and wet-sanded the surface and wiped it dry to remove the amine blush that epoxies exhibit when curing which hinders adhesion of following coats. Then I applied two more coats about 3-4 hours apart (depending on temperature). The optimum time to recoat is when the first coat has cured to the point where your finger will leave a fingerprint but the resin will not stick to your finger. I've found it's best to leave the final coat of resin as long as possible before recoating with the rest of the program, because sometimes thinners in other epoxy and paint systems will attack freshly cured resin. You still need to wet scour and then sand. I used two coats of International Interprotect, a high-build epoxy coating, one coat early in the day and the second coat late in the day. I sanded this the next day before applying 2 coats of Bilgekote on successive days. Bare timber like the short half-beams and carlins under the cockpit seating get three coats of Yacht Primer and two coats of Bilgekote. Obviously you do not coat any gluing surfaces, and you need to make sure these are clean and dust-free before gluing. I also built drainage for the two cockpit hatches, a lazarette hatch aft and a cockpit seat hatch to Port. I then glued down the seat ply, screwing with bronze screws where the temporary screws had been, and adding Monel ring nails every 150mm or so between screws. The cockpit sole hatch will be screwed down over a watertight seal as it will only be occasionally removed. The photos below are of the cockpit prior to gluing down the seating ply, in fact prior to priming and painting under. The next step was to build the back of the cabin and add the companion hatch carlins and the aftermost half-beams. The joinery timber for the back of the cabin is all Queensland Maple (in keeping with most of the other boats to this design). There will be removable hatch boards fitted in the "windows" either side of the companionway. At anchor these make the interior of the boats very airy. A Tea-tree (Melaleuca) lodging knee and a hanging knee were part of the structure aft on each side. The final part of the main cockpit structure is the narrow aft and side decks. A tapered packing piece was necessary to bring the level of the outboard sides to the right height, a maximum of 22 mmm (7/8") on top of the lower sheer clamp at the forward end. A 100 x 25 MM (4"x 1") timber on edge was added to the outboard seat following the line of the carlin under. This will support the inboard end of the side deck and be the backing against which the varnished Queensland Maple coamings will be fastened. A thick Jarrah pad was fitted so its top surface will be landed on by the side deck ply each side as a backing pad for the secondary winches which will be outside the coamings. Other preparation for the deck ply involved cutting off the protruding top of the Blackbutt sternpost and the fairing of the top of the transom and knee structure and all landing areas for the deck ply. I then cut and dry-fitted the 16mm (5/8") Hoop Pine deck ply, cut scarfs where the aft and side decks join, then resin-coated and painted the undersides as before. As of today they are glued down with all nail and screw heads epoxy-filled and sanded. Sheathing with dynel cloth in epoxy resin is the next job. And in the middle of all this the foundry completed casting bronze from my patterns for rudder fittings and deck gear and I now have to trim, drill and polish these.
0 Comments
|
AuthorIan Smith, Boatbuilder (ret'd) Archives
January 2024
Categories |
 RSS Feed
