|
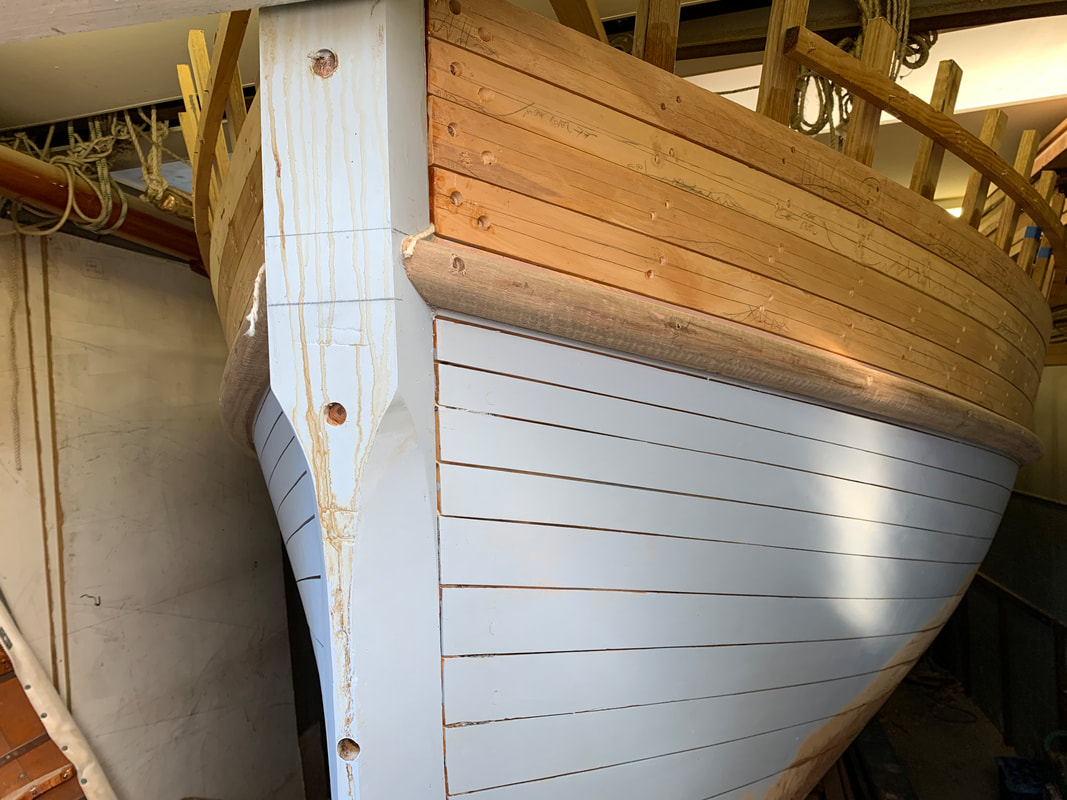
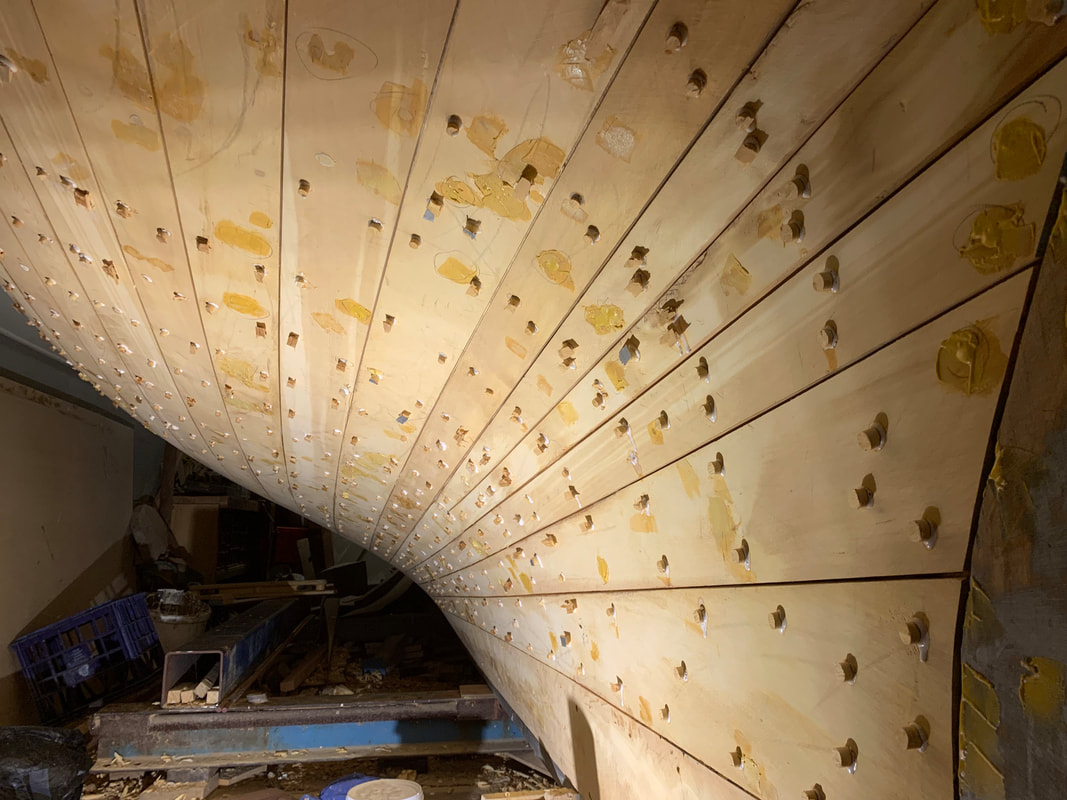
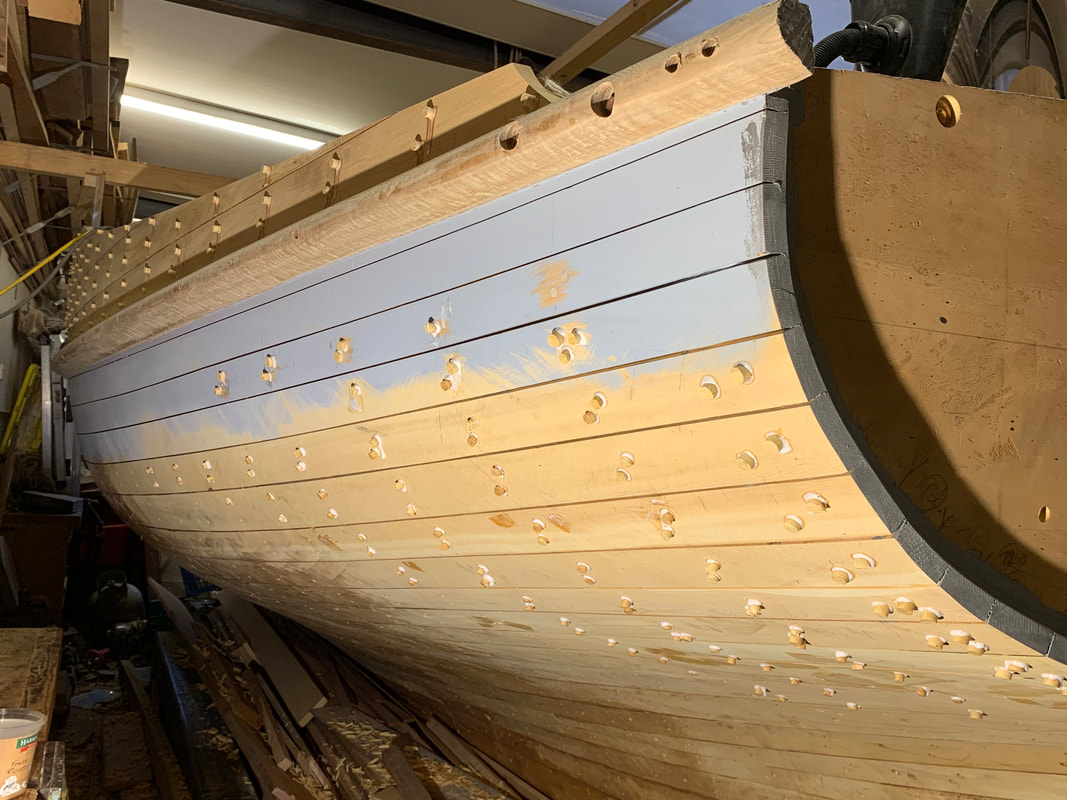
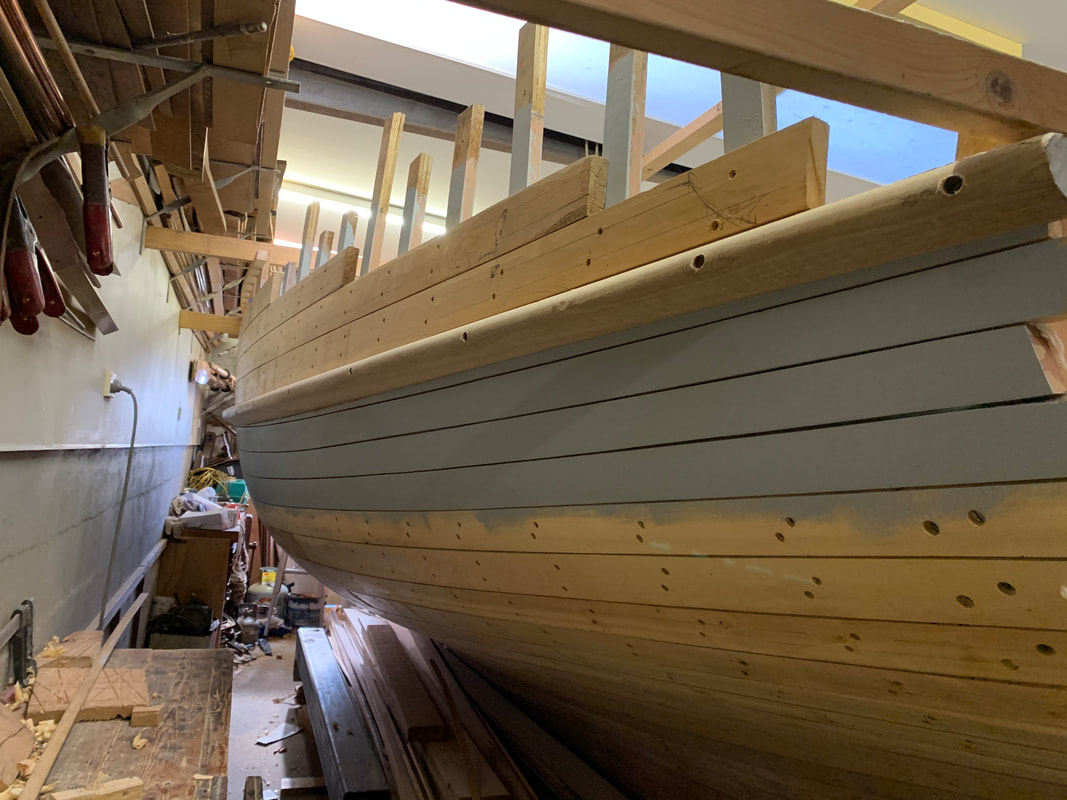
During the hull fairing process any knots that appear on the surface of the planking have to be fitted with gravos or graving pieces let into rebates over the knots. There's a traditional way to do it, with a few modern modifications like using a router, and gluing them in. At the same time the fastening holes all get plugged.
0 Comments
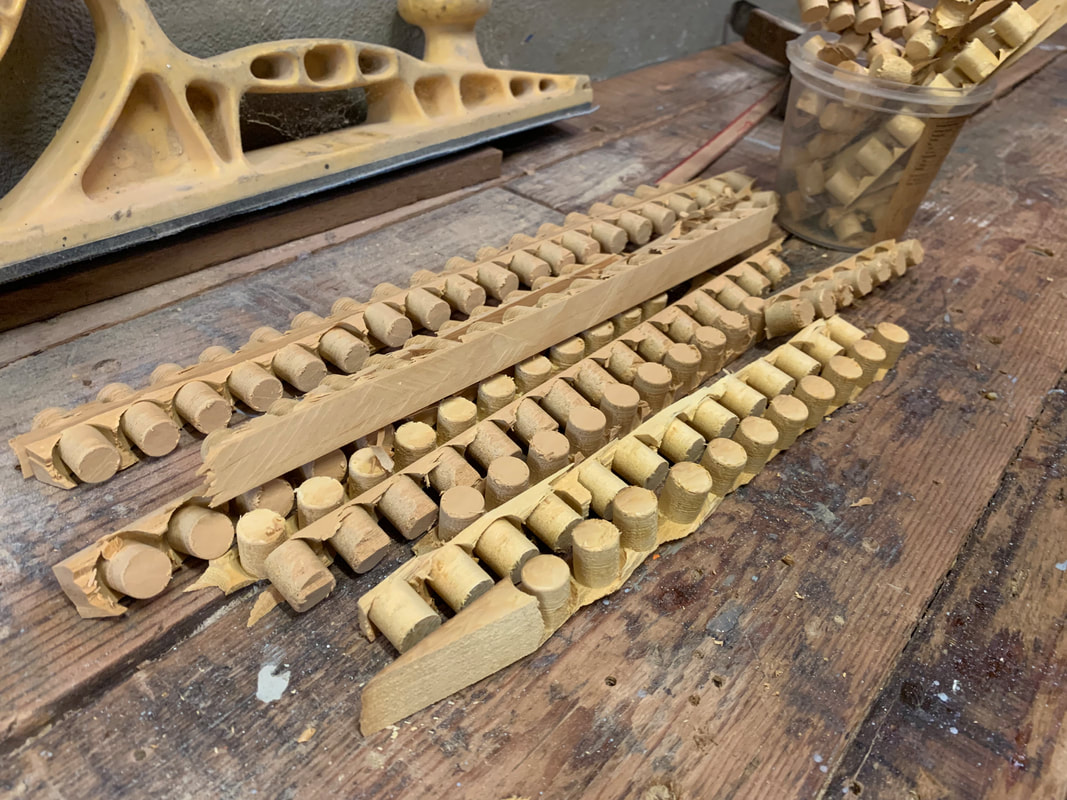
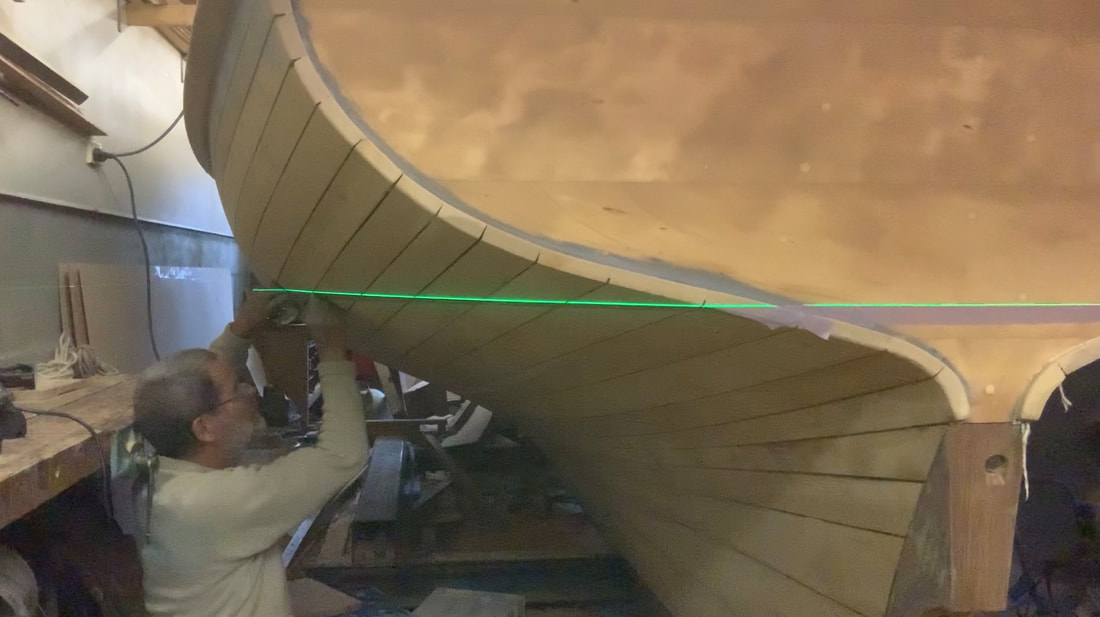
After fairing the hull surface is ready to prime. These pictures are a bit misleading....in order to break up the work I have only faired the port stern quarter, so three-quarters of the boat still remains to be done. But as it is best to prime sanded timber as soon as possible after sanding I have marked the waterline and applied the first coat of primer above the waterline, plus on the transom. The primer is International Yacht primer. I will prime below the waterline in a day or so with International Primocon. The whole of the Port stern quarter is plugged. There is a short video of this process on the Ian Smith Facebook Page, and I will be adding that footage to a longer video on plugs and gravos (graving pieces) soon. I used a method that Larry Pardey showed me 30 years ago where you drill the plugs in a line on a thin strip leaving only a millimetre or less of wood connecting the plugs. You dip the end one in glue and tap it into the hole, lining the strip up so the grain follows the grain of the planking. It's a little quicker, less messy and more accurate (with regard to the grain) than cutting and fitting individual plugs. I use WEST epoxy glue with Microspheres to thicken it. This mix is not as strong a glue as with Microfibres, but that is a good thing, it is well strong enough to glue in the plugs but soft enough to sand easily. The Facebook post certainly brought out the plug Nazis! Laser levels are brilliant for marking waterlines! I set it up to do the transom and the Port aft quarter and ran masking tape along the bottom of the line. When the topside primer is dry enough to take tape, I will retape above the line and prime the bottom. There will be only one coat at the moment, the rest of the priming will have to wait until the seams are fully caulked and payed.
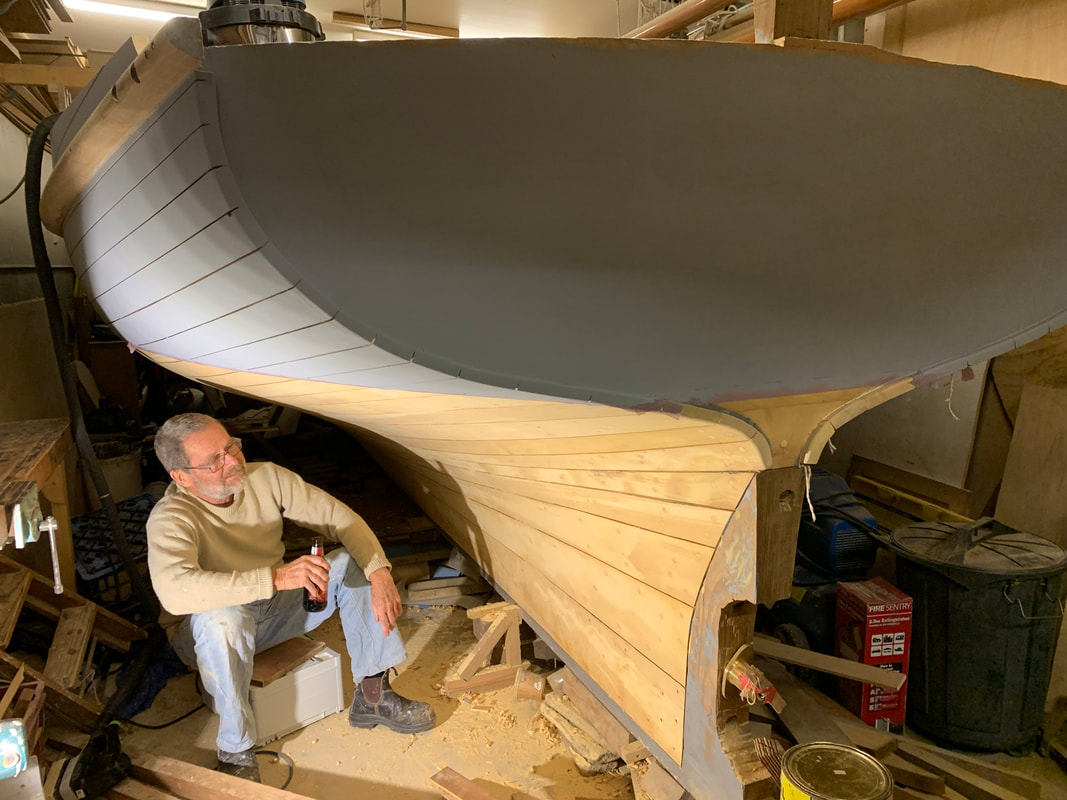
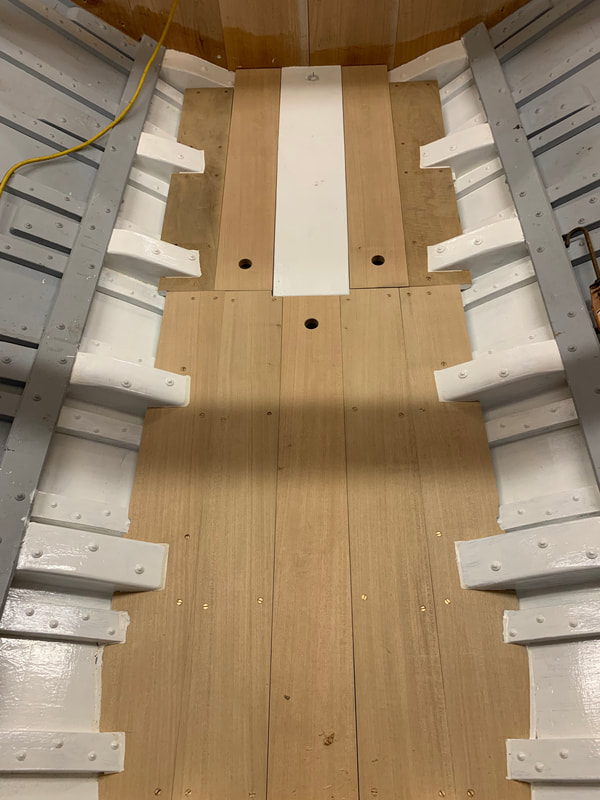
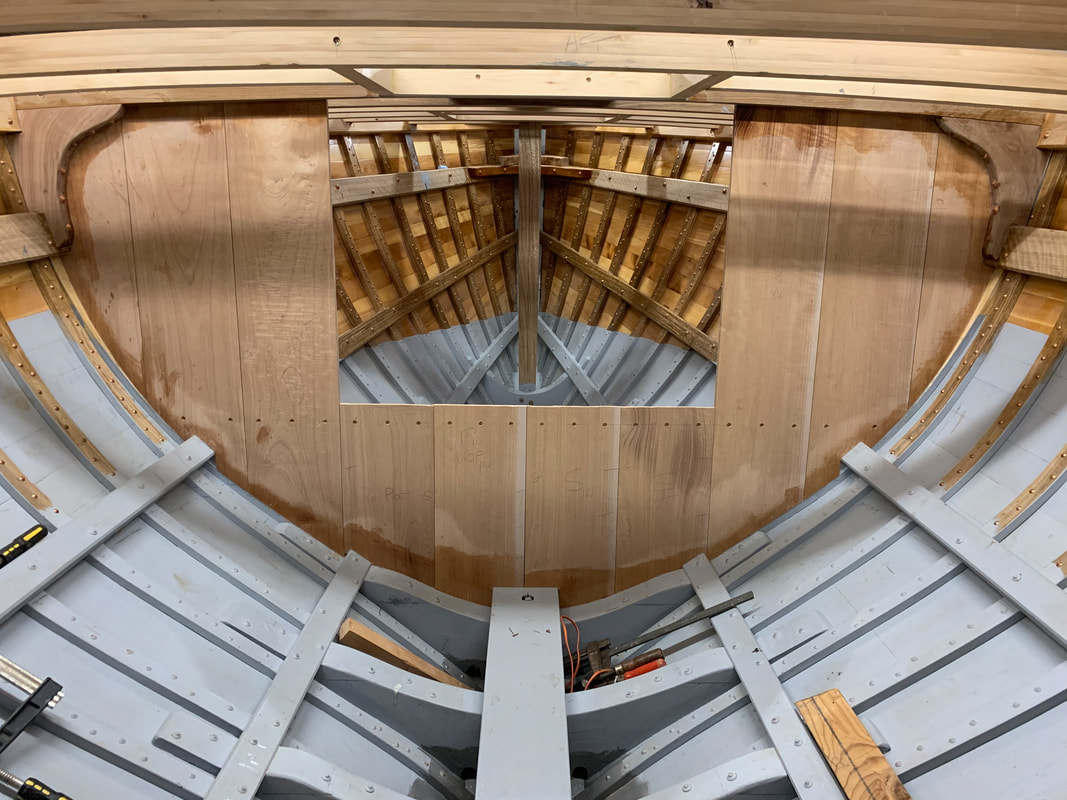
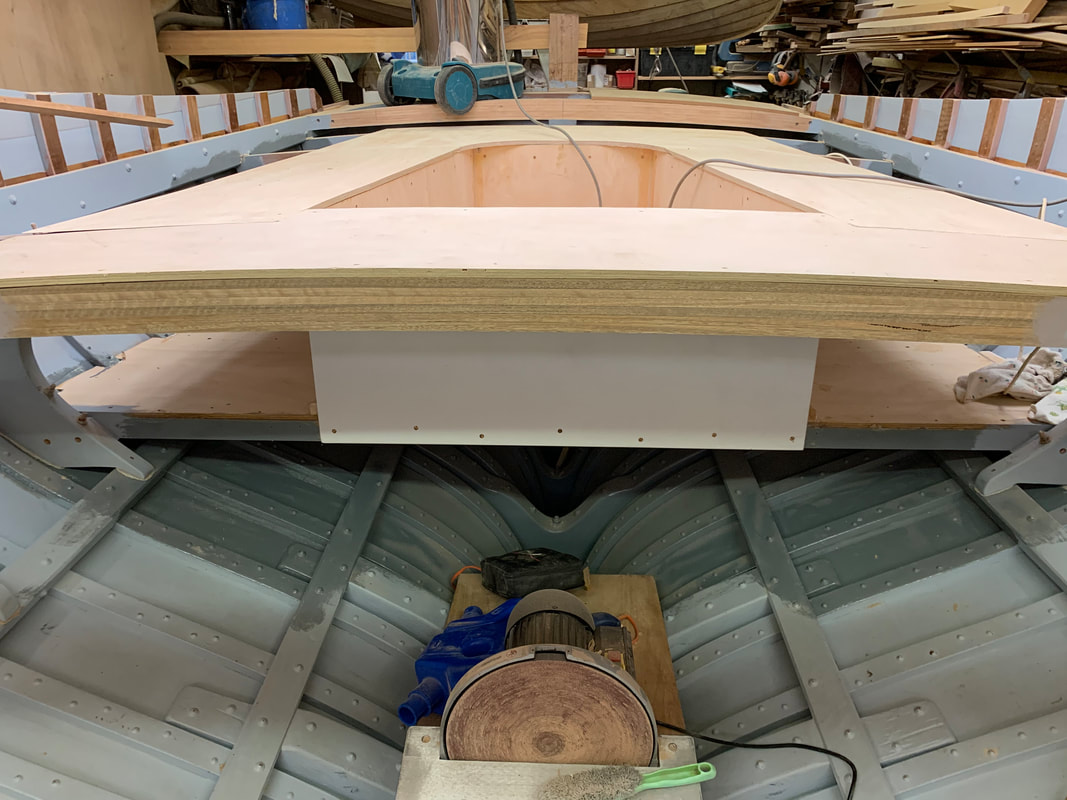
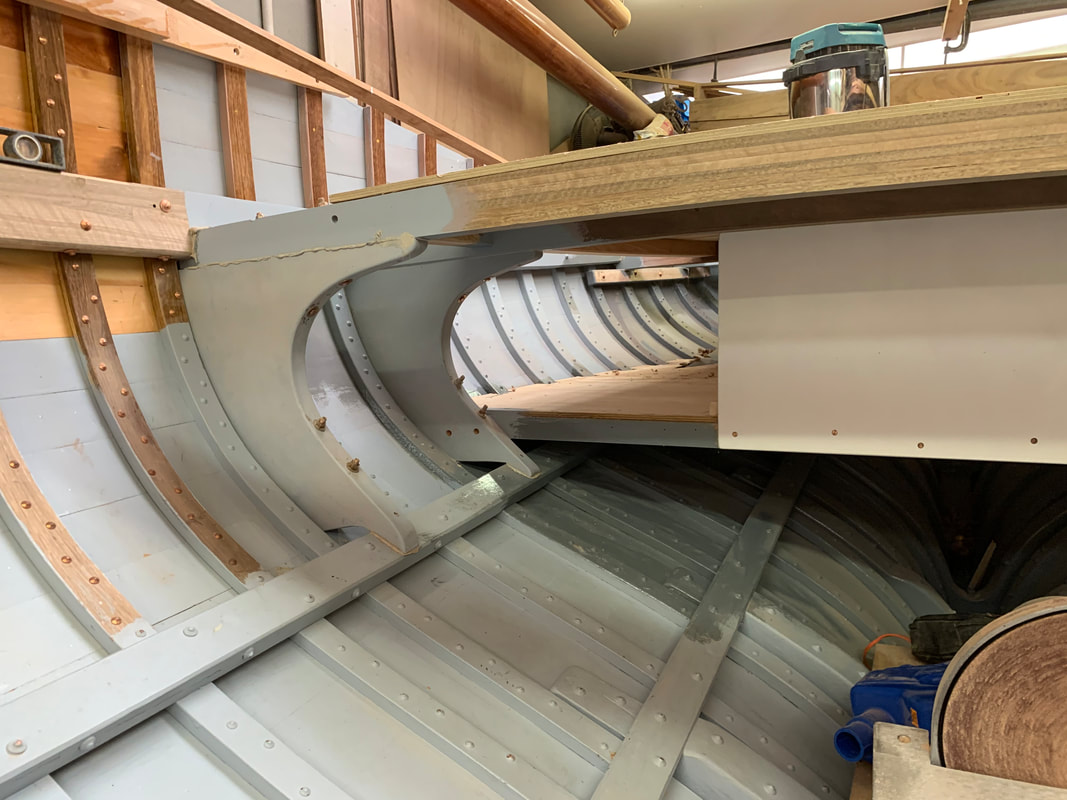
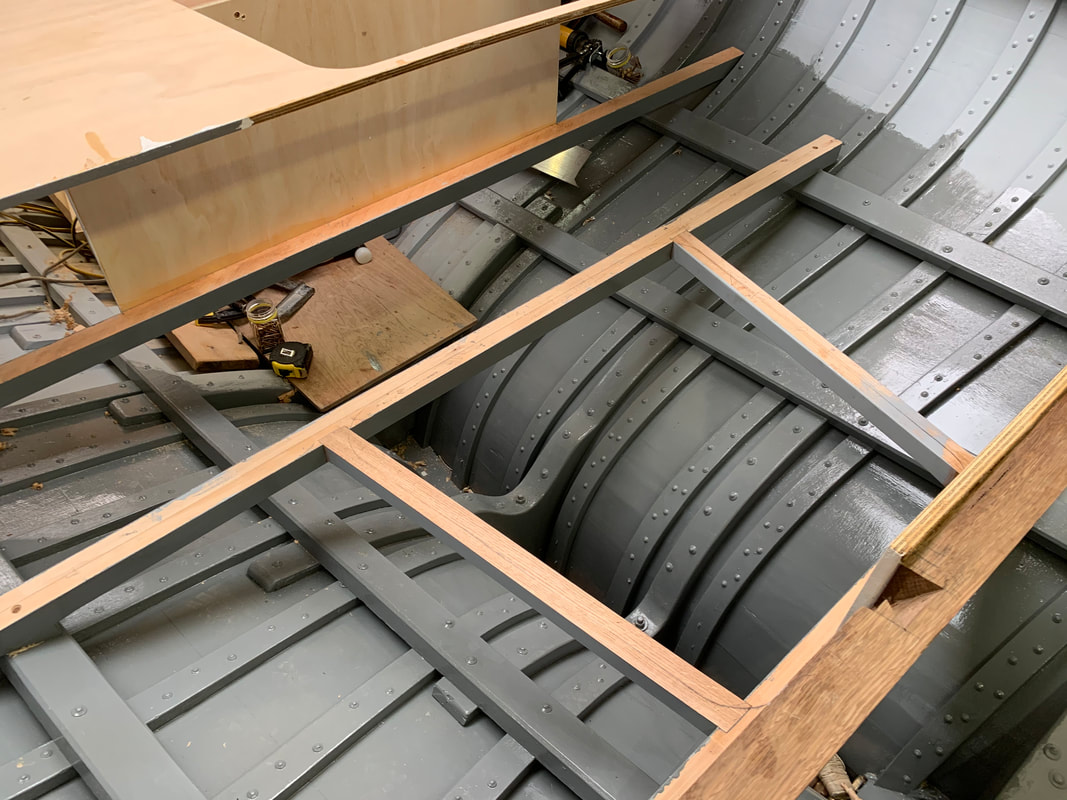
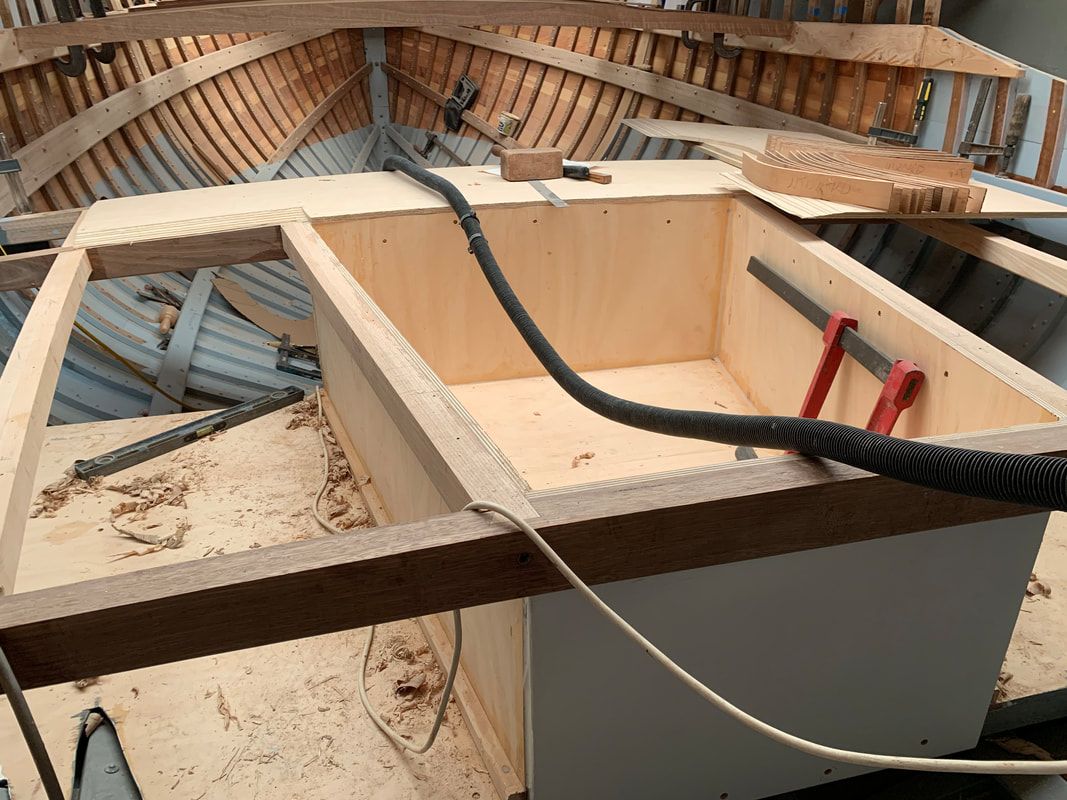
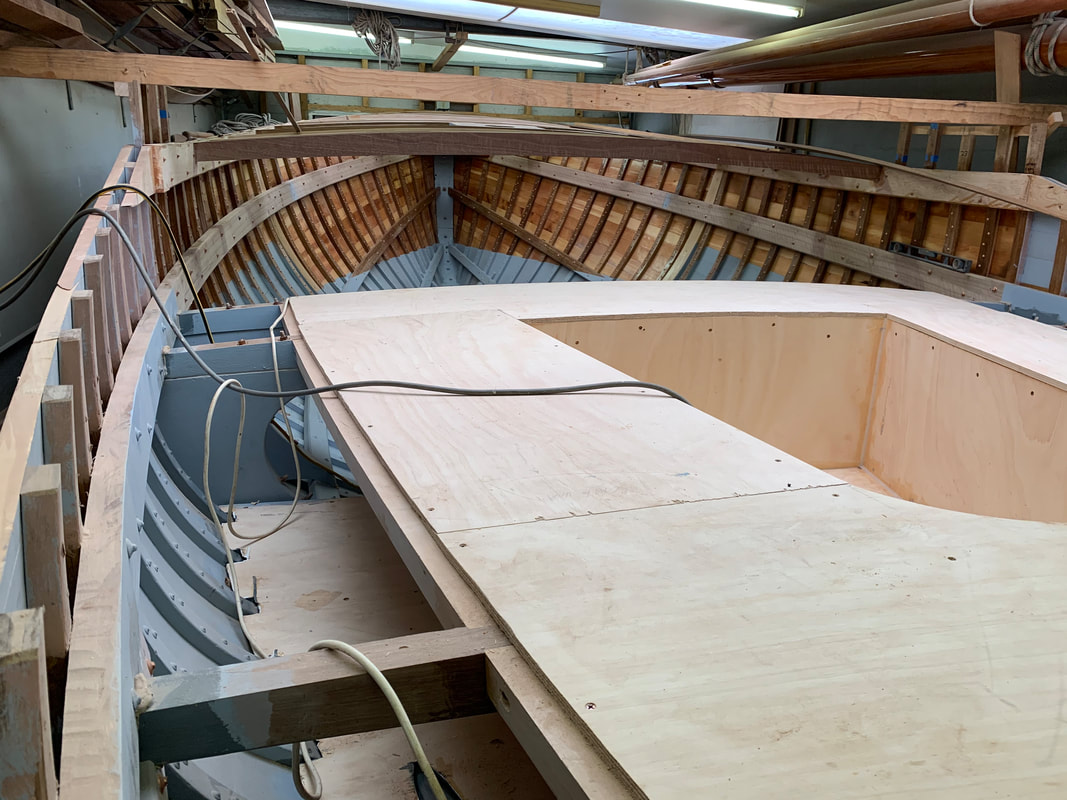
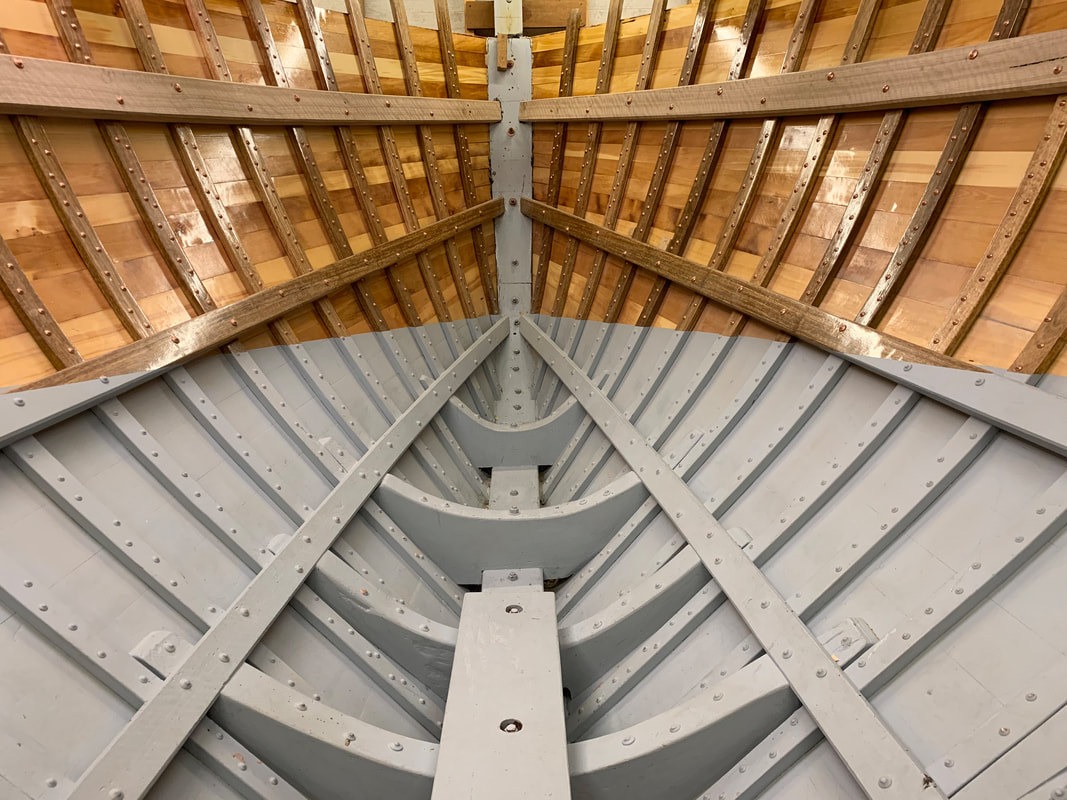
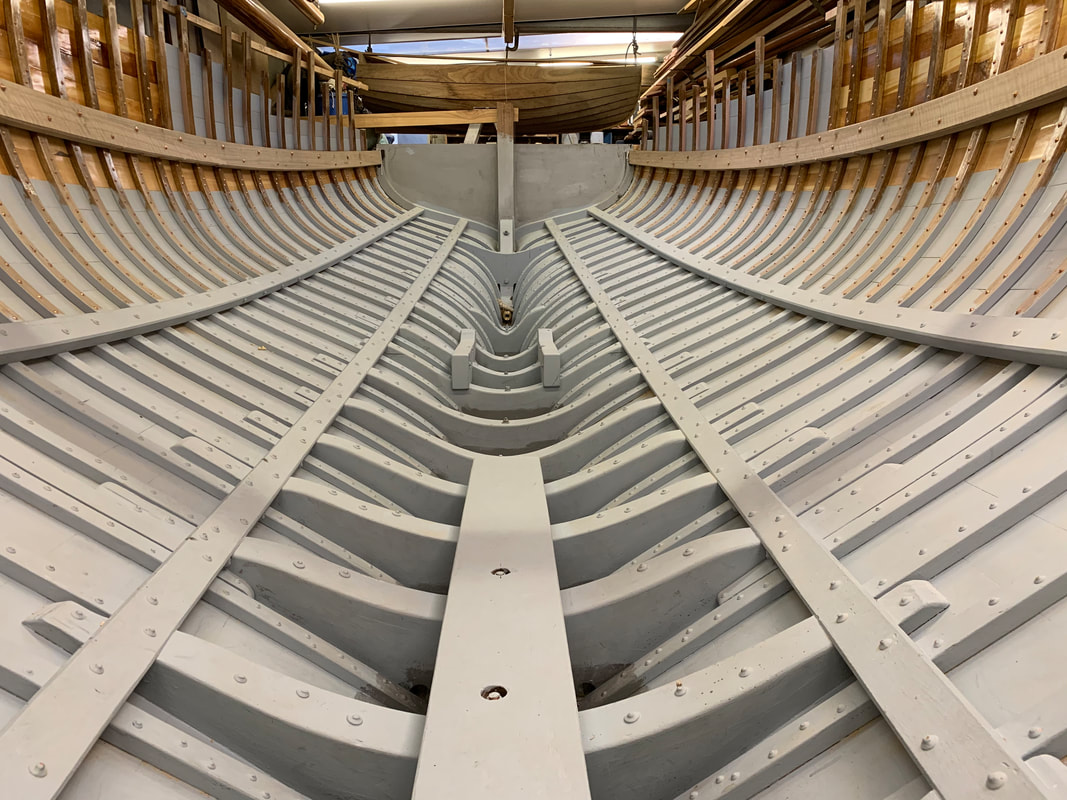
I had fitted a temporary sole of MDF to make it easier to walk around inside the hull, but with the cabin joinery next on the list I needed to fit the permanent sole as the bunk fronts land on the outer edges of the sole. I originally planned to use Kauri boards which was commonly done back in the day (even if they were painted), but with Covid disruptions and shortages in the building industry I was unable to find suitable boards in Queensland Kauri, Fijian Kauri or Malaysian Kauri (Damar Minyak), let alone New Zealand Kauri. So I settled for Queensland White Beech (no relation to Northern Hemisphere Beech), which was commonly used in laid decks, as it is durable and weathers to a light silvery grey. I don't expect it will go grey in the cabin for a long time, but I plan to leave it bare. If it shows the dirt too much I will eventually oil or clear finish it. The boards with the finger holes are loose, the others are tongue-and-grooved together, screwed but not glued down. I plan to make all of the interior joinery relatively easily removable. This will make it easier for future generations of repairers. I have painted the bilges and the other side of the sole boards with white International Bilgekote (sold in Europe as Danbolene), from one of two 1 litre cans I was able to secure. There is still a shortage of some International Paint products. In the cooler weather I have been getting into fairing the hull. I faired the upper topsides last year before fitting the lower sponsons, and now I am moving down to the lower topsides and below the waterline. I hope to finish it in the cooler months. Its a big job and I will be pacing myself by interspersing bouts of fairing with the interior joiner work.
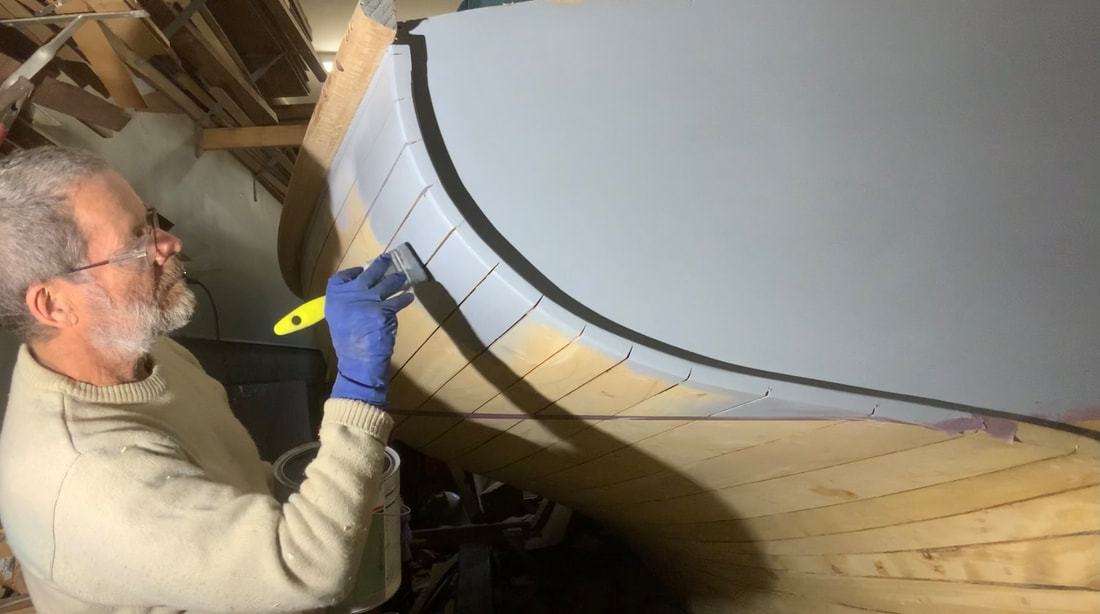
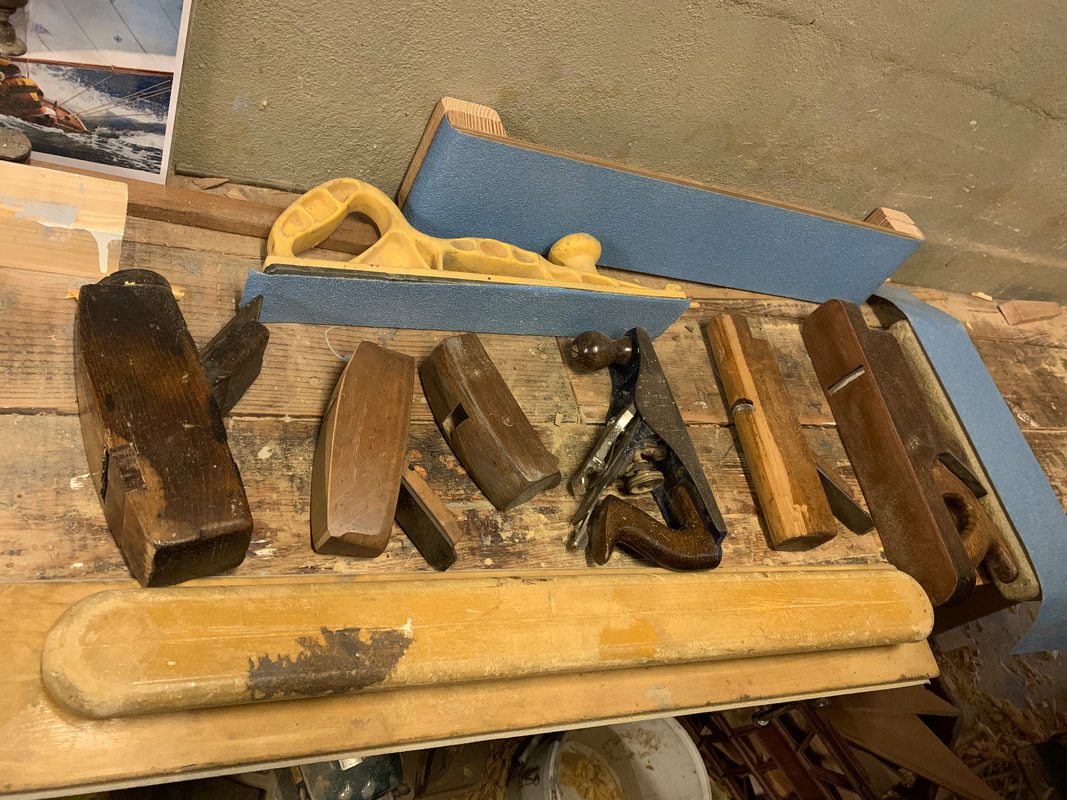
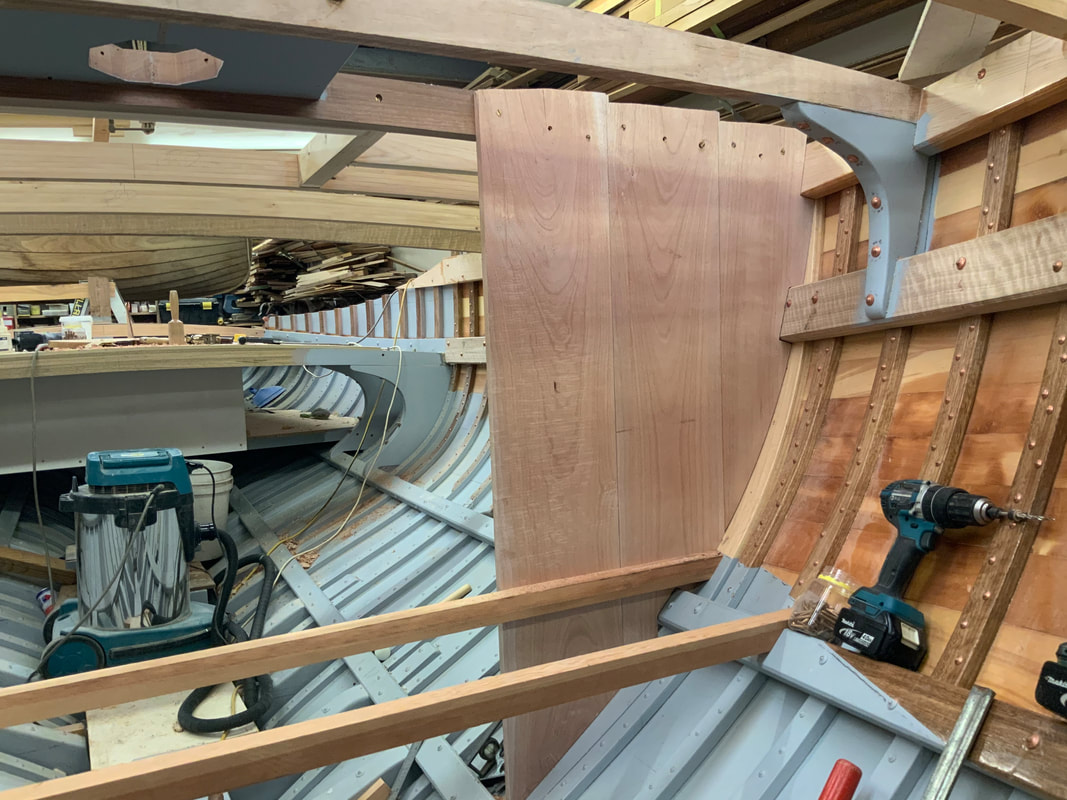
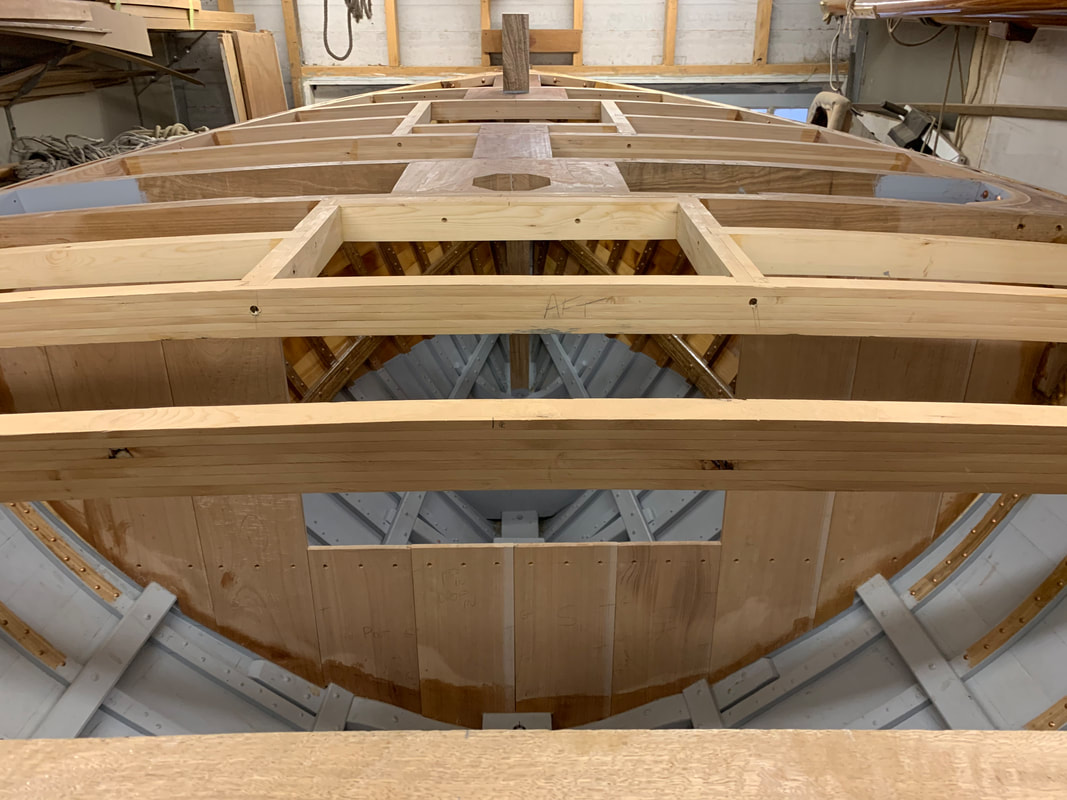
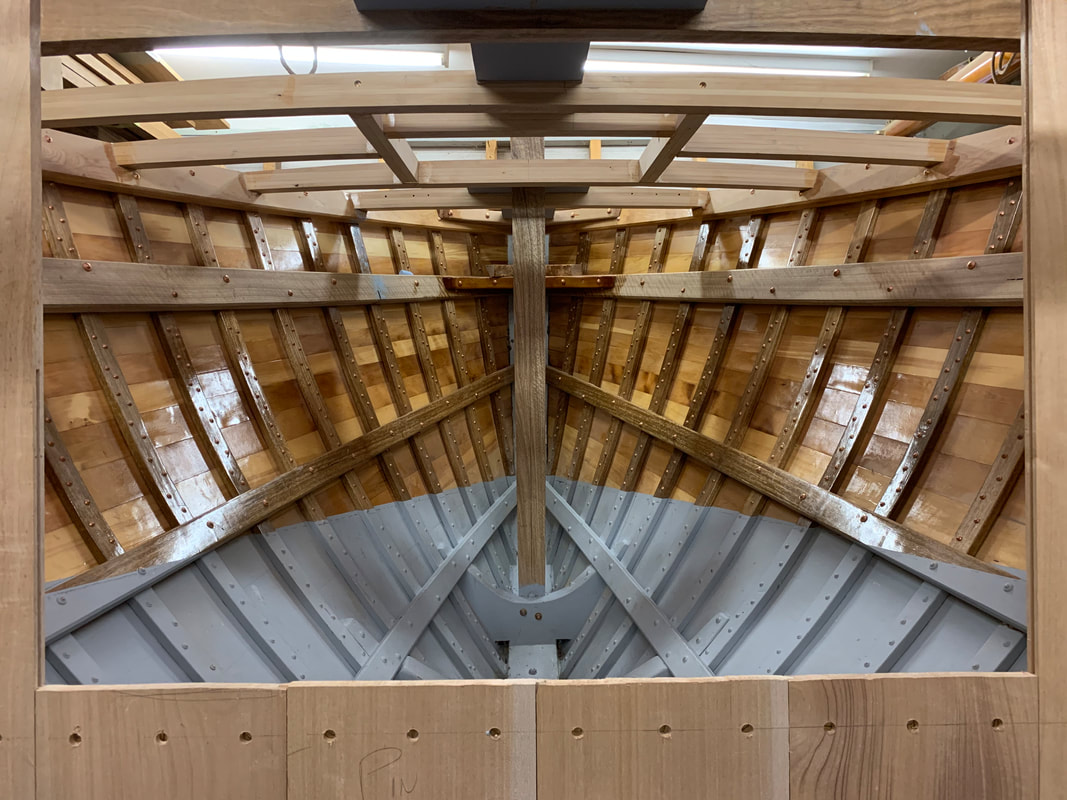
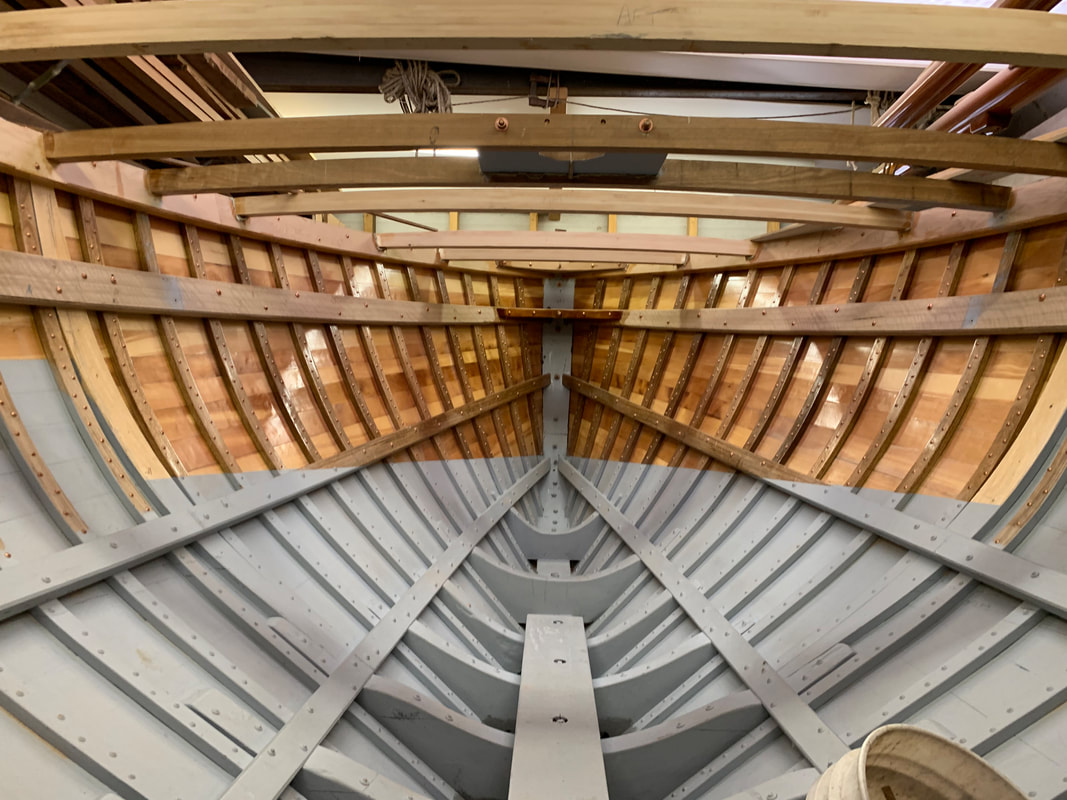
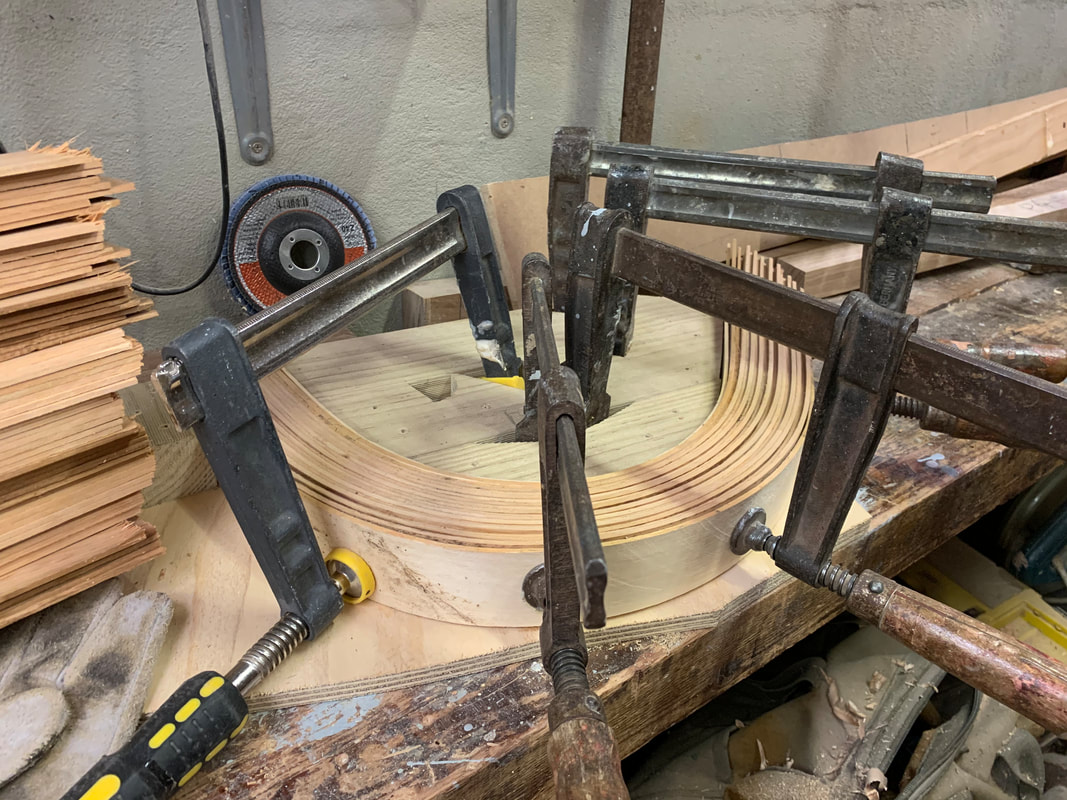
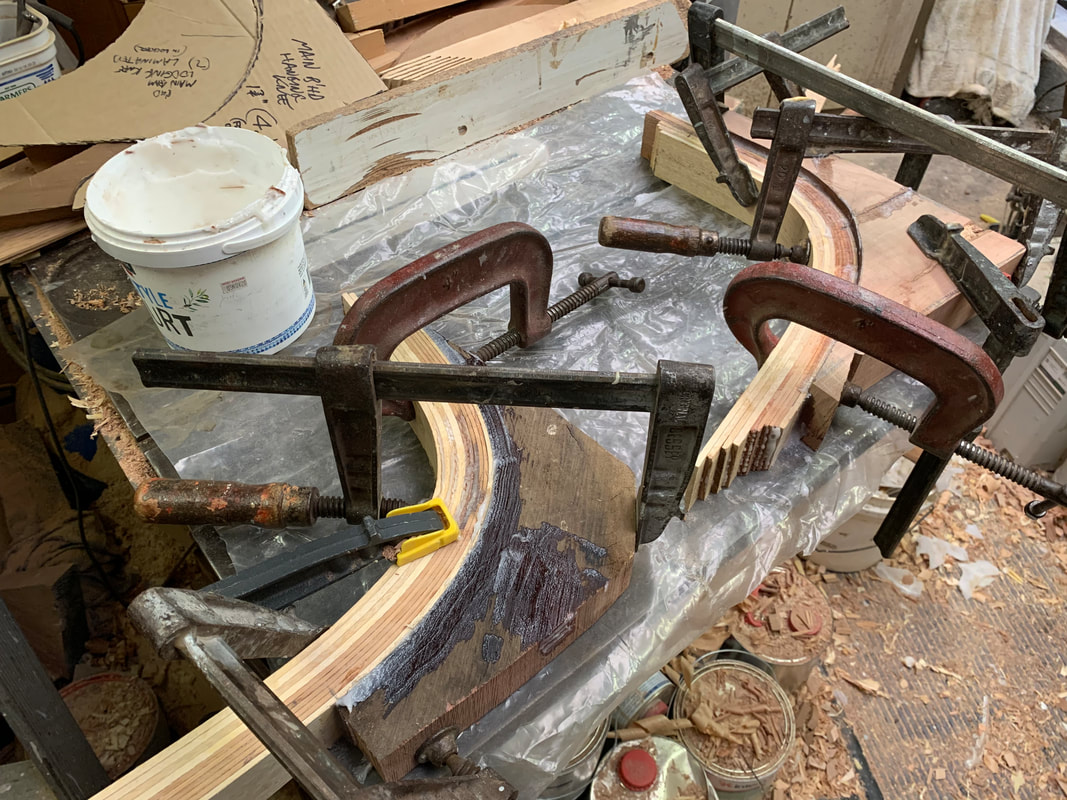
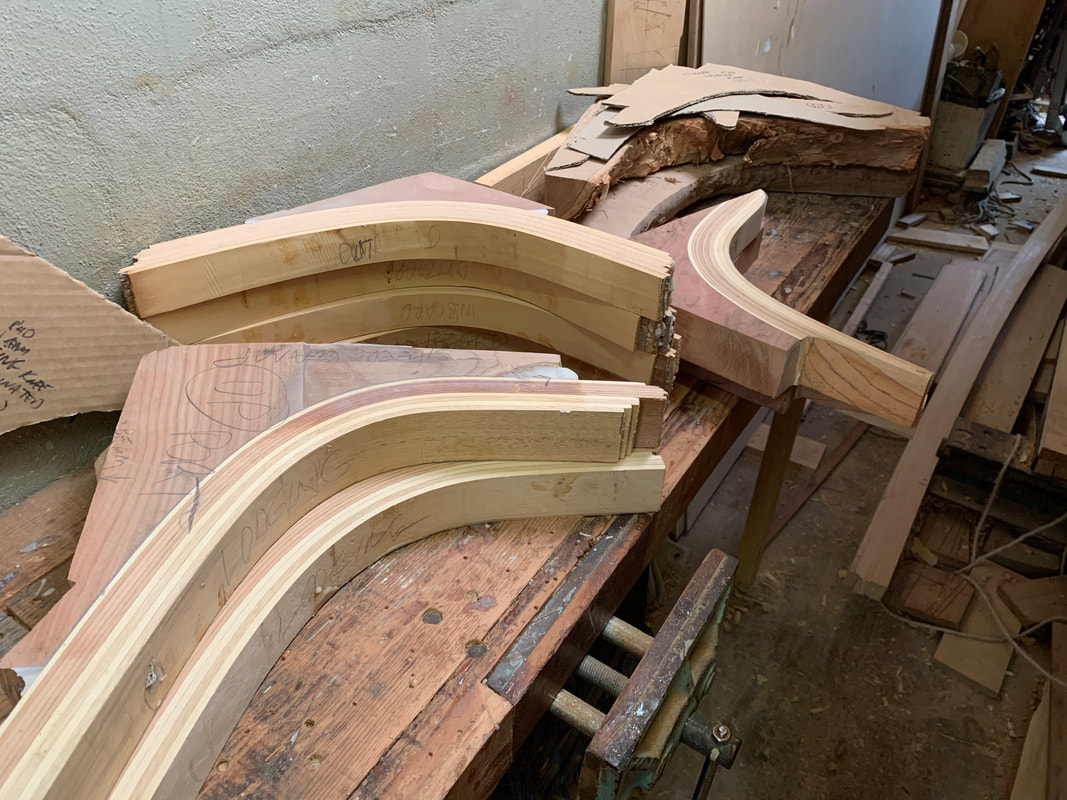
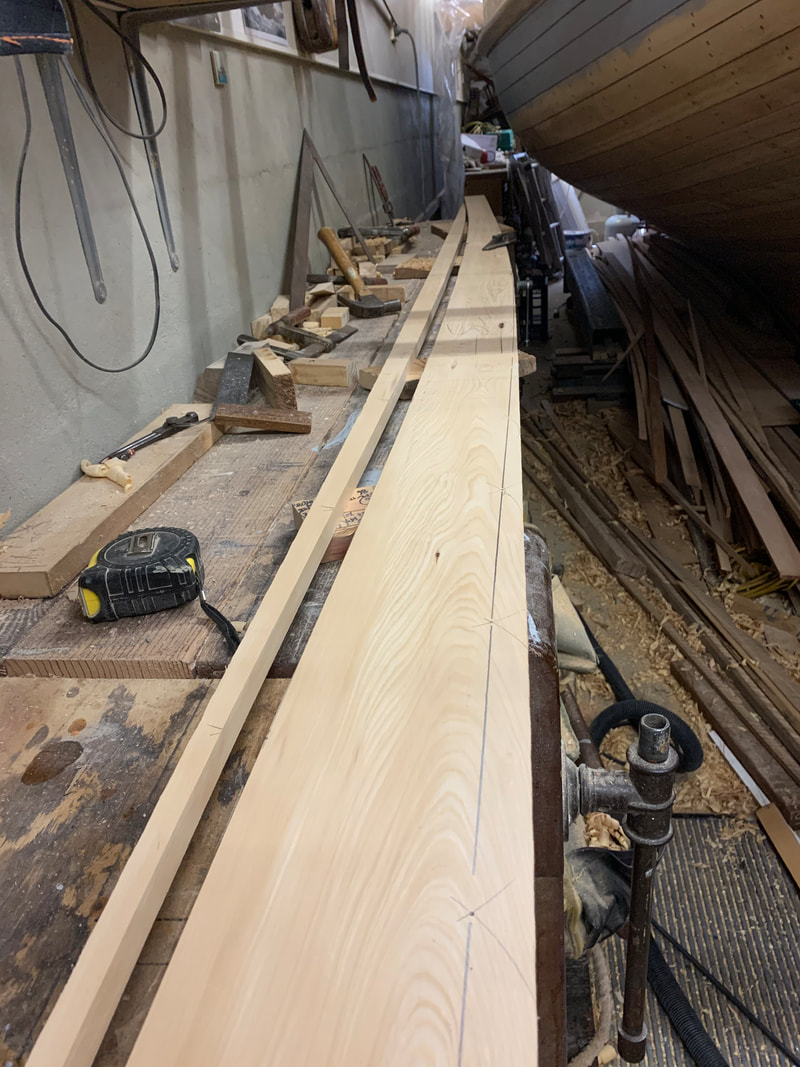
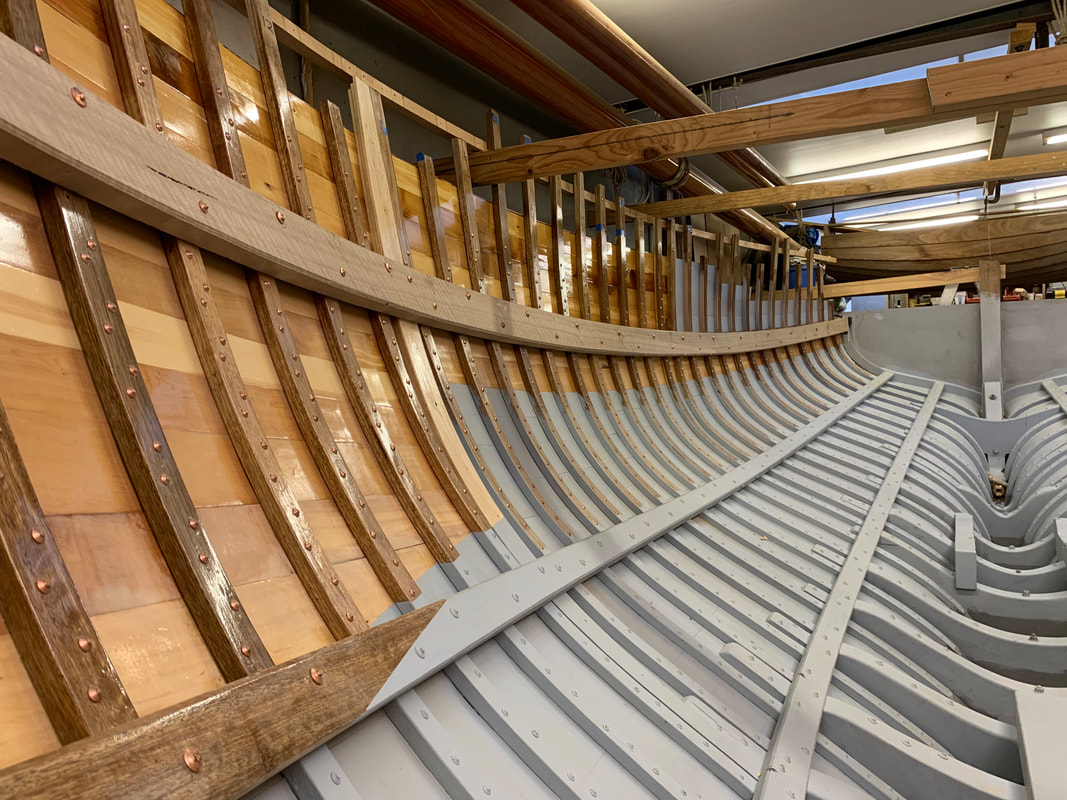
The photo shows a selection of the tools I use for fairing. Most of the work is done by planes. All of the convex and flat surfaces are planed with the Record No3, planing in all directions but mostly with alternate diagonal strokes. The concave surfaces are planed with a selection of round-soled wooden planes. The flexible fairing boards pictured with 40-grit paper are used to remove the plane marks and do the fine tuning before priming. The concave surfaces are sanded with the paper held on a rounded block of foam and a selection of rounded items such as large-diameter plastic water pipe. The other photo shows the Port stern quarter and the raised deck section of planking above the sponson which have been roughly faired receiving plugs in the fastening holes. Most of the knees are fitted into the hull so I've put together some footage from fitting these over the last few months. All of the visible knees have been cut from natural crooks of Tea Tree (Melaleuca quinquinerva), and those that will be out of the way under furniture etc have been laminated. This is how I went about it. When my thickness planer came back from from repair (I'll tell that story shortly) I was able to plane the wide (10-11", 250-270mm) boards of Queensland Maple (Flindersia Brayleyana, no relation to Northern Hemisphere Maples at all) I had purchased from Anagote Timbers in Marrickville, rout a tongue and groove on matching edges and start fitting them. Unlike any of the other Rangers I decided to make the whole area forward of the bulkhead into a V-berth, a layout that worked great on a previous boat Blackwattle (see MY BOATS Page on the Menu above). The bulkhead will be trimmed with Australian Red Cedar. 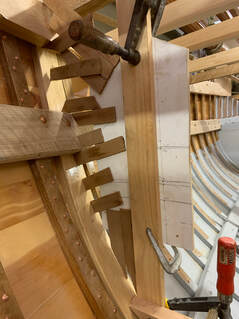 I built up a template with bits of timber and plywood and hot-melt glue for the board that adjoined the hull side that had to be fitted over the upper and lower sheer clamps. Like any template, I always cut conservatively when fashioning the board to be used because my templates never prove to be accurate enough, so I leave extra wood on and worry it down to a decent fit. I'll put out a video on bulkhead fitting later. 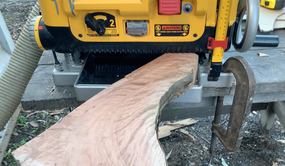 My thickness planer, a DeWalt 735, seen here doing sterling service thicknessing a Tea-Tree knee spent 5 months being repaired. I left it with Sydney Tools from whom I purchased it a couple of years ago after it stopped when I asked a bit much of it. To cut a long story short, Sydney Tools sent me the quote in a no-reply email. There was no indication that it was a no-reply email so I promptly responded with a message to proceed, and it took many months and many phone calls to get the situation worked out and the bloody thing repaired. They did eventually apologise, but my advice to anyone leaving tools for repair with them or indeed anyone else is never assume. Keep ringing until you get a result. The Maple boards are bedded to the laminated grounds with low-modulus polyurethane (SIKAFLEX PRO), and are screwed to the deck beam, the bunk support beam and the structural floor. The sections between the stringers will be screwed to Spotted Gum frame sections yet to be fitted, which will themselves be bolted through the hull. This will be shown also in a later video on bulkheads. I have also fitted sections of hardwood (Jarrah in this case, which will be painted where visible) as a king plank forward of the mast, including a wider section which houses the Sampson post, a 4" (100mm) square piece of Spotted Gum, tapered slightly below decks. If you look closely at some of the images you might also see a couple of varnished Tea-Tree hanging knees under the beam against the bulkhead, another pair of (painted) knees on the next beam forward (they will be inside a locker), and a lodging knee forward of the bulkhead to Starboard, the only one yet fitted of a number of lodging knees to be fitted to the deck structure. The next video to appear will most likely be about fitting knees.
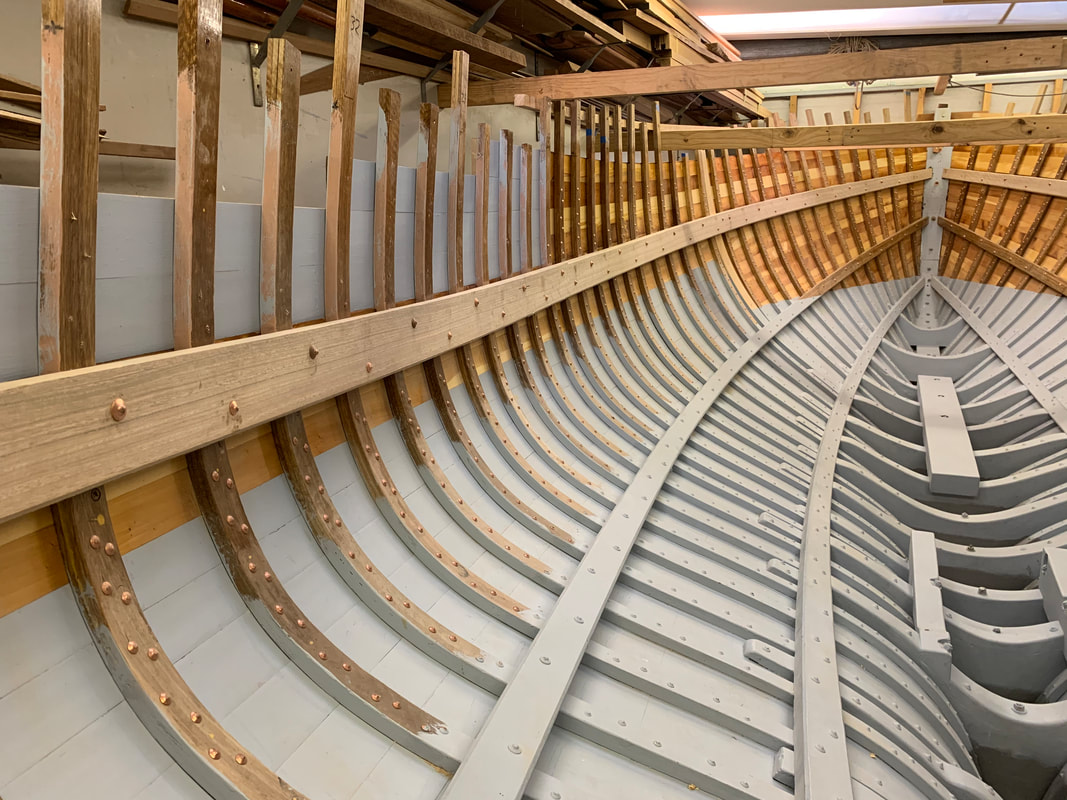
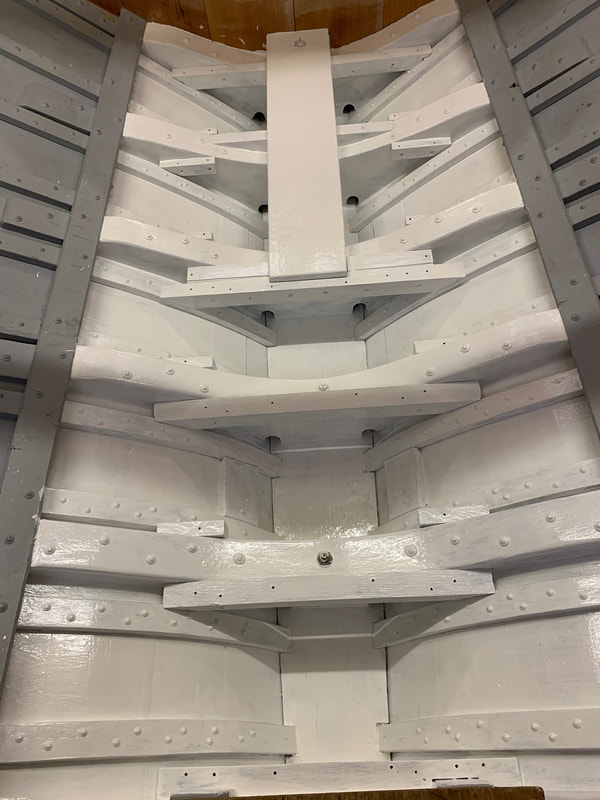
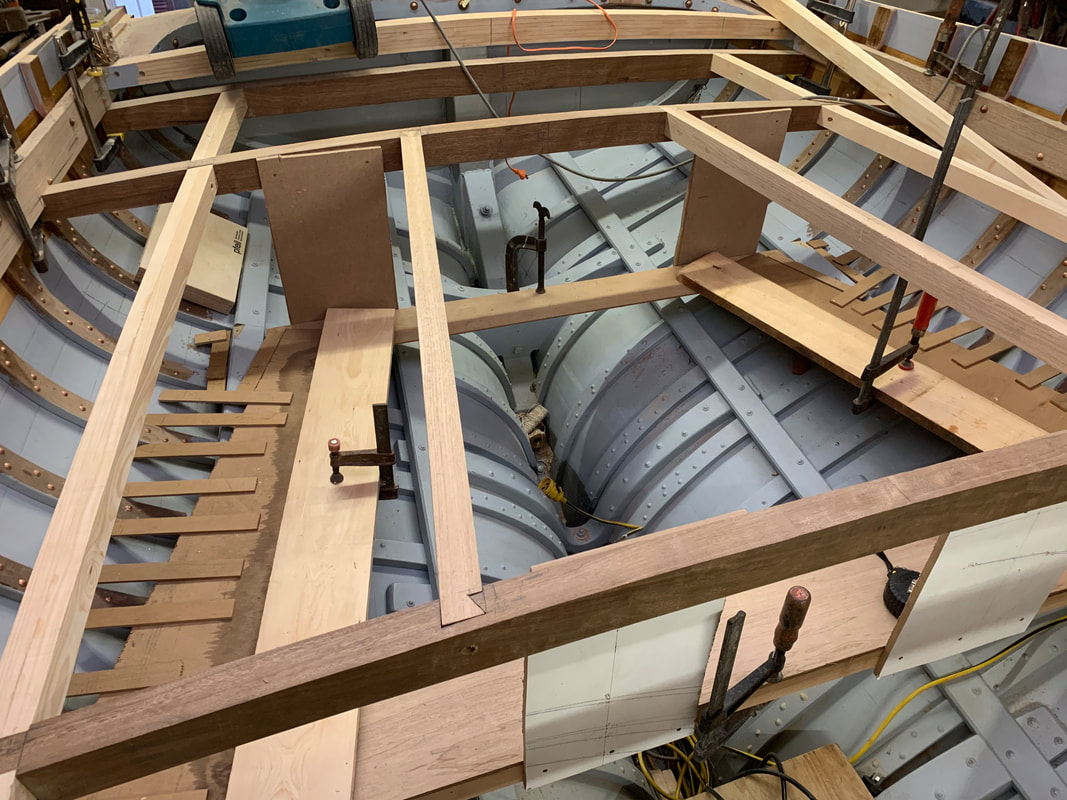
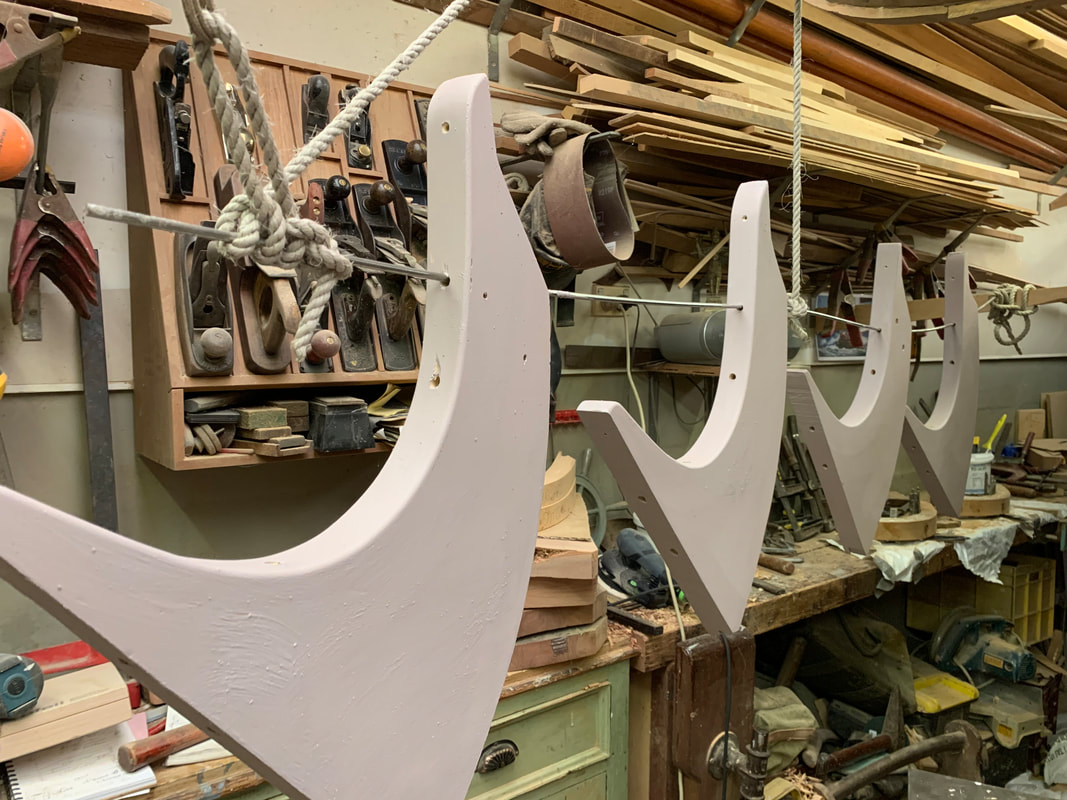
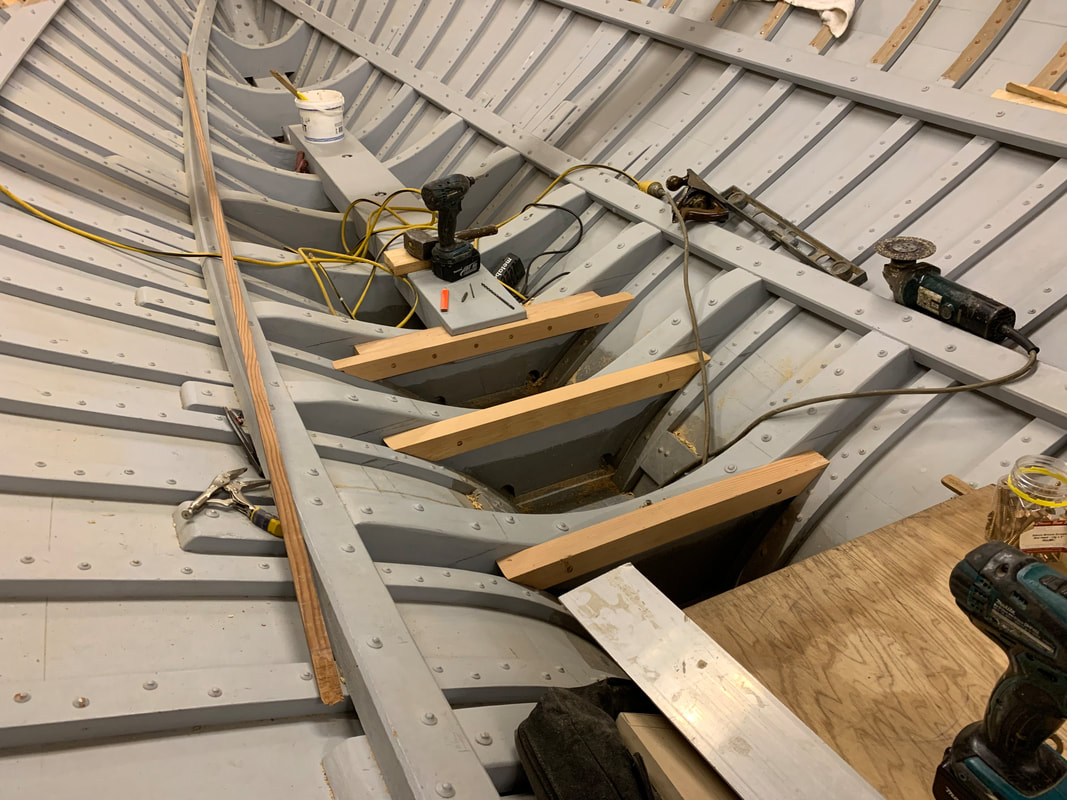
Here's how I did it. Most of the Ranger class have solid Spotted Gum deck beams, I decided to use Spotted Gum for the cockpit and King beams, but I laminated the others and the carlins from Celery Top Pine. The Rangers also mostly had their deck beams half-dovetailed right through the sheer clamp, I decided to do stopped half-dovetails. They take a bit longer to do, but take less meat out of the sheer clamp...but it's a tradeoff, there's less of a dovetail to resist movement. But I like the woodwork involved. You might still need to look up the textbook but seeing it happen on the screen might help visualise the process. 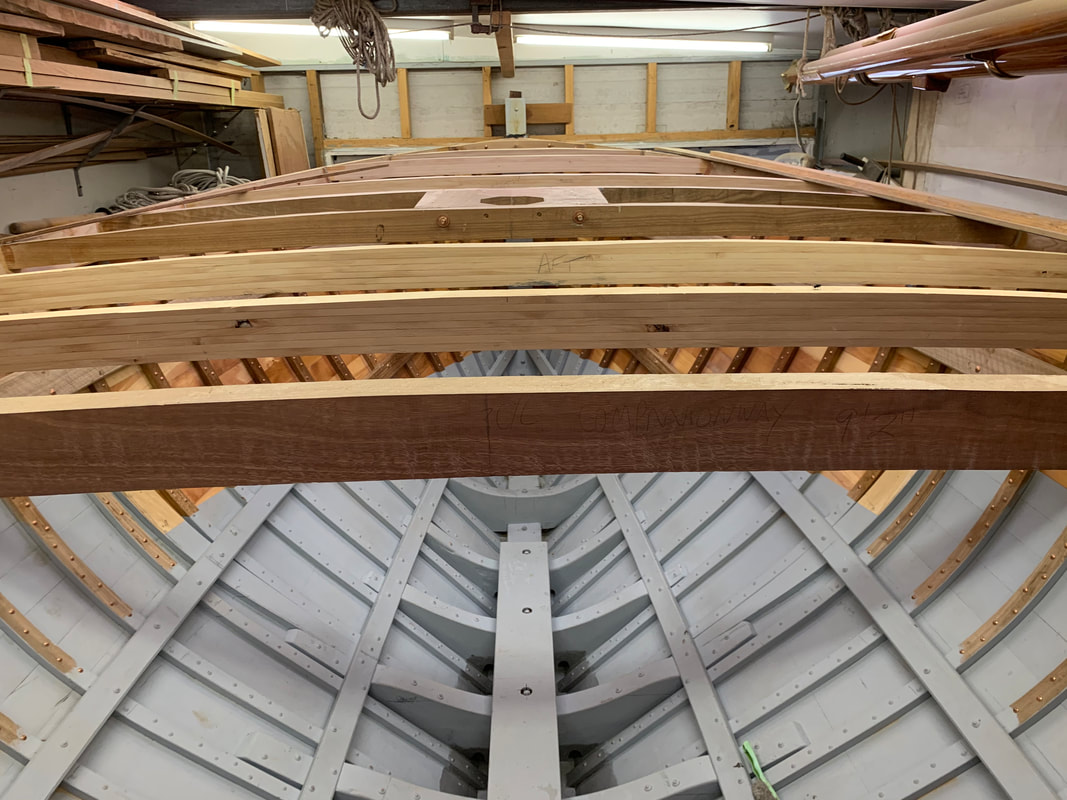 Here's where we're at as of mid-February 2021, all the full-width deck beams are in and the cockpit framing is in with the ply cladding temporarily fitted. Temporarily because of a shortage of Bilgekote bilge paint in Australia. International Paints say a container fell off a ship but I reckon they've been relying on "just-in-time" supply chains which work well until a hiccup like Covid. I just had enough paint to finish the hardest to reach areas of the hull under the cockpit and the underside of the cockpit sole which extends out to the sides of the hull. The sole has a lift-out panel for access to the stern gland, the hull and the back of the engine, This panel will be watertight. The two beams at the mast partners and the forward end of the sliding hatch opening and the beams at the forward and aft ends of the cockpit footwell are solid Spotted Gum. The other bridge deck beam is laminated Spotted Gum (because I happened to have just the right amount of suitable laminate timber) and all of the other beams are laminated Celery Top Pine. All ahead of the cockpit are half-dovetailed into the Celery Top sheer clamp, the cockpit beams are let into the underside of the the lower sheerclamp, the aft two resting on an extra cleat of Spotted Gum and the forward two on large knees. I will eventually put a video together on fitting deck beams. Here's some shots of the cockpit structure. The well carlins are dovetailed into the beams, the outer carlins which will be under the coamings are let into shallow housings so as not to take too much timber out of the beams. In the second picture you can see a pattern for the cockpit sole being made from ply strips. With the large number of knees needed for the boat I made a bunch of cardboard patterns and took a trip to Smithy's Boatshed West (my storage container in an outer suburb) and checked my stock of natural Tea Tree (Meleleuca Quinquinerva) knees. I fluked it... I had exactly enough to do all of the knees which will be visible in the cabin and therefore will be varnished. The other knees will all be laminated and painted. I set up a production line. I machined the laminates, steamed them and bent them around simple jigs, then dried them and epoxy-glued them together and added filler blocks. The largest were the four knees to support the bridgedeck beams. I dry-fitted them, drilled for fastenings and primed them. The other laminated lodging and hanging knees are in various states of preparation. I used Tasmanian Myrtle, Silver Ash and Huon Pine in the knee laminates. The laminated knees in the foreground have Tea Tree filler blocks, and there are several Tea Tree natural crooks in the distant pile under the cardboard patterns. Fitting knees will also eventually be shown in a video. 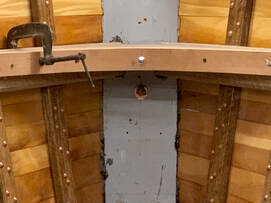 Two breasthooks in the bow hold the sides of the upper and lower sheer clamps together. These were both laminated from Tas Myrtle with Tea Tree filler blocks. I will varnish these but they won't be particularly prominent in the finished boat. You can see the central bolt hole drilled right through the stem. The ply cladding of the cockpit will be off and on more than once before final fitting, but it's handy to have it on when climbing in and out of the boat. I'll be starting on the main bulkhead and other interior joinery soon once I get my thickness planer back from repair, I'll tell you that story next time.  Sidetracked again, I've put together the final episode from the footage filmed in 1999, the the Sydney Wooden Boat School Summer School Class built two clinker dinghies. In this episode the Huon Pine snub dinghy gets its stringers, risers, thwarts, knees and rowlock blocks and has a trial launching into salt water, and the crew has a sausage sizzle. 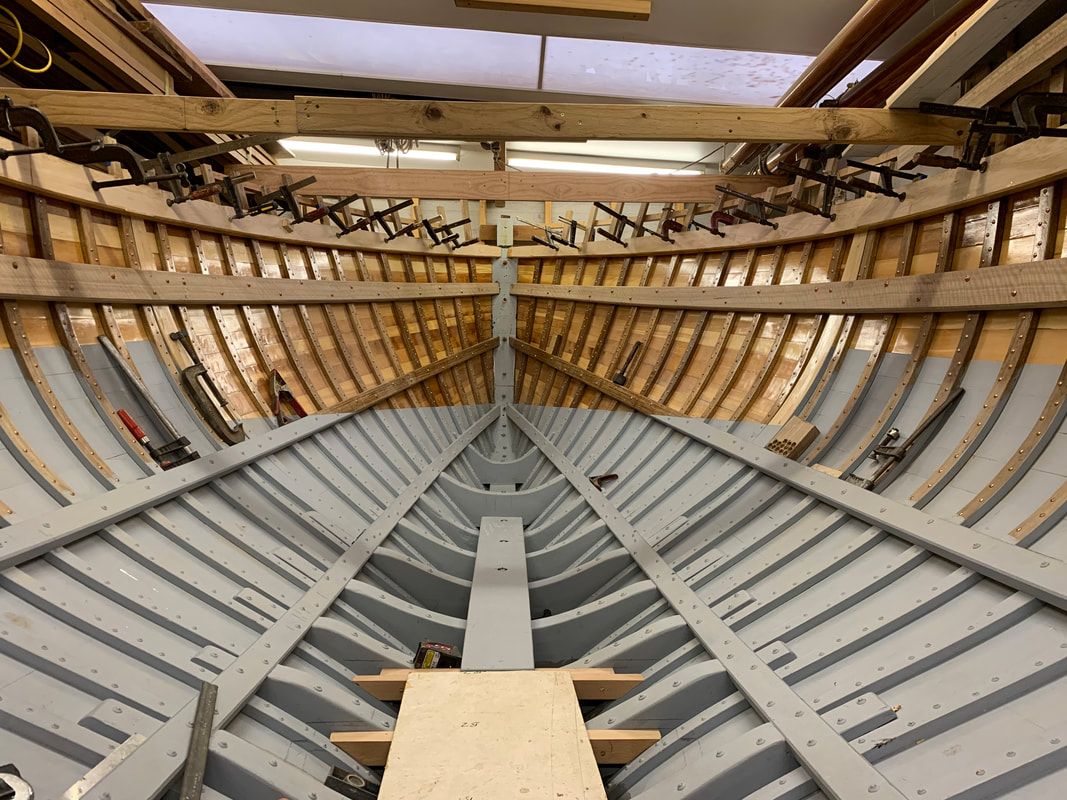 Being a raised-decker, the Ranger has an upper sheer clamp to support the deck beam ends in the forward part of the ship. Some of the Ranger class have sheer clamps in Spotted Gum same as the lower clamps, but some have sheer clamps in Oregon (Douglas Fir). I preferred to use another Tasmanian pine, Celery Top Pine which is roughly the same strength as Oregon, but just a little heavier and way more durable, second only to Huon Pine. It is somewhat similar to American Pitch Pine. I was unable to source any at the designed thickness of 1 1/2" (38mm), but there was some available at 3/4" (19mm) so I decided to laminate it in two thicknesses. Length was also a problem so each layer has a scarf joint, staggered of course. The first photo shows the glued-up sheer clamps ready to fasten off. It was still necessary to steam the forward parts of the 3/4" laminates because of the full deck line forward. As I did with the lower sheer clamps I steamed them in a polyethylene bag on the outside of the hull, and allowed them to dry for several days before gluing them together with epoxy. 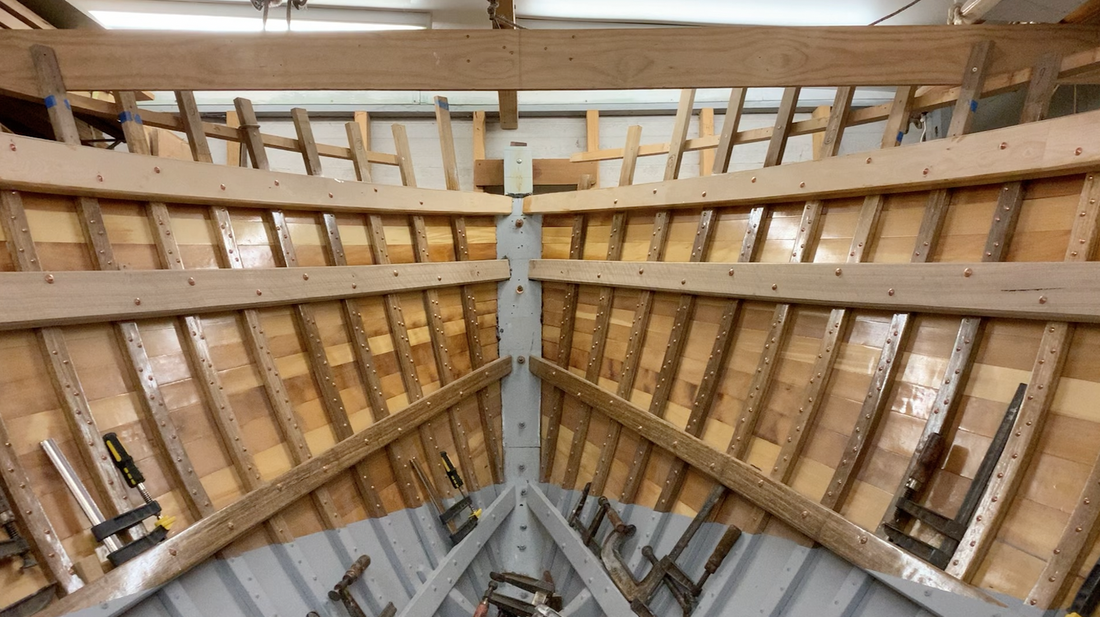 I fastened them off with 4" x 8g copper nails and 16mm (5/8") roves, reeled (staggered) as is normal practice. The photo below shows one of the 3/4" laminates being prepared on the bench. Because of the big shoulders of the boat the sheer clamp had to be cut from wider timber because it actually bends down as it approaches the bow, in spite of sweeping up when the boat is viewed in profile. I spiled the shape of each part. I was able to get the 4 1/2" (115mm) wide sheer clamp out of 6" (150mm) stock. The other photo below shows the beginnings of fitting sole bearers for a temporary sole to make it easier to walk around inside the boat. 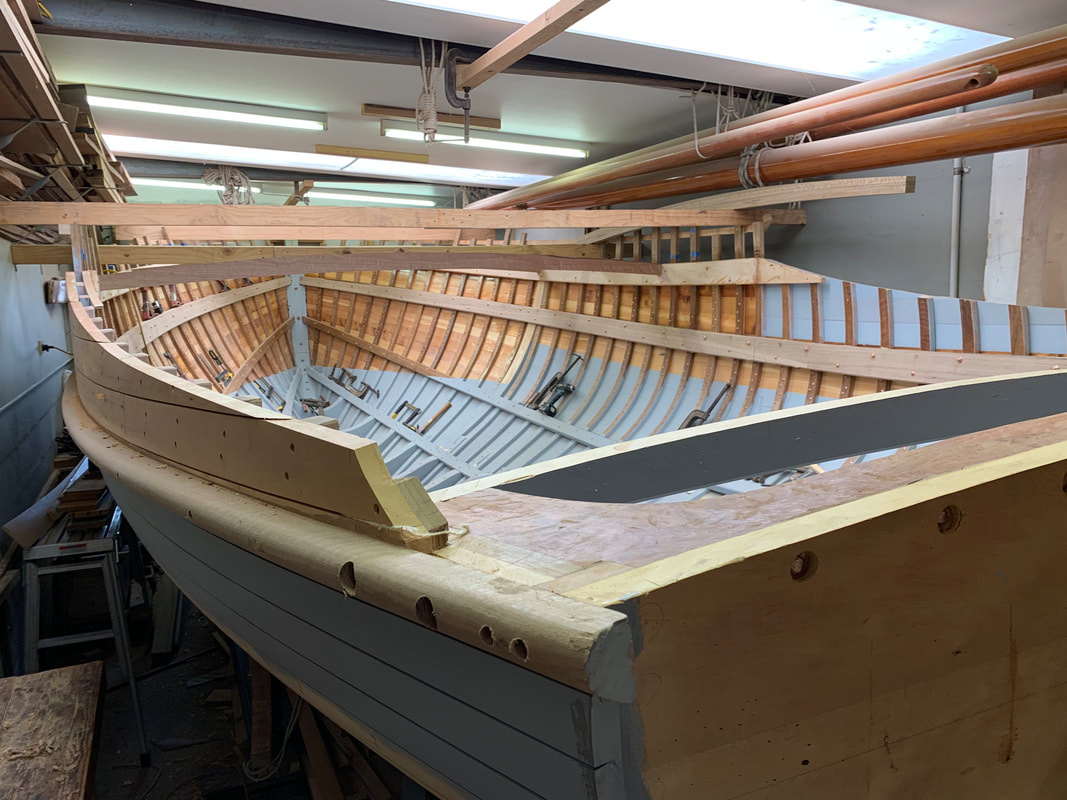 The above photo shows the boat as it is today, with two of the solid Spotted Gum King Beams dry fitted (with half-dovetails- I will film and describe this process in a video eventually - and it is already covered in the Carvel Planking section of my book WOODEN BOATBUILDING - THE SYDNEY WOODEN BOAT SCHOOL MANUALS ). And the aft deck beam, quarter knees and the tuck beam (at the top of the tuck or transom) are permanently fitted. You might notice I have also cut the curve into the planking on either side of the cockpit and trimmed off the frame heads there. This has really made a difference to the look of the stern of the boat, as has trimming the transom down to the curved camber line. One of the things I learned when working professionally is that trimming rough edges is usually a small job that makes a big difference, so we usually made sure we were able to do something like this just before the owner visited. Or more commonly, paint something, a change in colour is noticeable and the owner feels like progress is being made. It is not a matter of being dishonest, but most owners do not appreciate that some jobs take a long time for very little visual result, so make sure you've done something that looks like a lot of progress has been made and they will be happy. 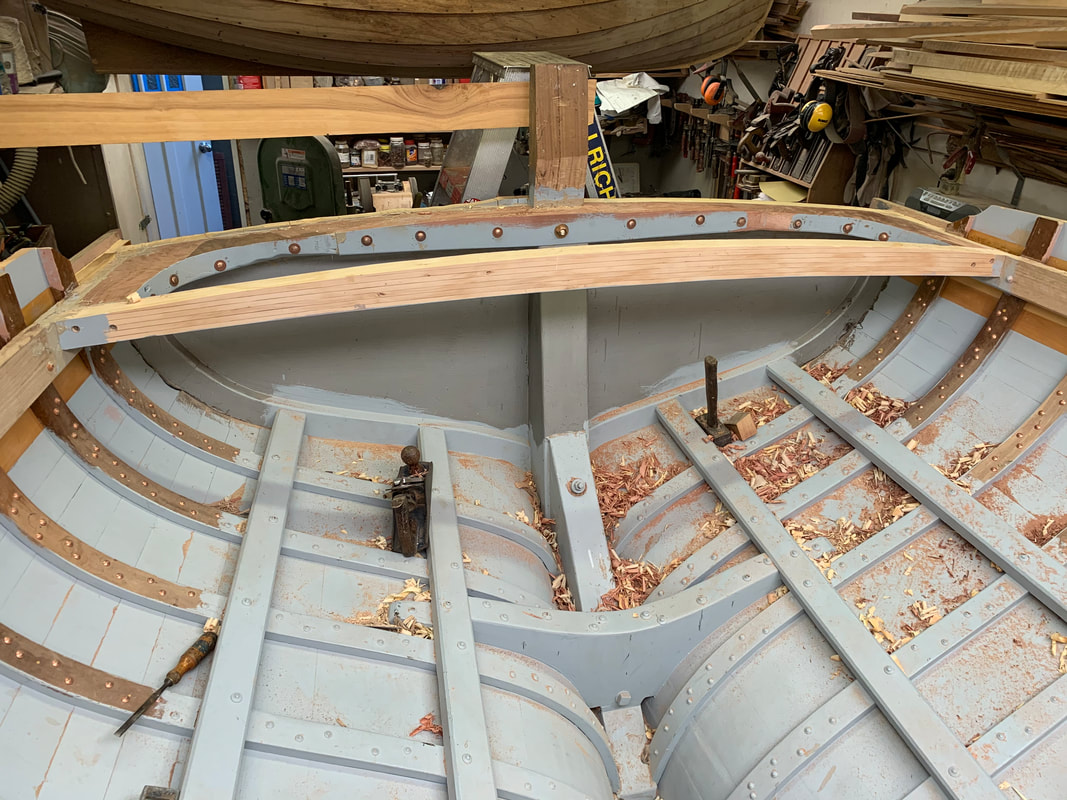 Another view of the aft deck beam (laminated Celery Top Pine) , quarter knees (grown Blue Gum) and tuck beam (Jarrah), all fastened with 3/8" (9mm) copper rod peened over bronze washers. The tuck beam will anchor the mainsheet horse. The Starboard side is only roughly faired. I worked up a sweat fairing the Jarrah and Blue Gum (both tough eucalypts) on the Port side with a Stanley No 4 1/2 which has the right amount of heft.
  The last planks on the raised-deck section were fastened on today. It's taken me a while but it's been very enjoyable, the Huon Pine is a pleasure to work. I'll still get plenty more chances to smell the Huon Pine shavings as most of the hull remains to be faired, so far I've only faired the top five or so planks on the topsides below the lower sponson plus a bit extra at the bow. I plan to fair the raised-deck section and the topsides down to a bit below the waterline at least while the weather is still cool. A Sydney Summer is way too hot and humid for doing such work by choice. I've rounded up some Celery-Top Pine for the beam shelves which I'll start to fit soon and I've started to mark out a beam mould which I will first use to build a jig on which to laminate the deck beams. I will also fit the cabin sole bearers and put down a temporary sole as I have already fallen over once or twice walking across the ribs and stringers and floors. A major part of boatbuilding is planning ahead, and I've already spent a bit of time working out where the chainplates will go, and where the three portholes per side will go. On either side of the cockpit the planks will sweep down in a sweet curve from the break in deck to the transom (see RANGER CLASS Page).
|
AuthorIan Smith, Boatbuilder (ret'd) Archives
January 2024
Categories |


 RSS Feed
