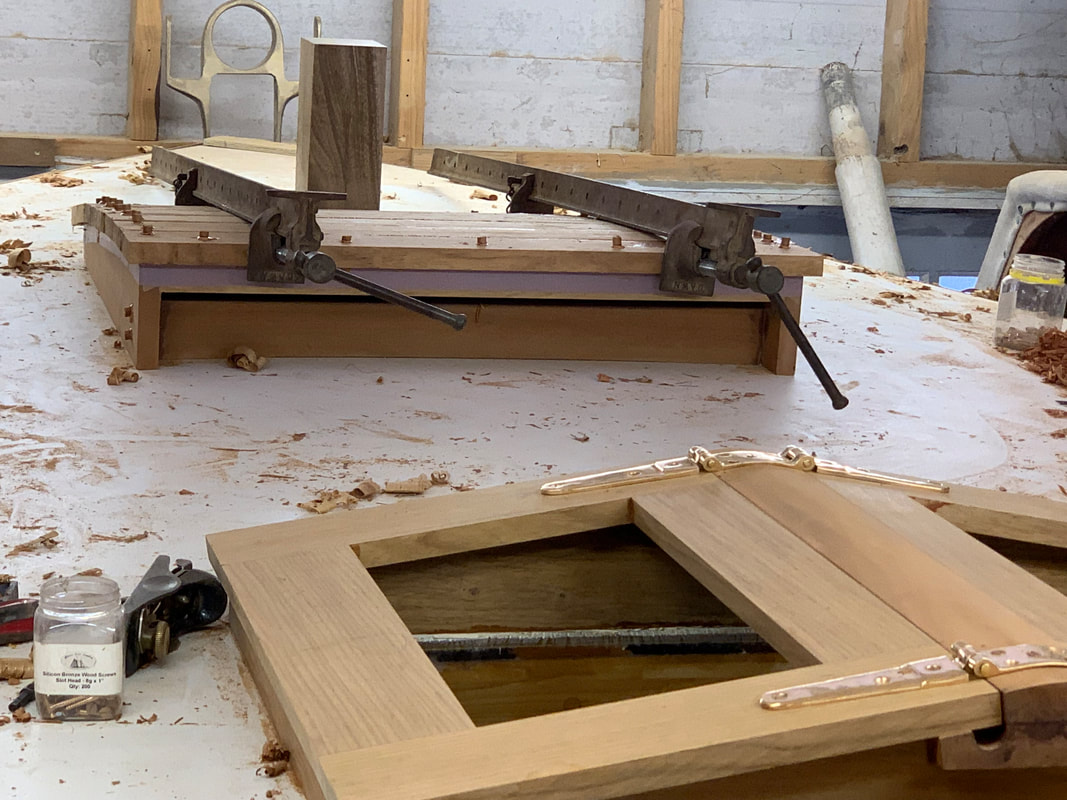
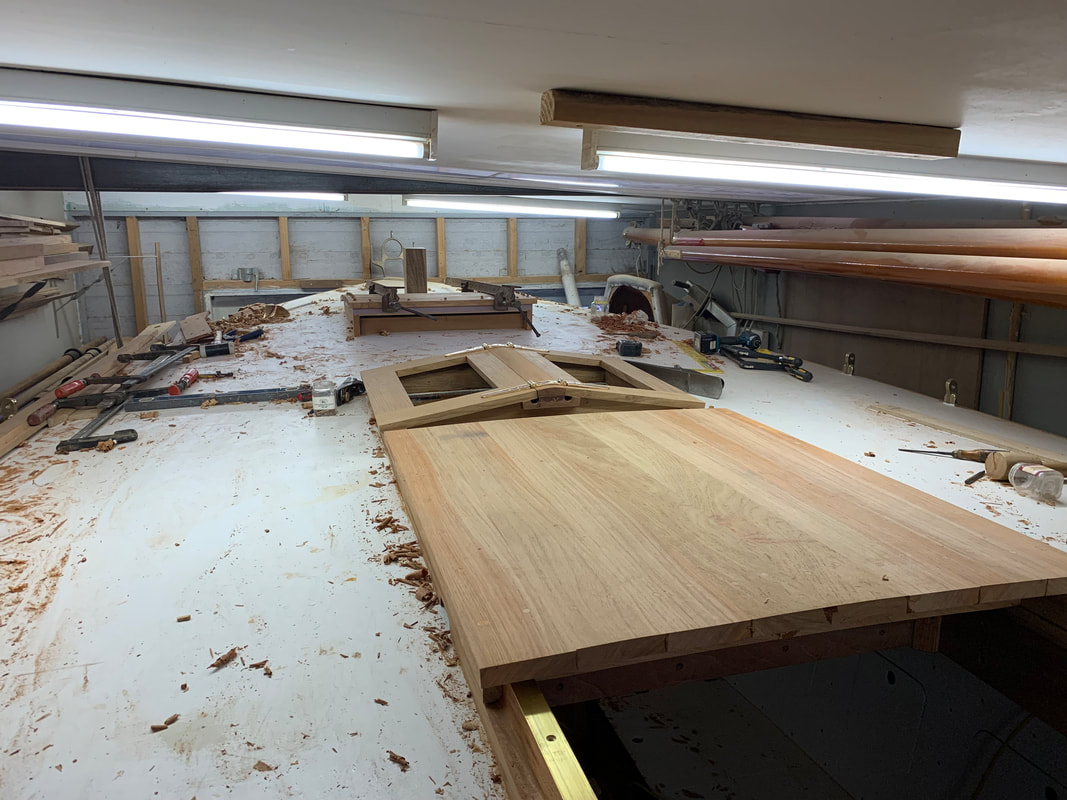
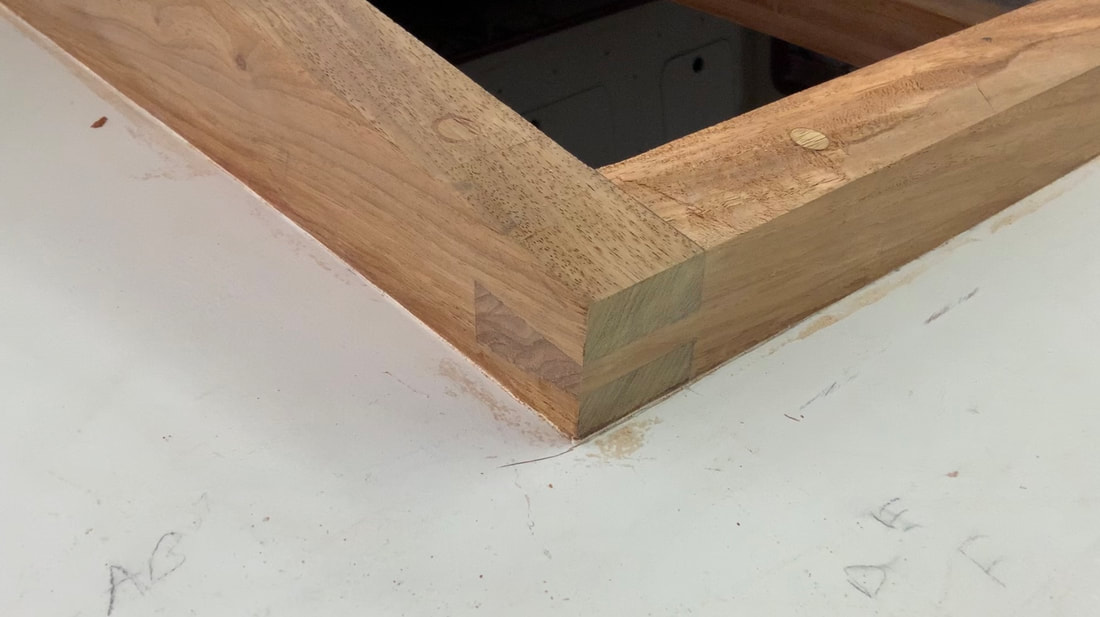
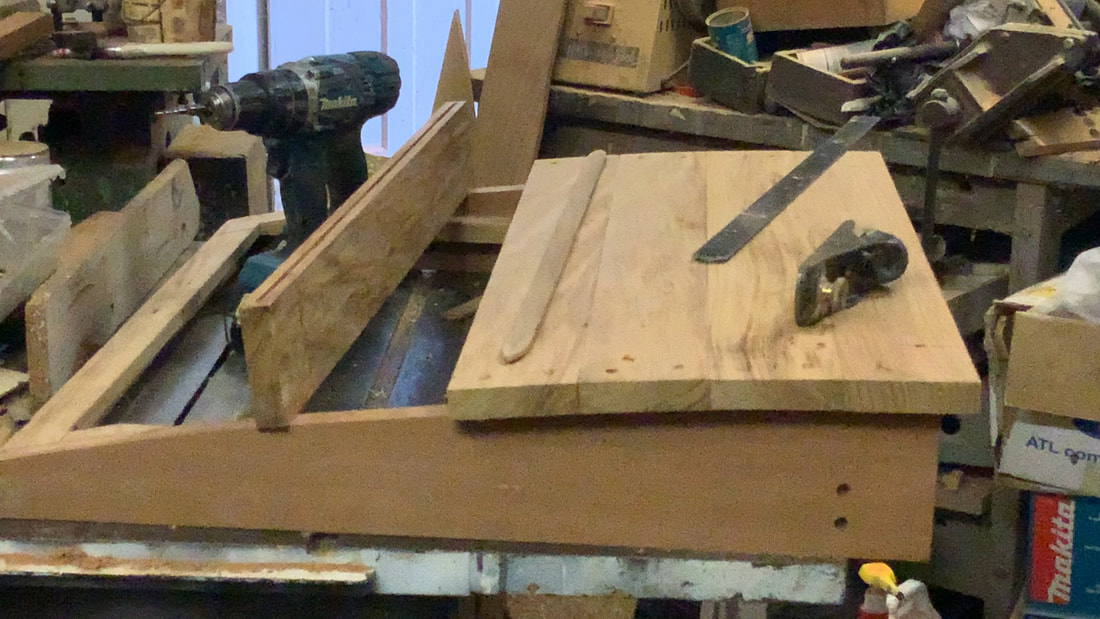
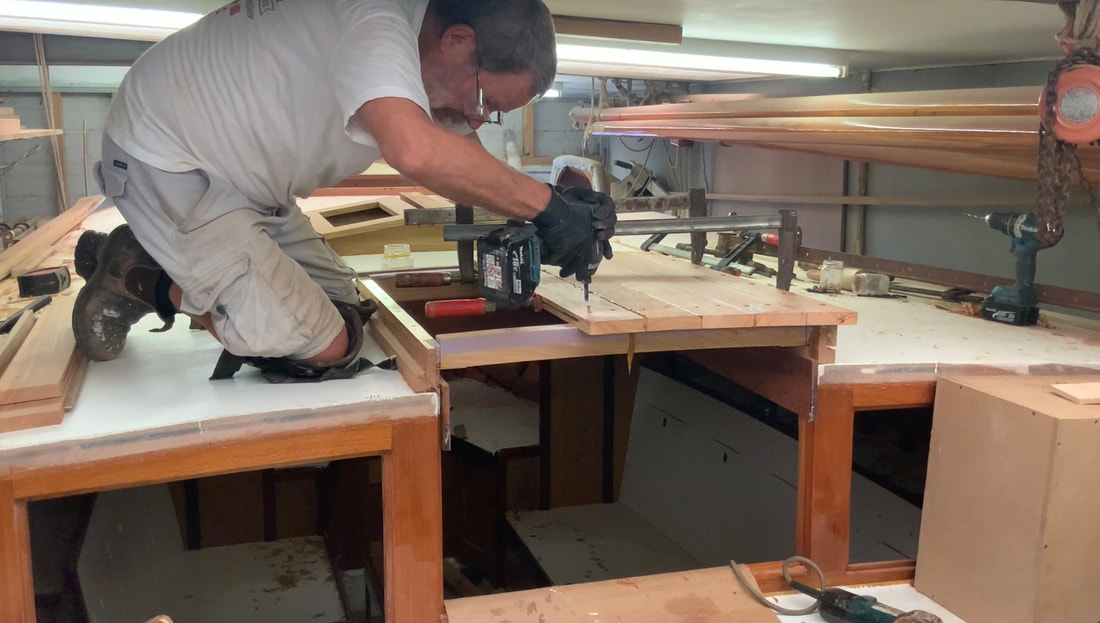
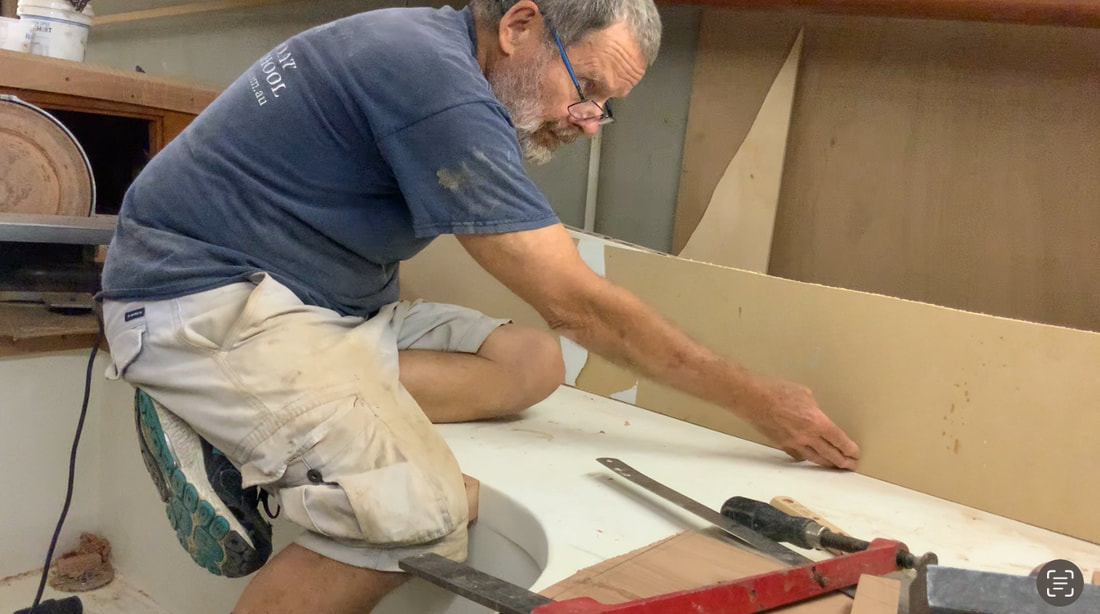
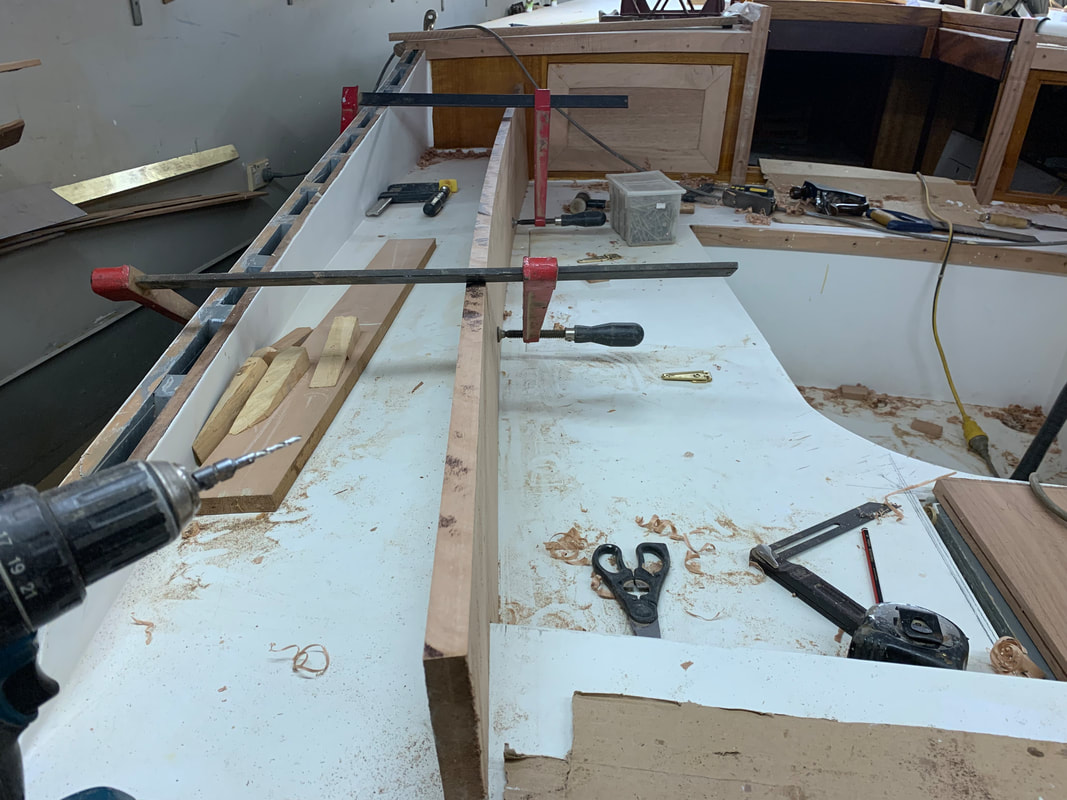
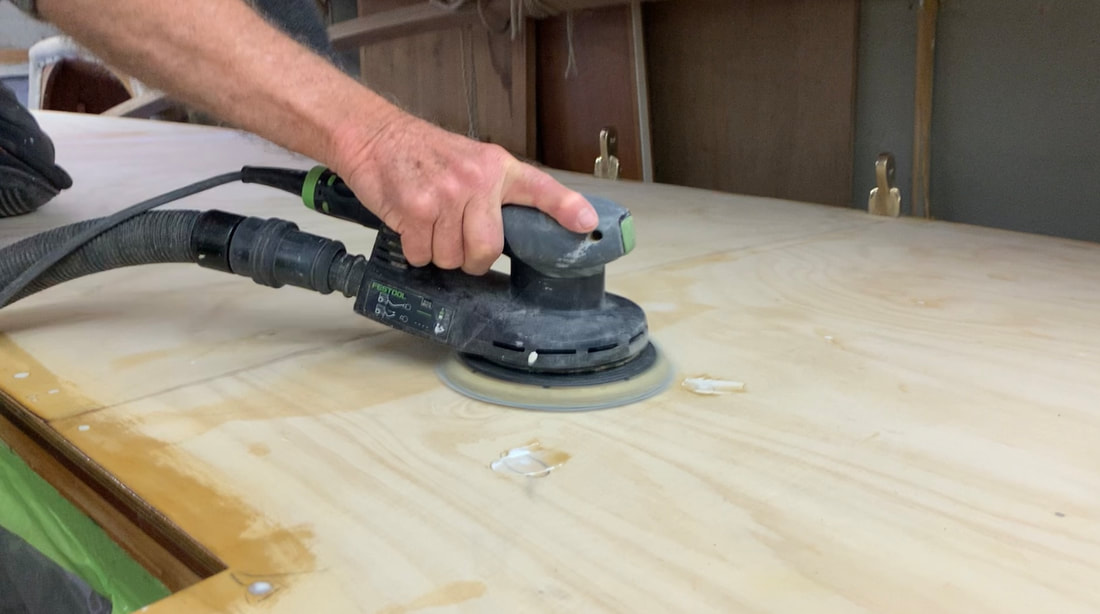
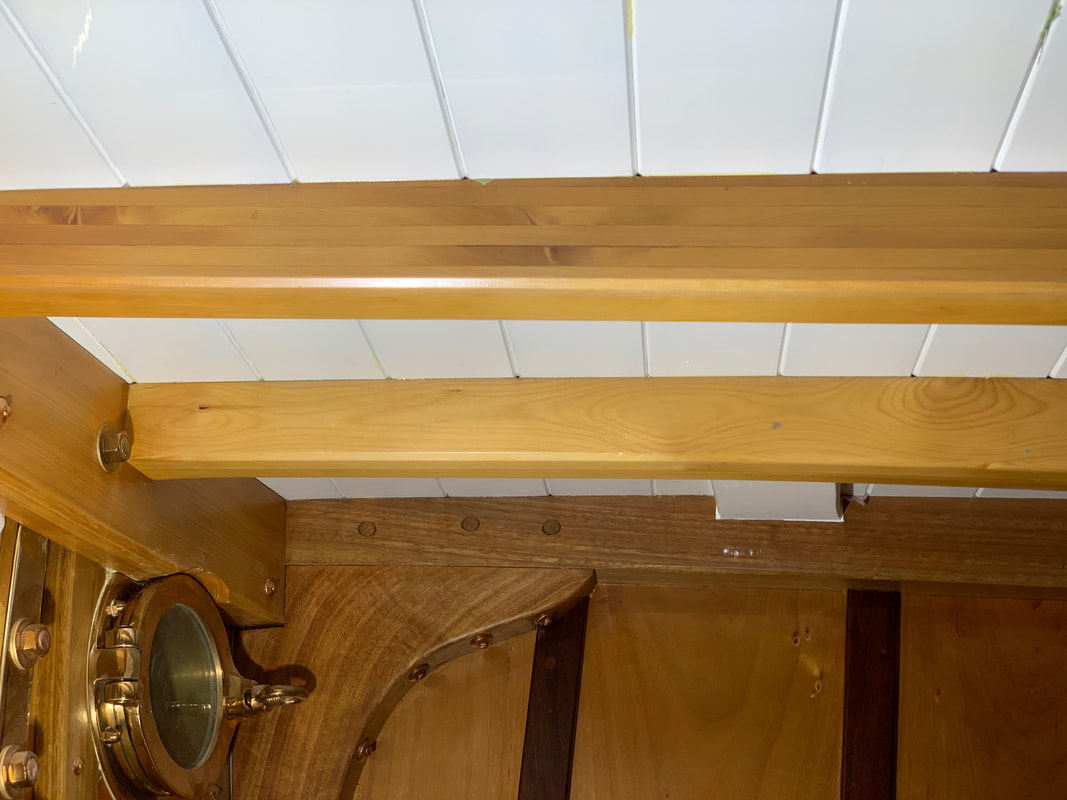
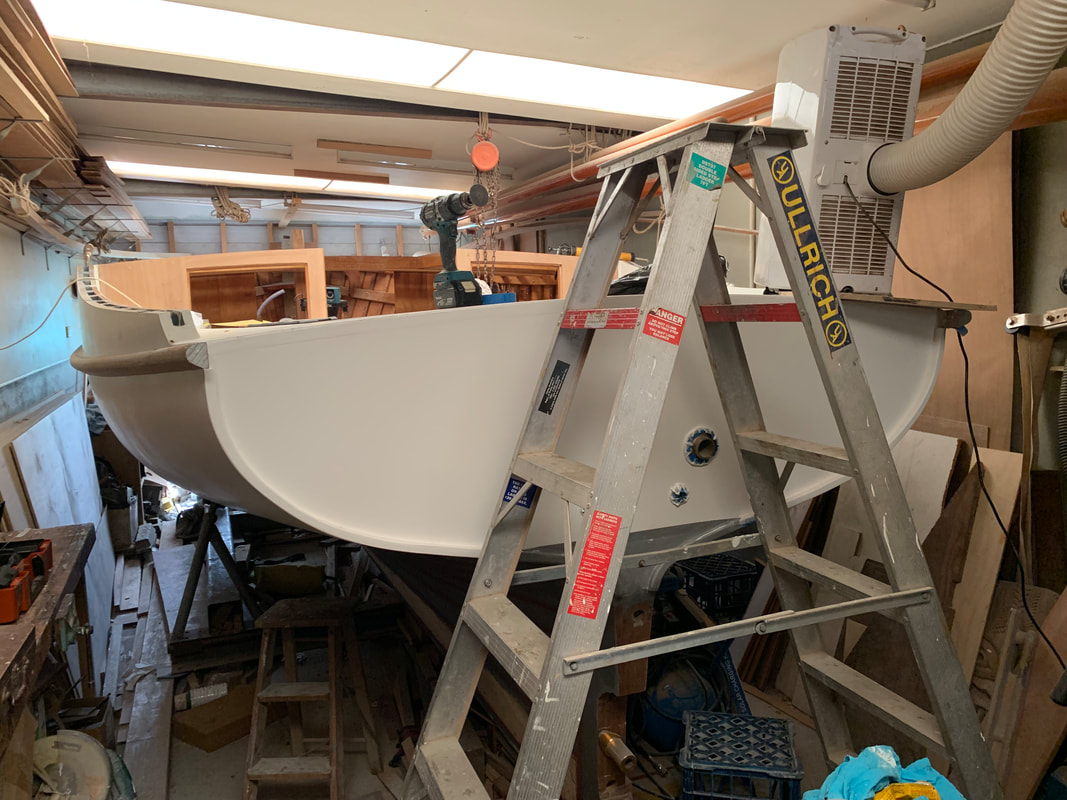
 The companionway hatch, the skylight and the forehatch are all built and are currently part of the way through their varnishwork. I have chosen New Guinea Rosewood (Pterocarpus Indicus) as the timber to use. The original boats of the Ranger class mostly had hatches of Queensland Maple, and I seriously considered that, but several of them have replaced the Queensland Maple with Teak over the decades. I decided against Teak for two reasons: one was the cost, at least 3 times as much as the Rosewood; and the other was that it seems that much of the money made from Teak finds its way to the gangster generals running Myanmar. New Guinea Rosewood has some important similarities to Teak in that it is a very stable wood once seasoned, and if the varnish is allowed to deteriorate and the wood discolours, both timbers can be brought back to looking new with a little work. Once Queensland Maple discolours it will never be able to look new again. I have nevertheless used Queensland Maple for the cockpit joinery including coamings, edge trim and caprails. I will just have to keep the varnish up to them. The rails on which the companionway hatch slide continue forward to become the sides of the skylight, and are dovetailed to the forward crosspiece of the skylight. The tops of the companionway hatch and the forehatch are of 95mm x 22mm (3 3/4" x 7/8") boards with glued plywood splines at the joints as seen below. The forehatch is planked athwartships and features a permanent opening for ventilation, like most of the rest of the class. This is not meant as a seagoing vessel, the hatch will be perfectly adequate for use in Sydney Harbour. As of today 4 January, the hatches have all had their interior surfaces varnished (3 coats of Awlwood MA plus 2 coats of Awlwood Satin). Their exterior surfaces will be varnished along with all of the other deck and cockpit joinery which I am now working on. The Spotted Gum upper sponsons are now bedded and fastened on, and the Spotted Gum toerails have been machined. Because of the full curves of the deck in such a beamy boat the toerails will need to be steam-bent, as will the rail caps outboard of the cockpit, and I have to take a trip out to Smithy's Boatshed West where the steam-box and steam generator are stored and bring them back. The cockpit coamings only have a slight curve and as you can see in the last photo they could be easily bent with deep clamps. The coamings are of 295mm x 22mm (11 1/2" x 7/8") Queensland Maple. I made a template from thin MDF of each side, transferred the shape to the Maple stock and bent them in and temporarily fastened them in an afternoon. In the last photo you can also see one of the removable panels fitted to the opening in the cockpit bulkhead. As usual I have been filming parts of the deck joinery construction and will put it up on YouTube after everything is varnished.
0 Comments
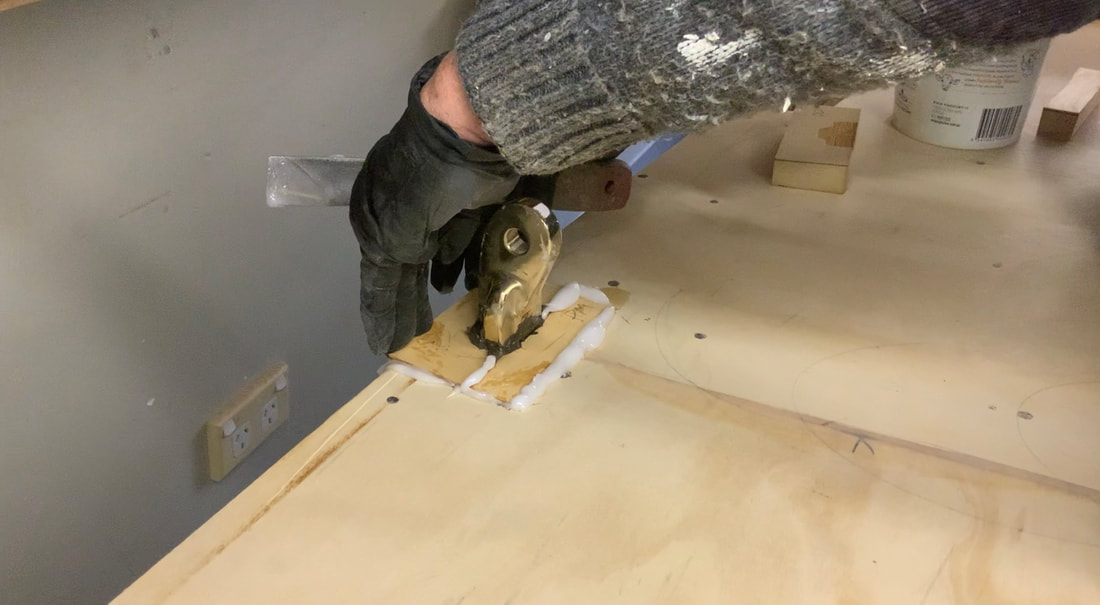
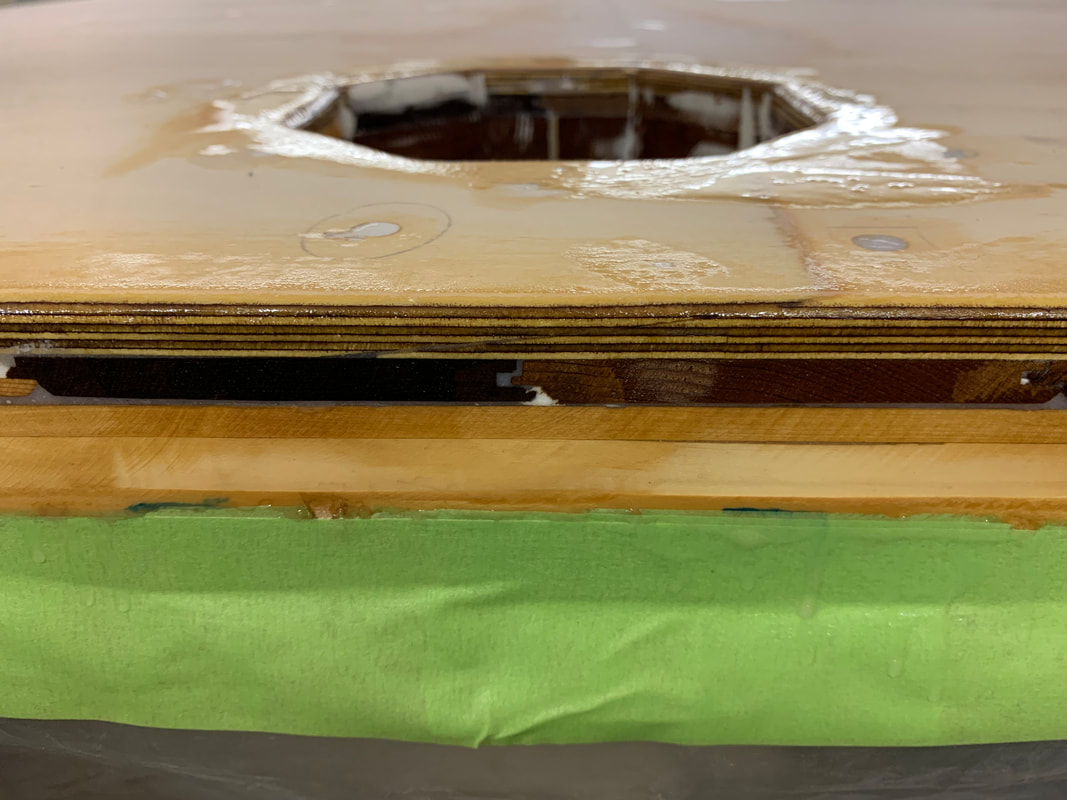
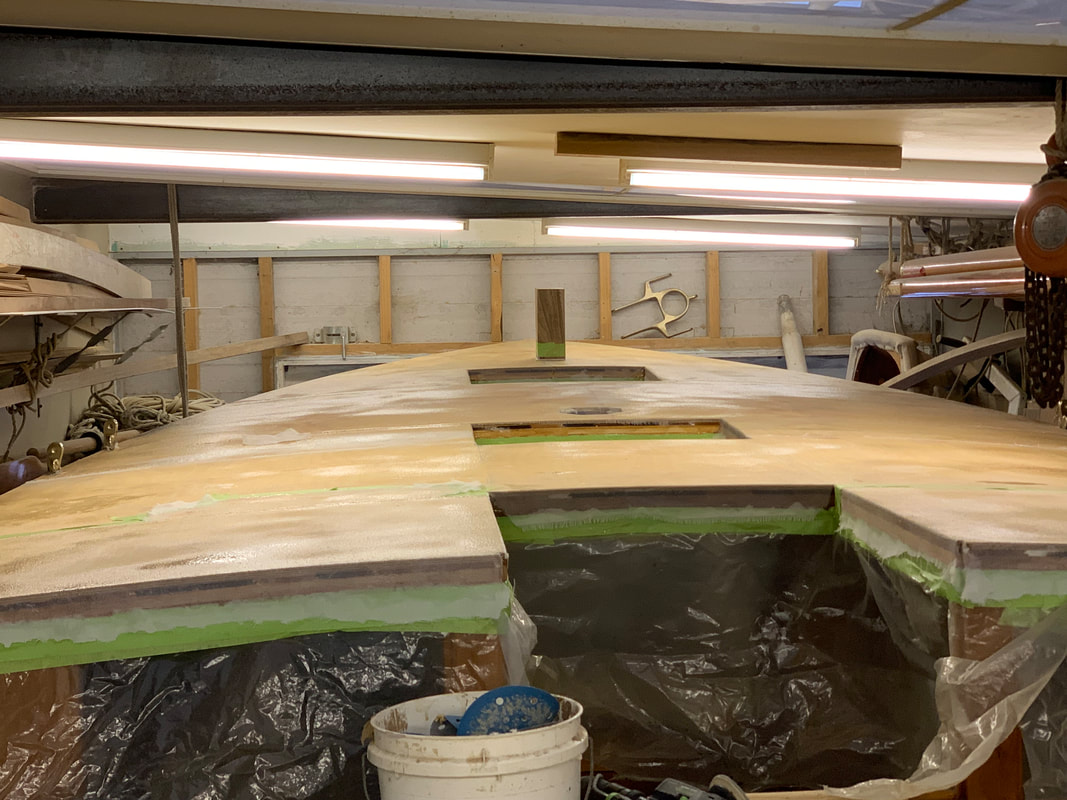
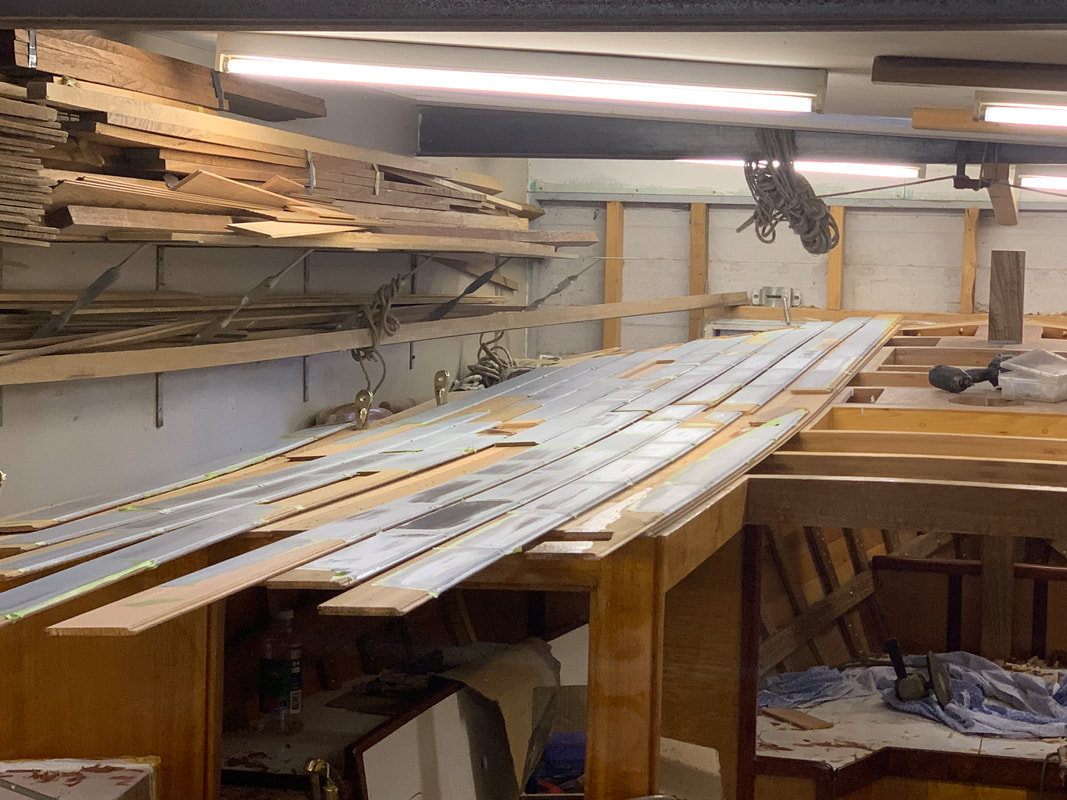
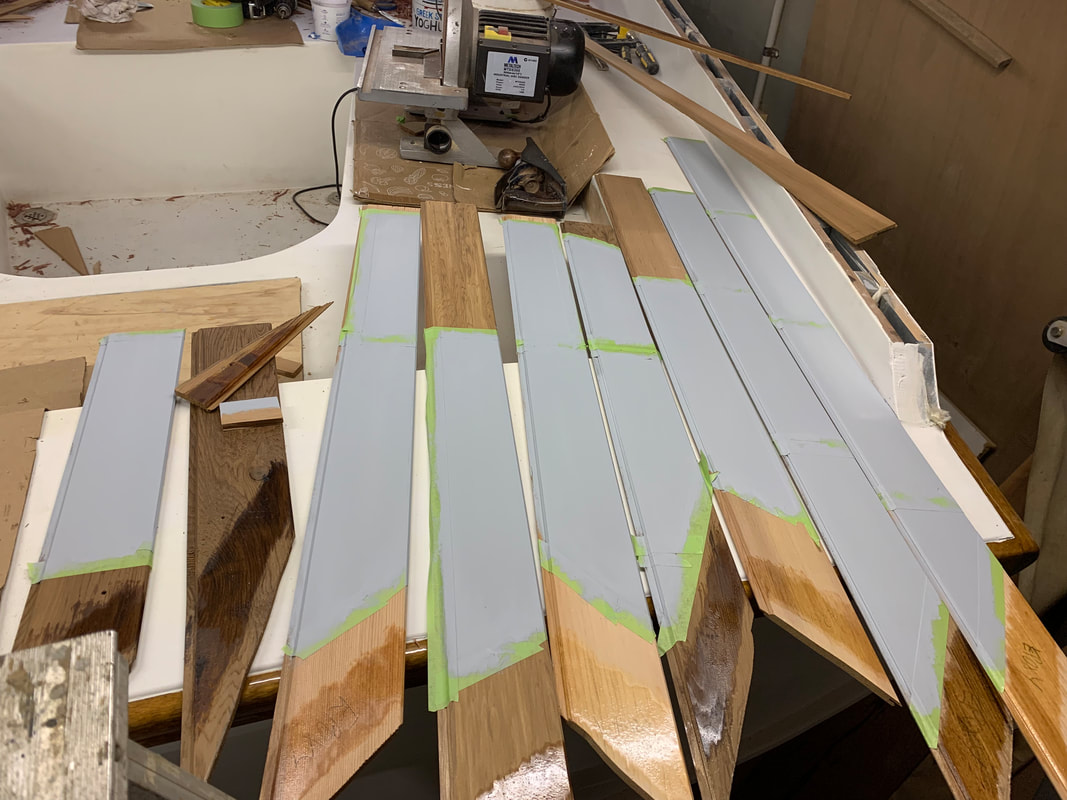
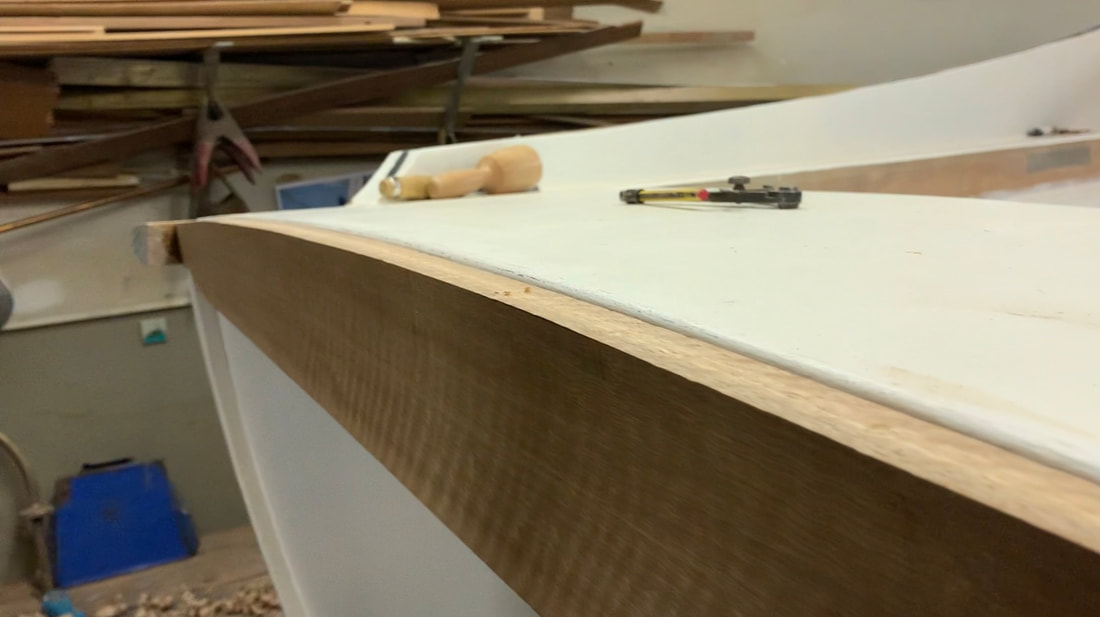
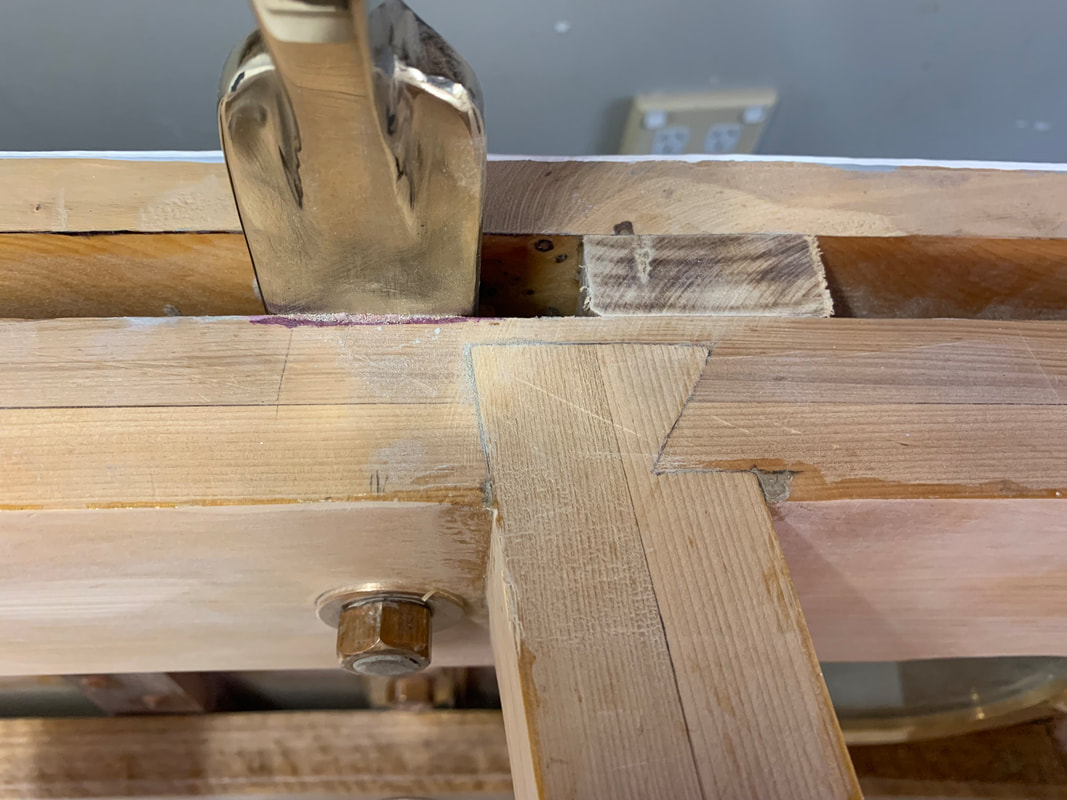
This video has been up on YouTube for a while, but I'd neglected to post it here. There's footage and explanation of the whole process from laying and scarfing plywood to sheathing with Dynel cloth and WEST System epoxy.  It took 3 days with other commitments, but I managed to sheathe the deck. I laid it in 8 separate panels, carefully planned to minimise the length of the joins, with the dynel cloth being exactly one metre wide. When I laid more than one contiguous panel on the one day I simply located the two pieces of cloth closely together with the narrowest of overlaps. When I started again the next day I sanded a feather edge on the old panel and placed two layers of masking tape around 1/2" (12mm) from the edge so the new panel would overlap slightly. But as usual, preparation is the key to a successful outcome. I had kept the deck plywood just clear of the 6 chainplates, I made up pieces of Huon Pine as packers around the chainplates and glued them in with epoxy, with Sikaflex Pro on the surfaces that touched the bronze chainplates, as in the first photo below. The reason for this is that chainplates that penetrate the deck are generally a common source of leaks. If the deck plywood is against the chainplates moisture will enter the end grain of the plywood and inevitably rot. In our case, any moisture that does find its way down the chainplates will find the extremely rot-resistant Huon Pine. Teak could also be used here. The other photo below shows another essential preparatory step: the plywood edges at deck edge and hatches received two coats of epoxy resin before the cloth went on. if this is not done, the plywood end grain has a tendency to soak up the resin from the cloth and leave the cloth resin-starved. In the second photo of the hatch opening just abaft the mast hole you can just make out the scarf joint in the plywood, and the cedar tongue and groove under-layer on the Celery-Top Pine laminated deck beam. The perimeter of the deck edge and all hatch openings also needs to be masked and protective plastic sheeting hung to protect the topsides and interior from epoxy runs. And of course all sharp edges have to be rounded over for the cloth to lie over, and all fastening holes need to be filled and sanded. tThe next step is to fair and fill the cloth overlaps, and scour and sand the deck ready for more coats of clear epoxy and hi-build epoxy, before finishing with deck paint. When I've got the hi-build epoxy on I'll post a video of the whole process of laying the deck on Smithy's Boatshed Channel on YouTube, and post it here. In the meantime there's a short video on the dynel sheathing process on Facebook and Instagram, on my Ian Smith Page (Facebook) and IanHughSmith (Instagram)..
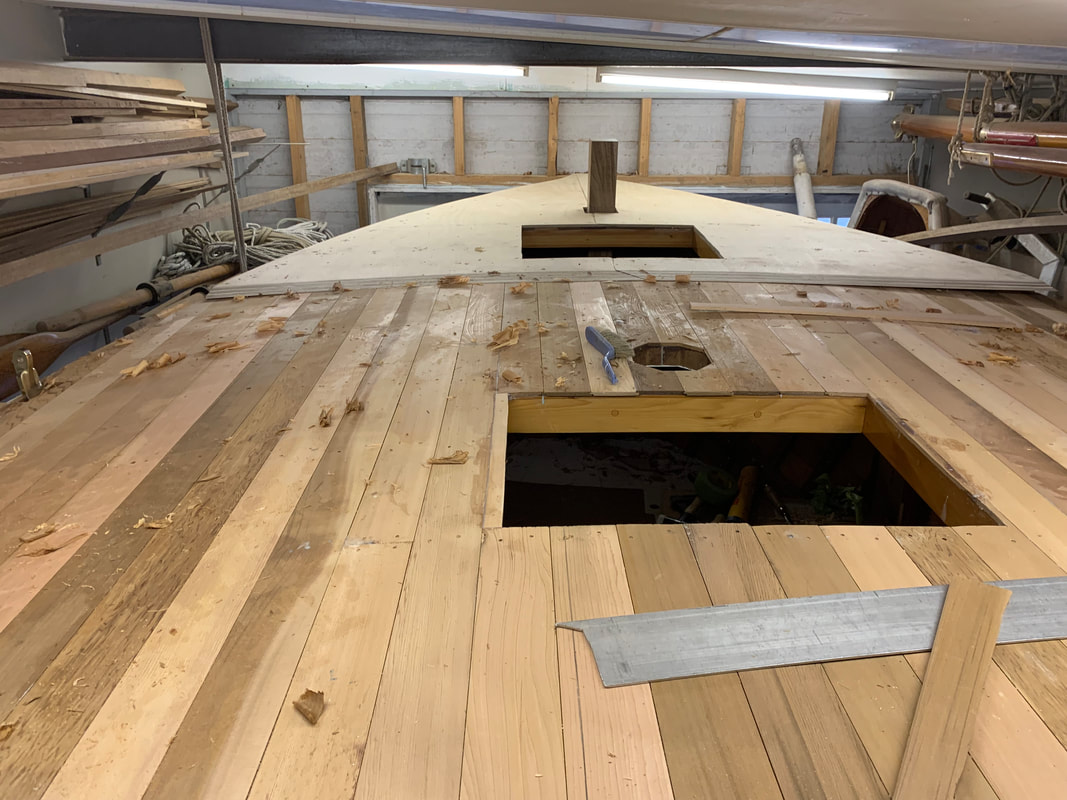
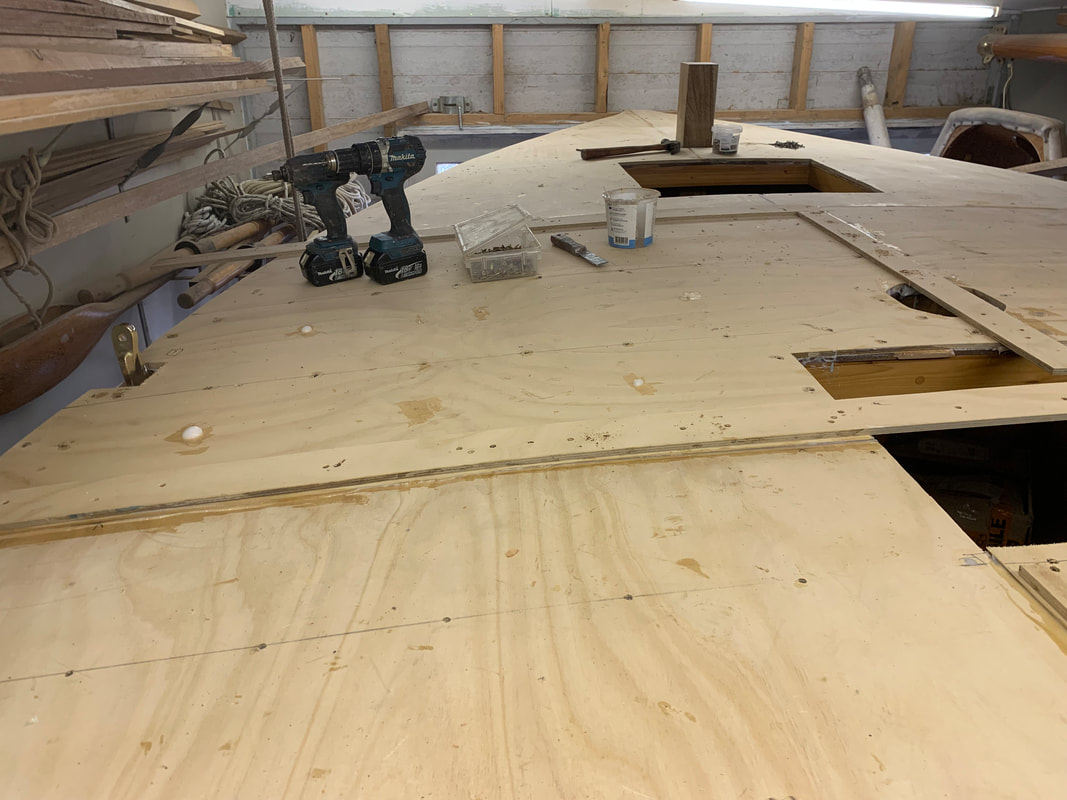
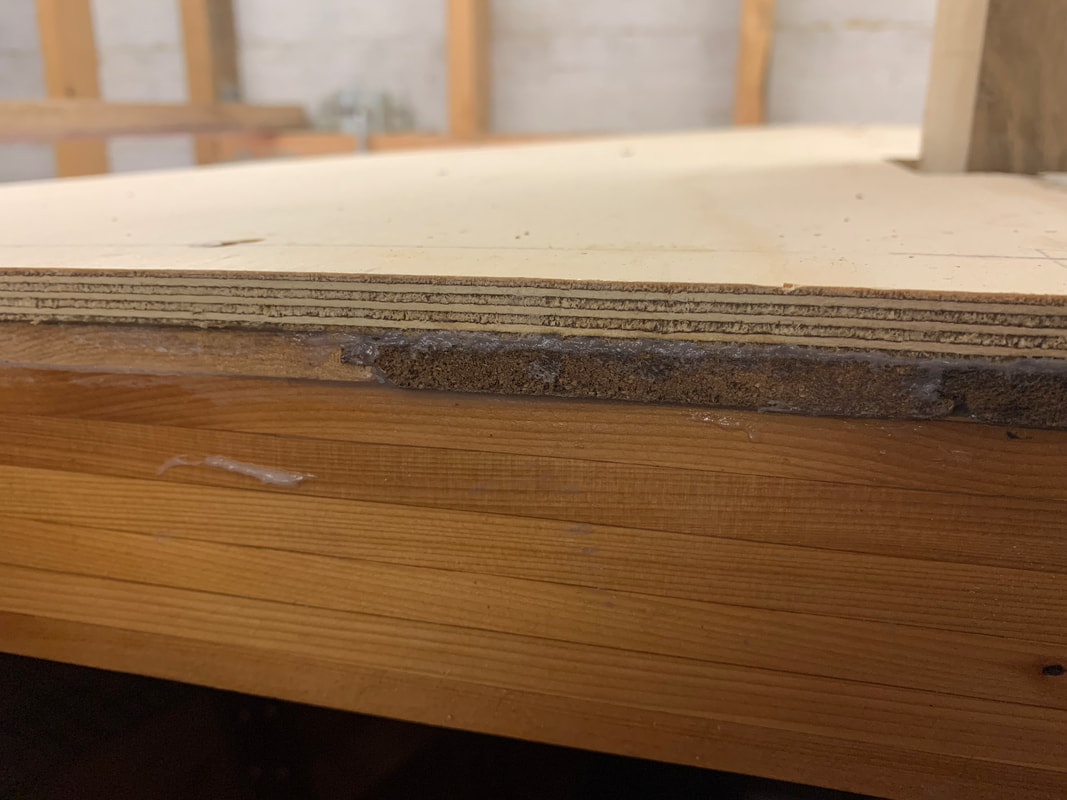
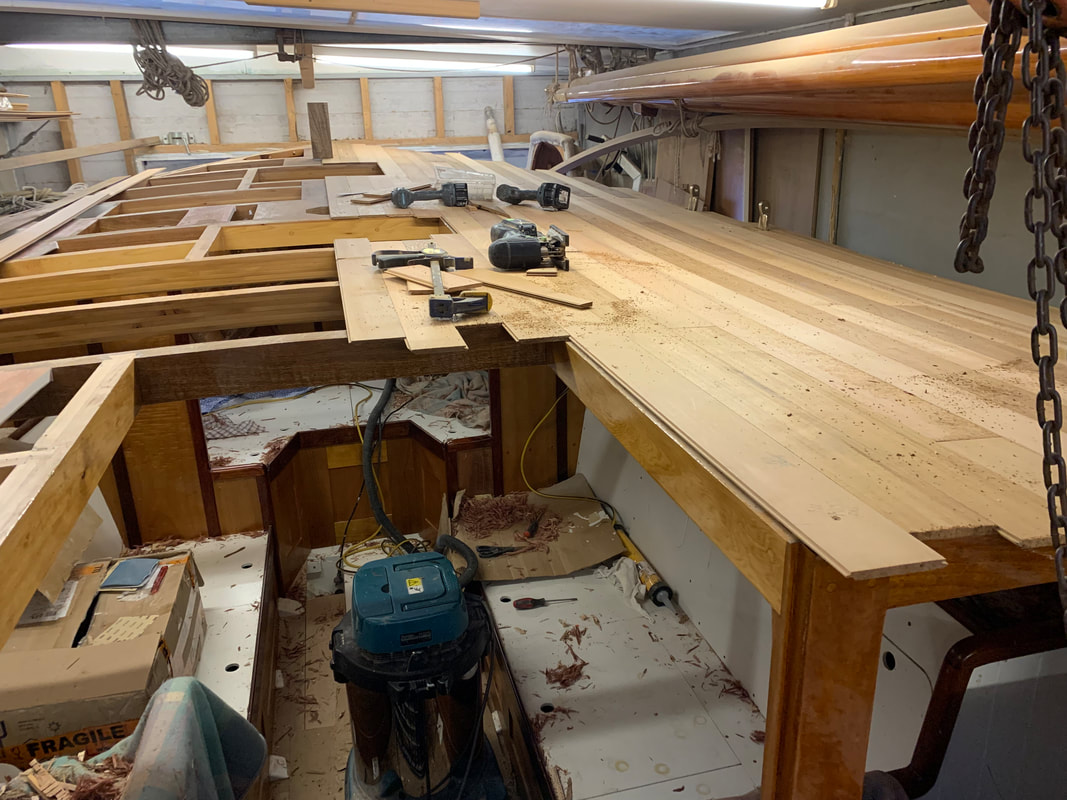
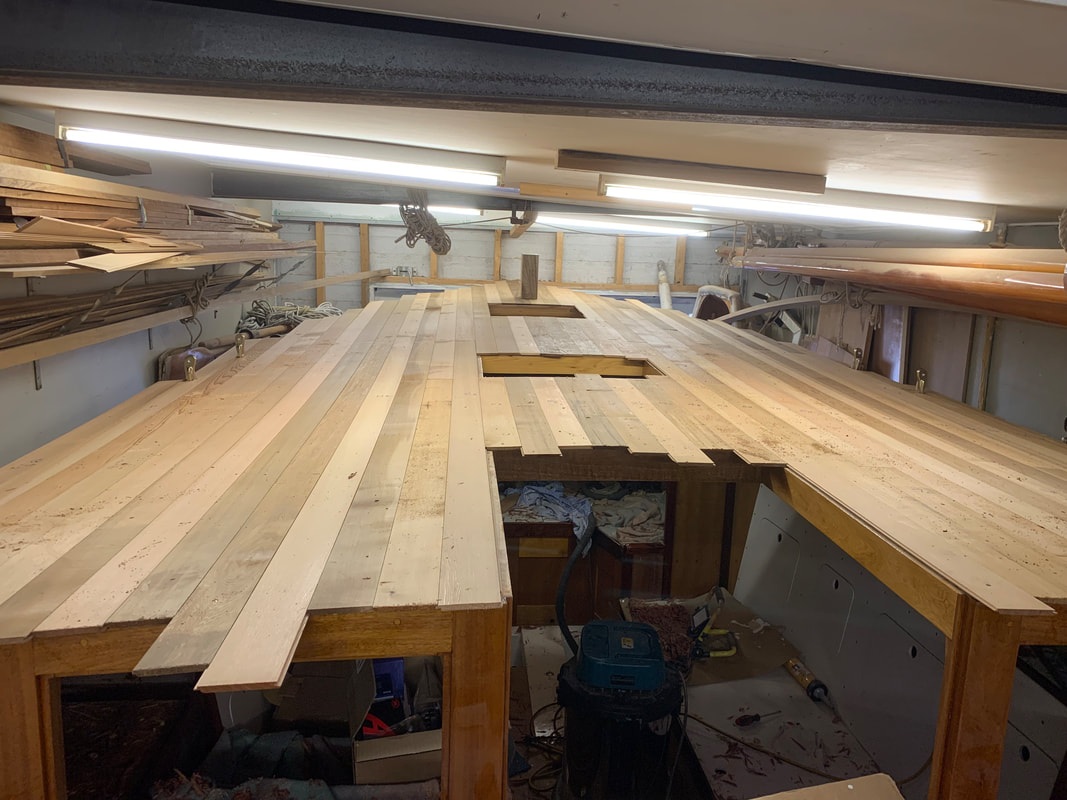
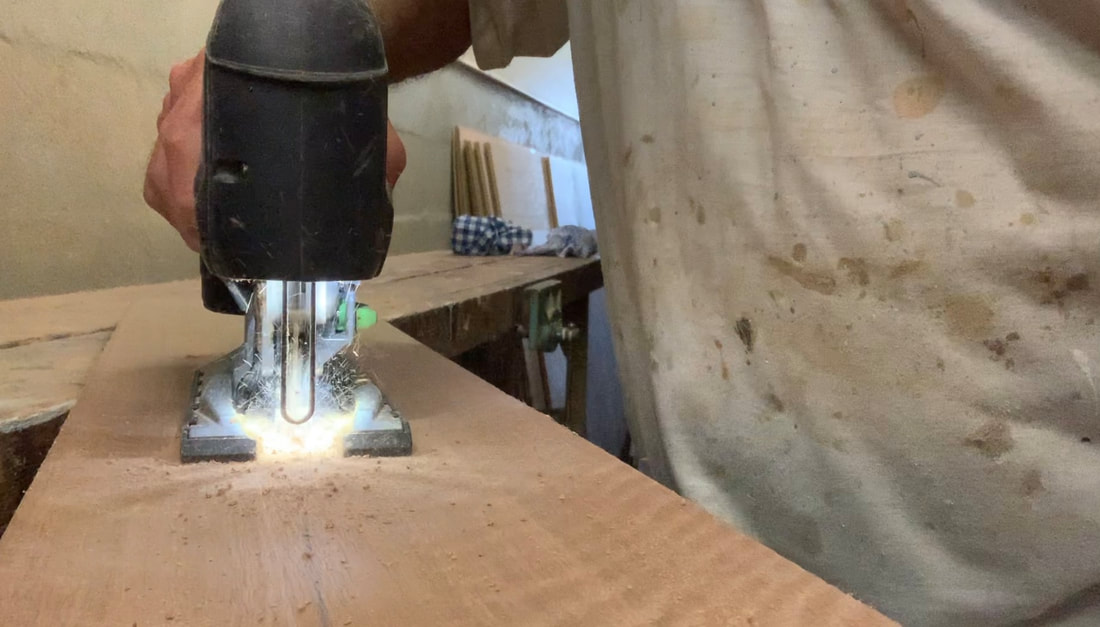
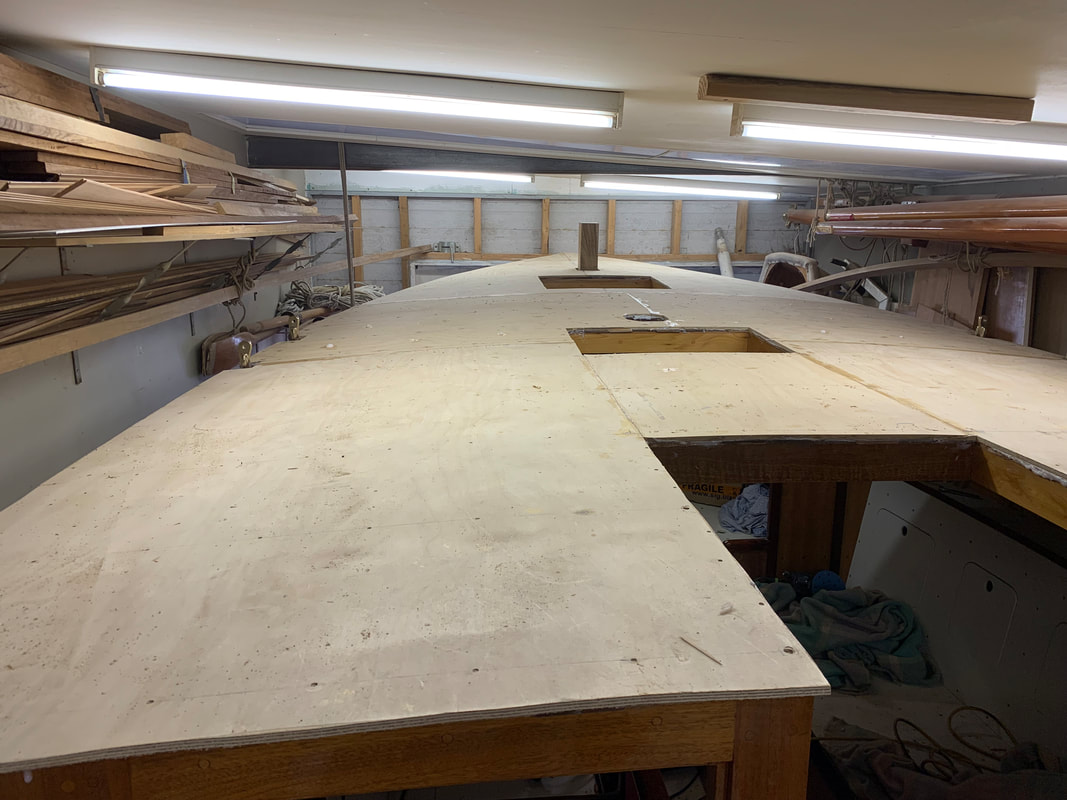 As I described in the previous post, the deck is a combination of a layer of (9mm tongue-and-groove Western Red Cedar with a layer of 9mm (more like 10mm actually) Hoop Pine Marine Plywood over it. That layer now is all fitted, seven pieces in all, scarfed together with 75mm (3 inch) scarfs at every panel joint. Each panel was glued down with WEST System epoxy resin thickened with Microfibers and fastened through to the deck beams with a few 1 1/2" (38mm) silicon bronze woodscrews and many 1 1/4" (32mm) monel ring nails. The first shot above shows the Port forward panel glued and fastened down, and the Starboard forward panel being dry fitted. You can see the 8:1 scarf joints ready to receive the next panels. The second shot shows the last panel to be glued and fastened just fitted with ply scraps used as packers to spread the load of temporary screws right through the three perimeter scarf joints. The lumps of glue you can see are emerging from the relief holes, 9 or so holes drilled in each ply panel between the deck beams so that excess glue can squeeze out and not be trapped in pockets between the layers. Above left is a shot taken inside the cabin to show how the painted tongue-and-groove looks. Above right is a shot of the deck layers at the forward hatch opening. Of course this edge will be trimmed flush and the dynel cloth that will sheathe the deck will be wrapped over the edge (and covered with Australian Red Cedar trim). So that's the next stage, trimming all edges, fairing out any bumps at the scarf joints, filling all nail and screw holes, and sheathing with dynel cloth in WEST System epoxy resin. The next post will have details of the whole deck process in my next video, Episode 22 in the Carvel Planking series. Oh, and the Spotted Gum for the deadwood below the keel has arrived from the North Coast, and it's beautiful timber. It's now stored cosily under the boat until it's time to start to shape it. Below is the timber arriving on the truck.  The deck is going to be in two layers, 9mm (3/8") Western Red Cedar tongue and groove, with 9mm Hoop Pine plywood on top, WEST System Epoxy-glued together. The T&G has a V-joint showing underneath. I've dry fitted the entire deck, held with temporary screws on every third or fourth beam, starting from the centreline and moving first to Starboard and then back to Port. I've done everything I can think of that would be easiest done with the deck off. I've got another few days before I fit it permanently so I'll keep trying to think of anything I've missed. When the deck is completely finished and sheathed I'll put together a video which will include the sorts of things I'm talking about that are best done before the deck goes on. Part of the job was to trim the top of the stem which had been left long and through-bolted to the front wall of the shed. When I cut off the stemhead and freed the bolt the boat did not move a millimetre, so it's being capably held by the four screw props under the bilges. The underside of the deck is going to be painted gloss white where visible, and this is always easier to do before installation, rather than painting overhead. There'll be two coats of International Yacht Primer, two of International One-Up and two coats of white gloss enamel. I removed the deck planks starting from the outer Starboard and worked back until I removed all of the short centreline planks between the hatches as well. I simply don't have the room in the shed to remove the lot and spread it out in the shed, so the longer Starboard side planks are all all being painted while laying on the dry-fitted Port side of the deck, and the shorter planks are in the cockpit and down below on benches. The 3rd and 4th photos show the first coat of grey Yacht Primer. Before removing the dry-fitted planks I carefully marked in pencil the location of all beams and the rest of the structure, and then taped off all the areas which are not to repainted because they will be glued down. You might also notice clear epoxy coating on the ends of most short planks. This area will mostly be glued but there is a gap in the gluing where the ribs are, between the planking and the sheer clamp, and I did not want to leave this area bare. It was easier to epoxy just beyond the likely area, compatible with the glue, rather than try to paint it because of the near-impossibility of marking it accurately. Once the final gloss coat is on, I will carefully tape the edges of the glued areas and the beams and other structure to make cleaning off the glue squeeze-out easier. Once the Starboard side deck is on I will take up the dry-fitted Port side and lay the planks individually on the glued Starboard deck so that they can be painted in turn.
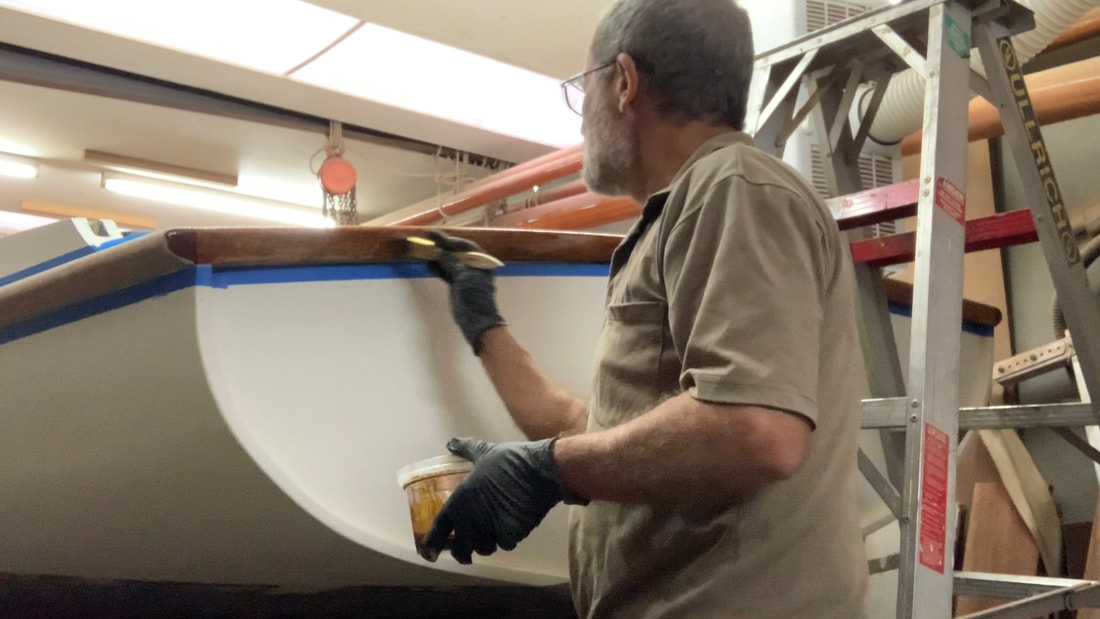
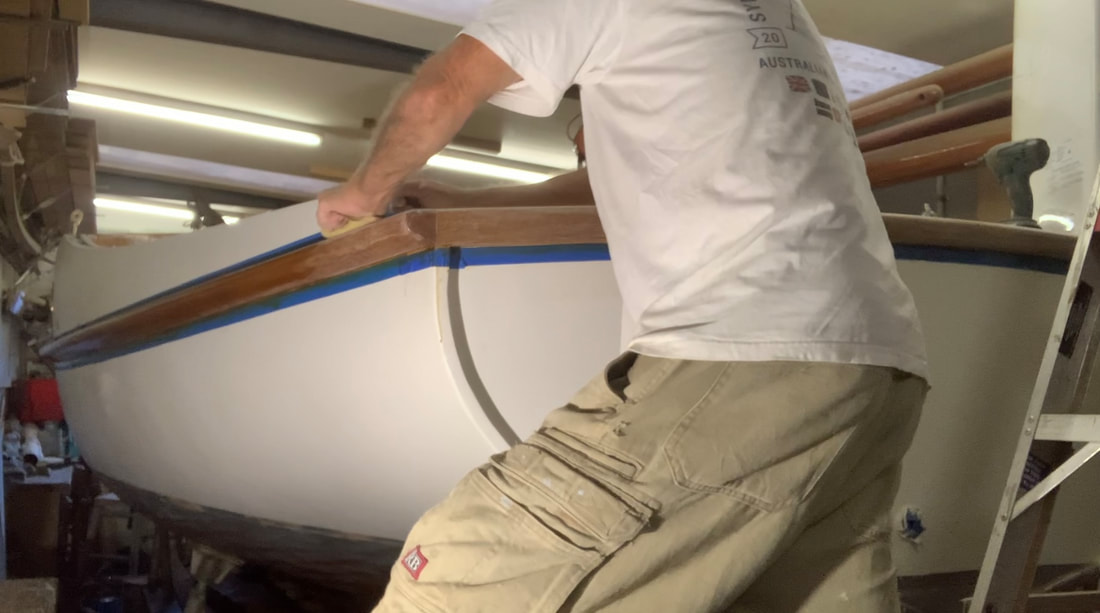
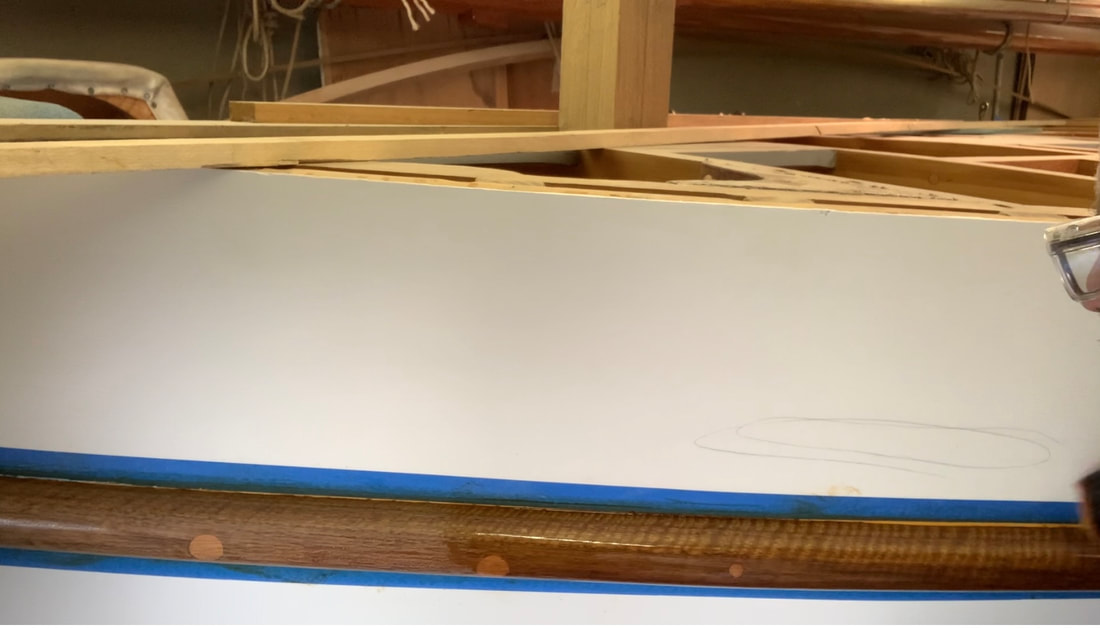
I've fitted all of the interior trim into the Ranger, all in Australian Red Cedar. I'll post a bit more about this shortly, but in the meantime have a squizz at the video youtu.be/WP77xJSp6-A 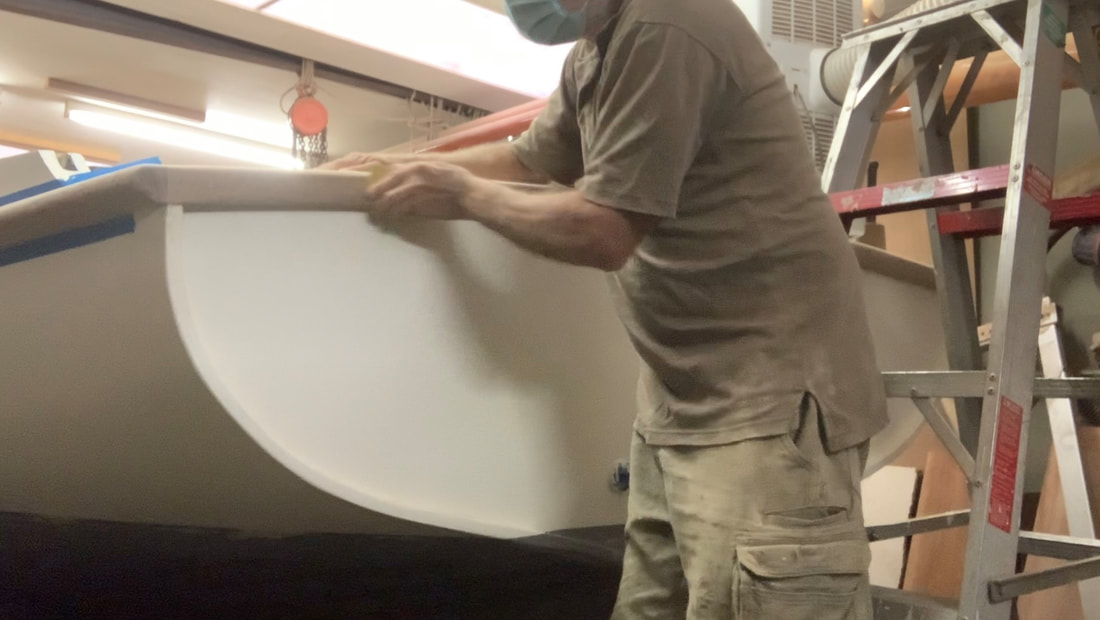 Well the lowest sponsons (rub rails) have been on for some time, even before planking was finished, but now I've added a Spotted Gum fashion piece to the top of the tuck (transom) and faired it in to the ends of the lower sponsons on each side. I had a piece of 8" x 1" (200 x 25mm) Spotted Gum with a beautiful fiddleback grain pattern reserved just for this job, and I marked and cut it to the curve of the transom, then when happy with the fit of the top, cut the underside in a fair curve so that the piece is narrowest in the middle and sweeps towards Port and Starboard. I also planed it so that it is not dead flat but has a subtle curve on its aft face. I'll explain why I did this in a future video, but the short version is that it looks better. I then fastened and bedded it on, and sanded it and the full length of the sponsons on both sides in preparation for clear finishing. I power sanded using an in-line sander with 60 grit, then 80 grit, then 150 grit and finished off by hand-sanding with 150 grit. You'll notice in the photo below that I've also fastened in the whisker stay chainplates right through the upper sheer clamp. I'm using Awlwood MA for all exterior varnished surfaces, and the first stage of this process is to apply the primer, in this case their yellow primer in order to darken the wood a little, applying by brush but then wiping the excess off thoroughly with a rage. The next day I applied the first clear gloss coat and at 2-3 hour intervals 2 more coats. This quick buildup is one of the main advantages of Awlwood MA. I sand after 3 coats (240grit) and then put 3 more coats on. In the second photo above you can see the gloss beginning to really show up the fiddleback grain. There's a short video of the process on my Facebook Page (Ian Smith).
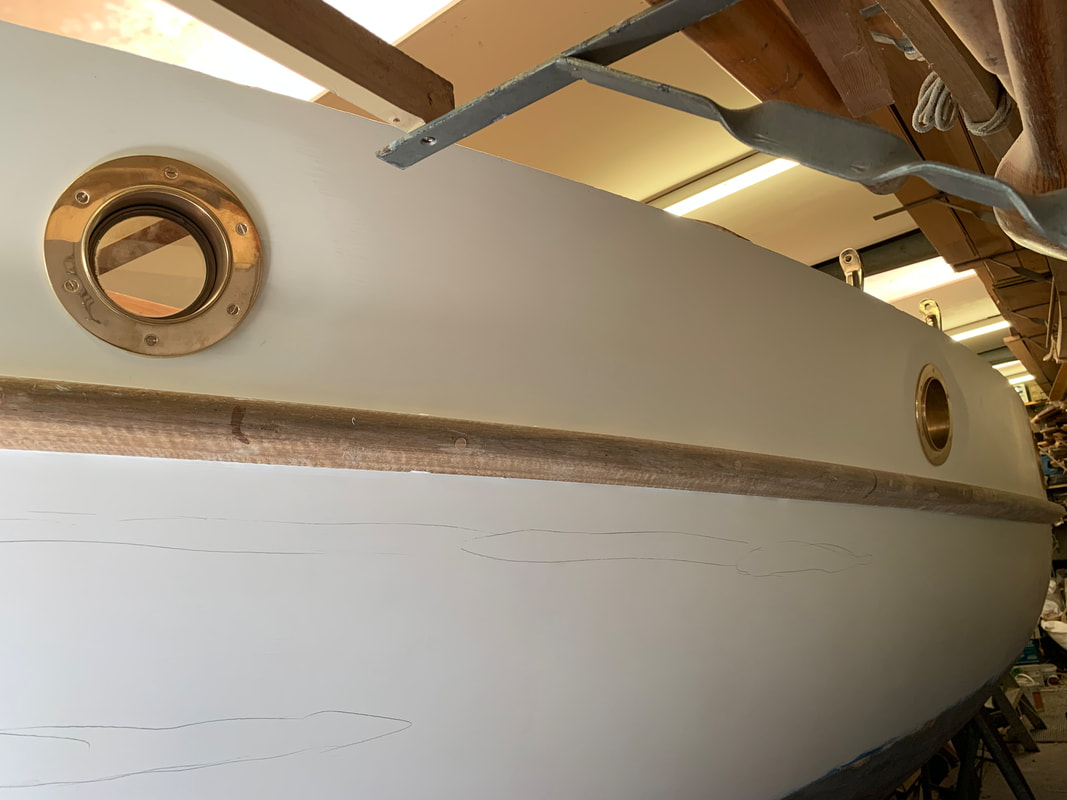
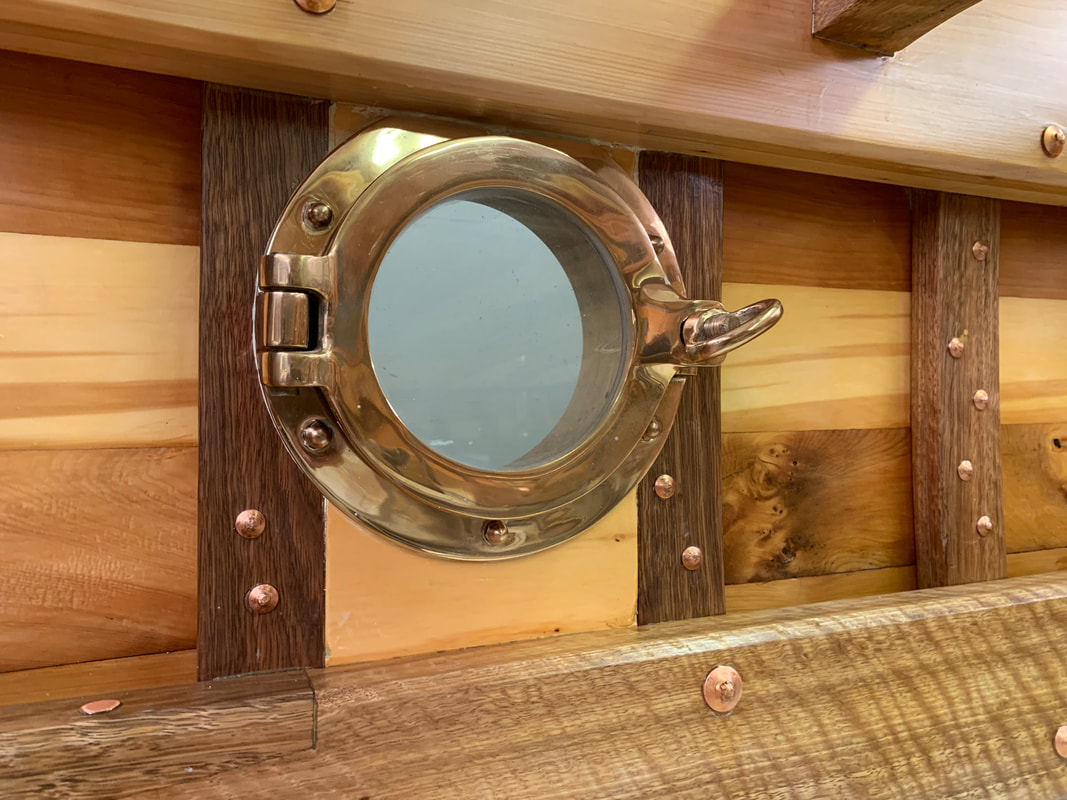
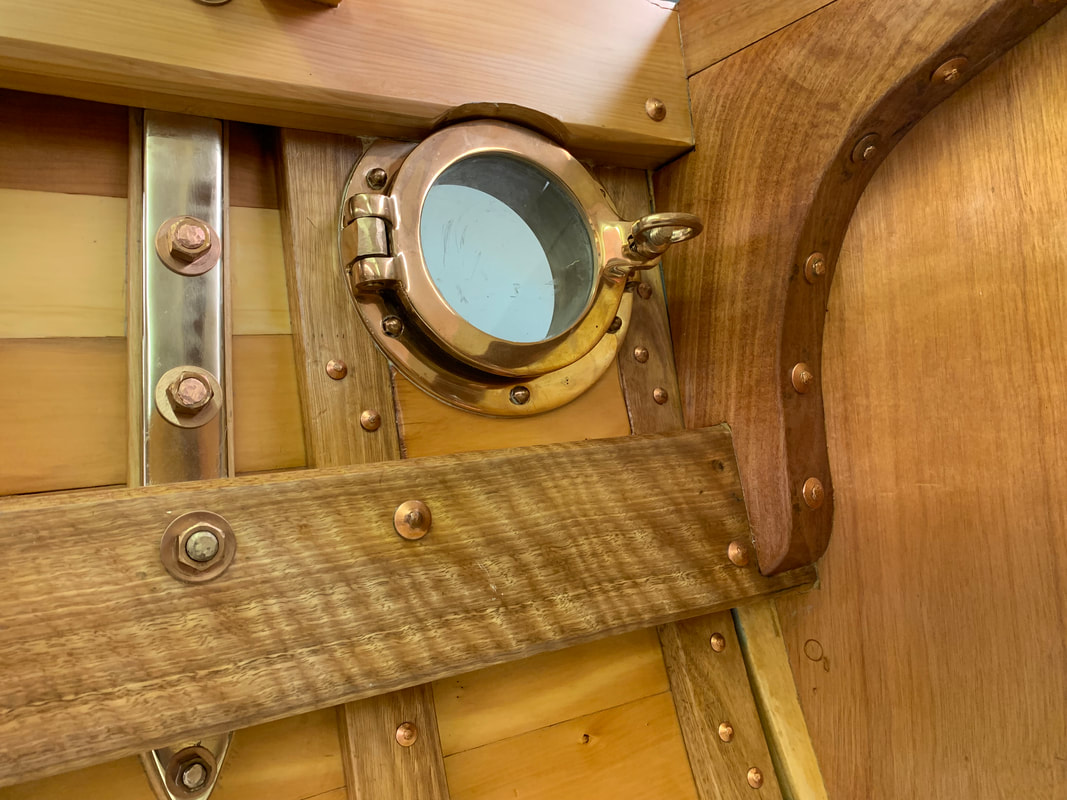 The portlights in the raised deck area of the hull have been fitted and so have the 6 chainplates. These were all easier to fit before I start laying the deck. Before I could fit the portholes it was best to undercoat the outside of the hull....and before I undercoated the hull I had to fit the chainplates so the bolt heads could be plugged, sanded and primed. And also the final coats of satin varnish were applied to the interior. You're looking at Huon Pine planking, Spotted Gum ribs and lower sheer clamp (with magnificent fiddleback grain), Celery Top Pine upper sheer clamp, Queensland Maple bulkhead and Tea- Tree (Melaleuca) knee. The portlights are from Briggs Marine in Melbourne (through Classic Boat Supplies in Sydney), and the chainplates were cast in bronze by Central Foundry in Mascot to my patterns. Four coats of International Yacht Primer were followed by four coats of Norglass PRi-COAT(that's the way they like to spell it). That should be plenty to sand into when I'm ready to topcoat, but you might notice I've highlighted with pencil a couple of seams that are still showing in a good low-angle light, and I will add a couple more undercoats to those areas. The next job is to fit the interior trim, fiddles and so on of Australian Cedar. The hull has been planked for a while, but in the Spring I started caulking, and after 115 hours spread over a few months the hull is completely caulked and the seams payed. The video shows all the tools, materials and methods, and I point out how we follow the English system in Australia, doing it a bit differently from the USA and Canada. Link https://youtu.be/0H1wDDVxJ-c I described the process of building the cockpit and the back of the cabin a couple of posts ago, but here's the video footage up to date including fitting the side and aft decks, sheathing the whole cockpit, and coating to high build primer stage. youtu.be/MX_L8NTl3k4 |
AuthorIan Smith, Boatbuilder (ret'd) Archives
January 2024
Categories |


 RSS Feed
